I was originally going to purchase an All Glass tank stand for a 40 gallon breeder aquarium (36"L x 18"D x 16"H) that I am putting together.
I went to the local pet store to order one, since most places don't carry a stand with those dimensions. I decided to take a look at the build quality of the stand and was pretty amazed that there were no studs for a frame. It was basically a bunch of 1"x4"s stapled together. I put some weight on it and tried to move it side to side and it swayed slightly. :eek3:
Since I have two small children (that are constantly running around the house), I need to be careful that the tank will be able to withstand one of them falling into it by mistake while they are playing.
So after looking at some great threads on this site, and gaining some confidence from their results, I decided to go out on a limb and have a go at it.
:hang:
This thread is meant to document the process for any others that dare to follow in my (amateurish) footsteps.
Legalese: Please note that I am not a professional carpenter. On the contrary, I am a computer professional that sits in front of a monitor for most of the day. So if you use this thread to build your own tank, and it falls apart, then don't blame me.
==================
I started out by searching for plans on the Web. Many of the plans seem to offer a strong design for vertical strength, but most seem to lack any strength if a torque (twisting or side to side movement) is applied.
Since I am not a professional carpenter, I went a bit overboard on the design to make sure it was strong enough (sort of like how the guy (Tim Allen) on Tool Time builds his stuff) and could withstand any sort of torque.
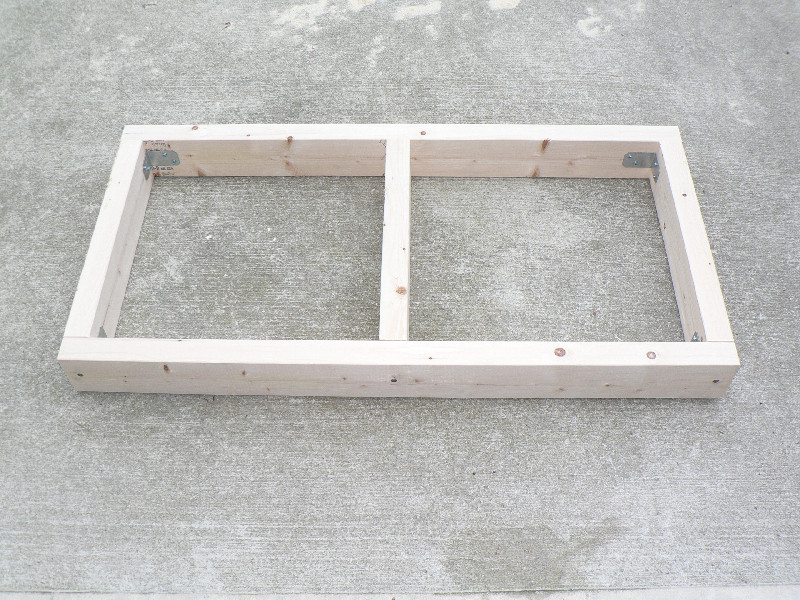
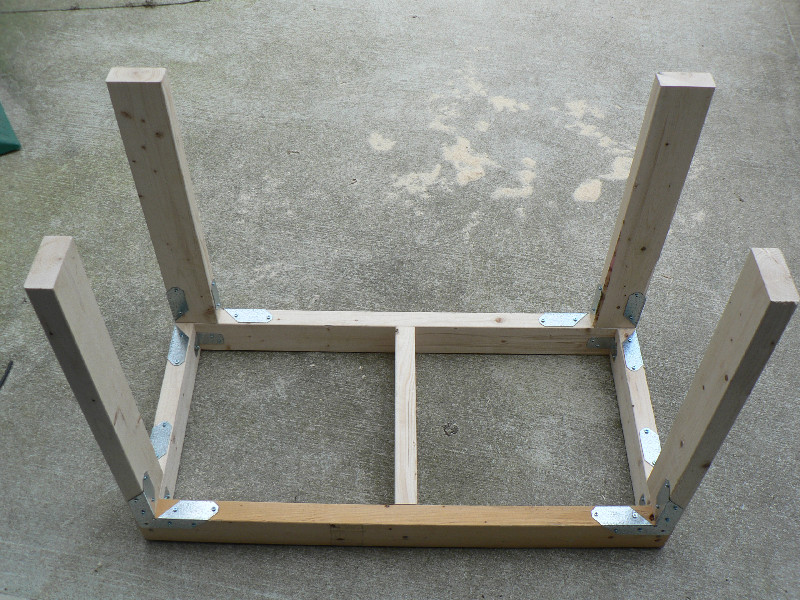
I didn't want legs in each corner of the stand, because I didn't want a lot of pressure on each leg or the carpet beneath. If I ever decide to move the tank, I don't want four indentations in the carpet that will never come out. I wanted to distribute the load as much as possible, hence the horizontal 2x4s.
I built two of these. One for the bottom and one for the top.
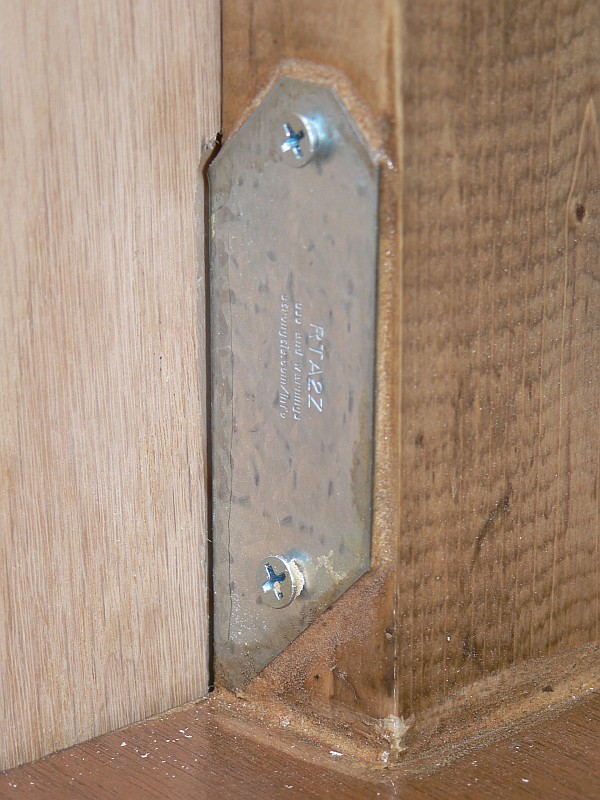
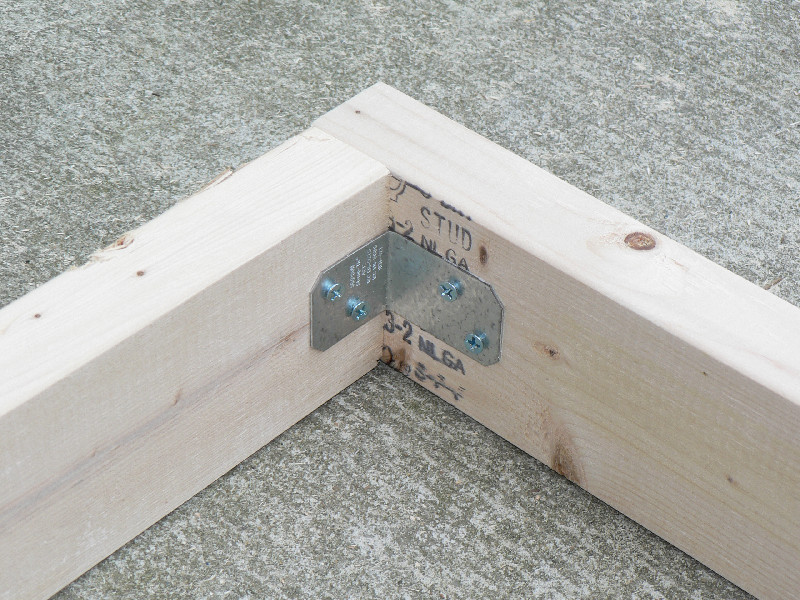
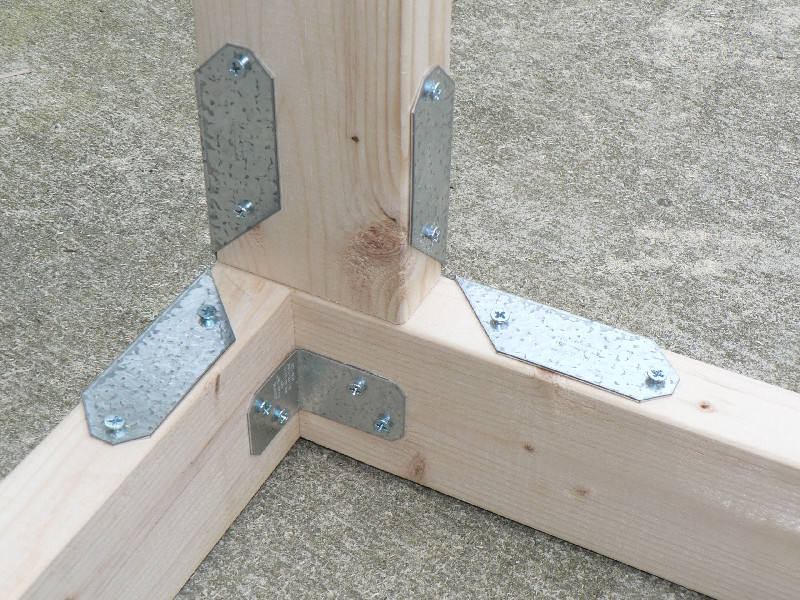
Here is a view of the inside corner. I used stainless steel angle ties to connect the inside of the 2x4s.
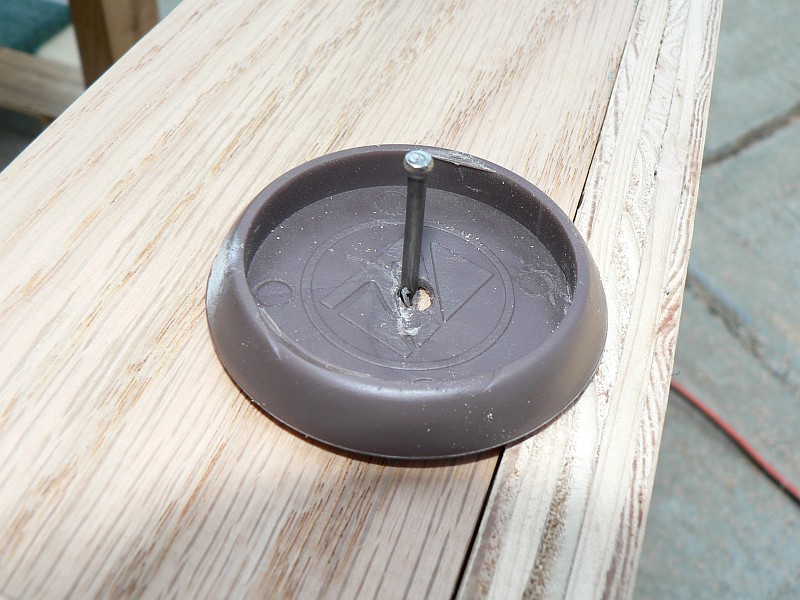
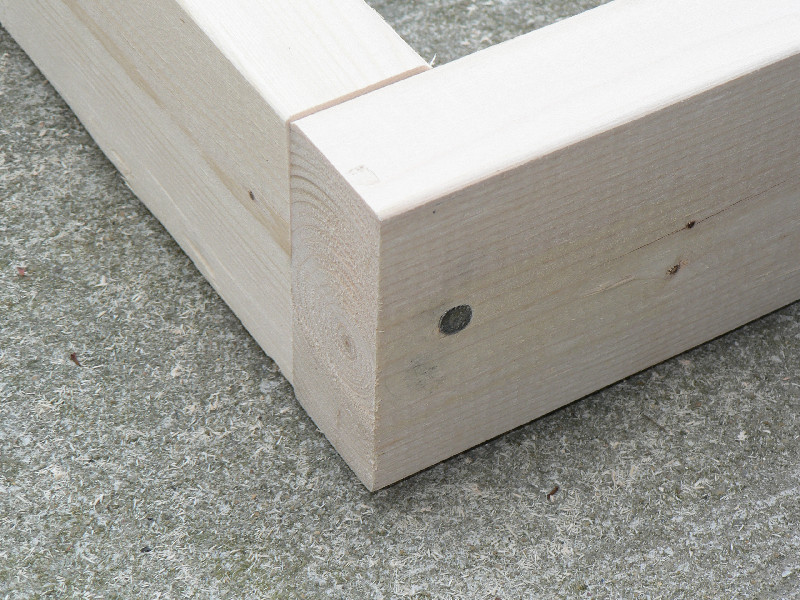
Here is a view of the outside corner. I used 4" nails to connect the outside of the 2x4s.
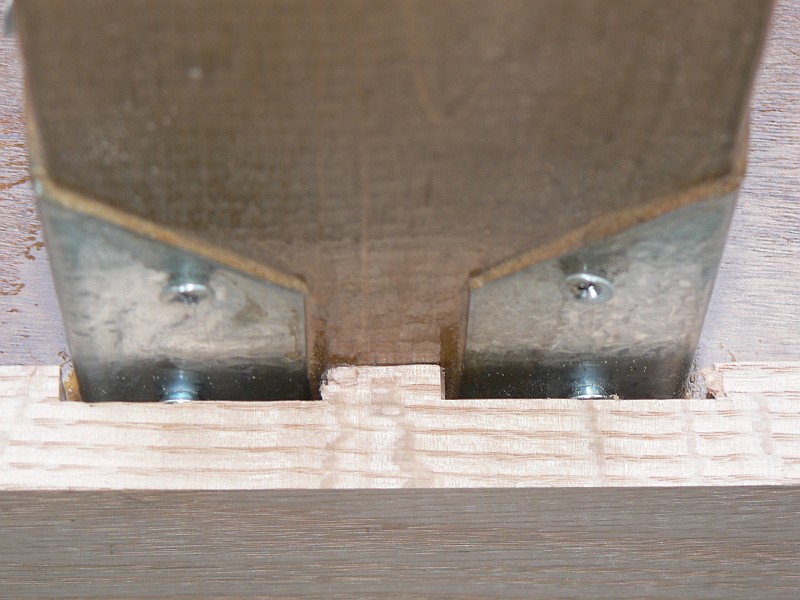
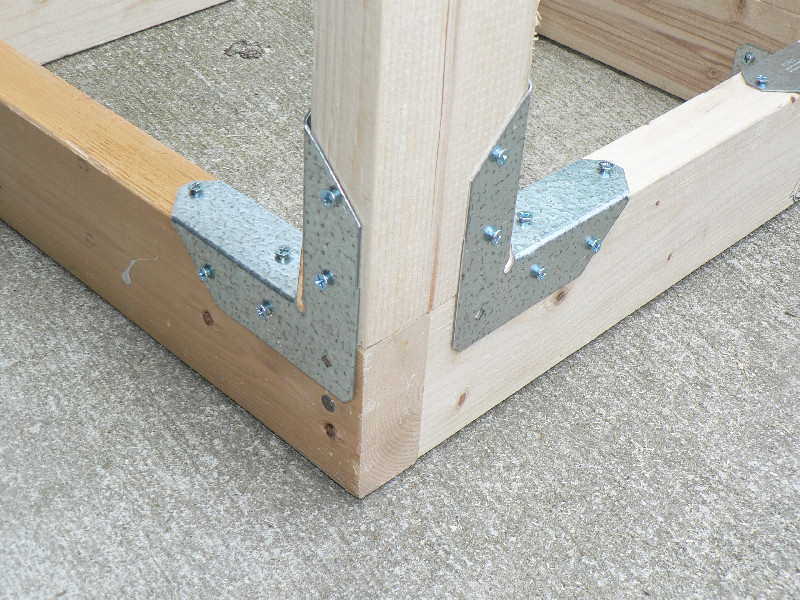
Here is a view after I added the outer "leg" supports. I only used stainless steel ties to connect the legs to the bottom base and nothing else (no nails or screws).
I was originally thinking that I would use nails or screws to connect the "leg" supports to the base, but they would have needed to be at least 6" or 7" long. The longest nails I could find were a little over 4", which wouldn't be long enough (since a 2x4 is 3.5" wide). I could find lag screws that were longer (up to 7" or 8"), but then I would have needed to drill countersinks for the large lag screws heads (which I thought was a little too much work). So I decided to try stainless steel ties. I'm glad that I did, because this thing is built like a rock.
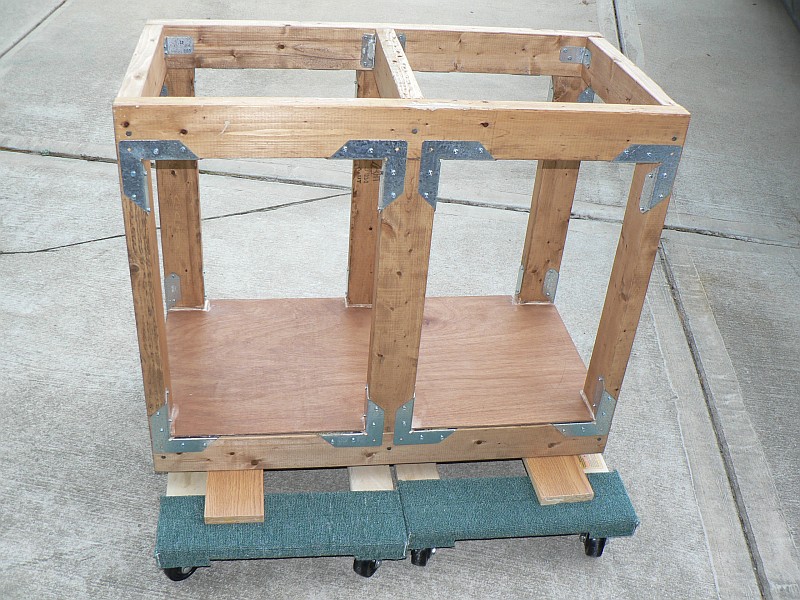
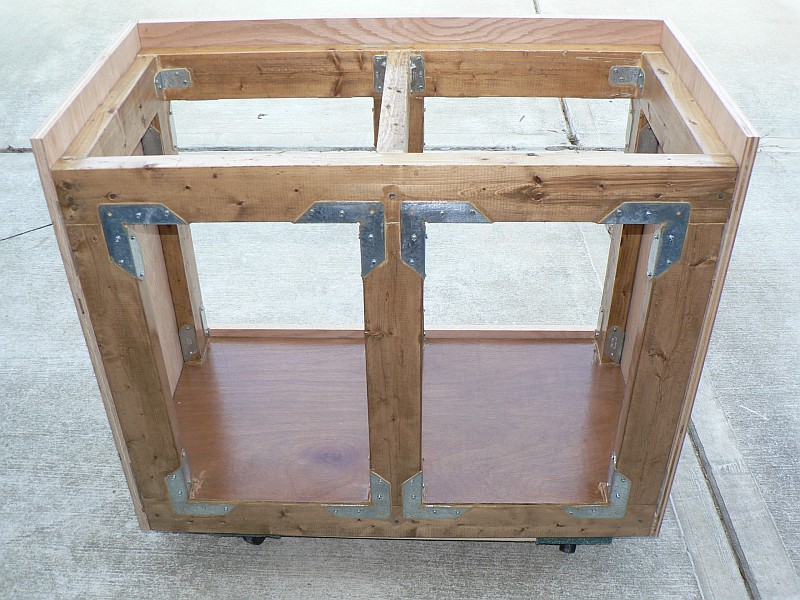
Here is a view of the inside corners after I added the "legs":
Here is a shot of the outside corner after I added the "legs":
Here is the stand after I added the top support:
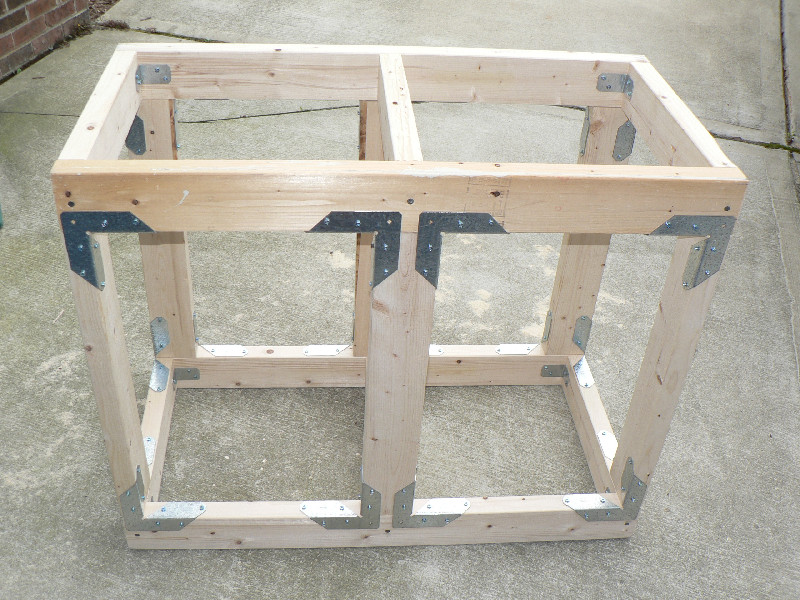
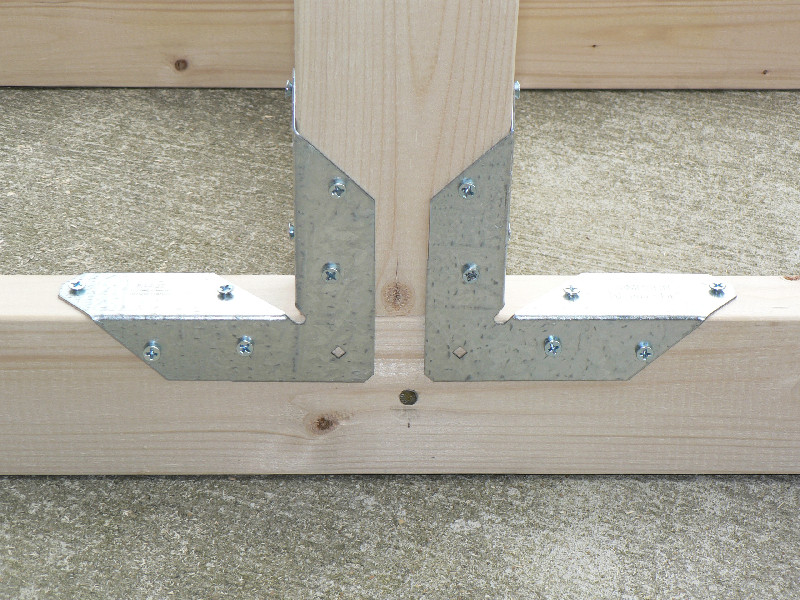
You'll also notice that I decided to add some more strength to the center supports as well:
Stay tuned: More to come...
I went to the local pet store to order one, since most places don't carry a stand with those dimensions. I decided to take a look at the build quality of the stand and was pretty amazed that there were no studs for a frame. It was basically a bunch of 1"x4"s stapled together. I put some weight on it and tried to move it side to side and it swayed slightly. :eek3:
Since I have two small children (that are constantly running around the house), I need to be careful that the tank will be able to withstand one of them falling into it by mistake while they are playing.
So after looking at some great threads on this site, and gaining some confidence from their results, I decided to go out on a limb and have a go at it.
:hang:
This thread is meant to document the process for any others that dare to follow in my (amateurish) footsteps.
Legalese: Please note that I am not a professional carpenter. On the contrary, I am a computer professional that sits in front of a monitor for most of the day. So if you use this thread to build your own tank, and it falls apart, then don't blame me.
==================
I started out by searching for plans on the Web. Many of the plans seem to offer a strong design for vertical strength, but most seem to lack any strength if a torque (twisting or side to side movement) is applied.
Since I am not a professional carpenter, I went a bit overboard on the design to make sure it was strong enough (sort of like how the guy (Tim Allen) on Tool Time builds his stuff) and could withstand any sort of torque.
I didn't want legs in each corner of the stand, because I didn't want a lot of pressure on each leg or the carpet beneath. If I ever decide to move the tank, I don't want four indentations in the carpet that will never come out. I wanted to distribute the load as much as possible, hence the horizontal 2x4s.
I built two of these. One for the bottom and one for the top.
Here is a view of the inside corner. I used stainless steel angle ties to connect the inside of the 2x4s.
Here is a view of the outside corner. I used 4" nails to connect the outside of the 2x4s.
Here is a view after I added the outer "leg" supports. I only used stainless steel ties to connect the legs to the bottom base and nothing else (no nails or screws).
I was originally thinking that I would use nails or screws to connect the "leg" supports to the base, but they would have needed to be at least 6" or 7" long. The longest nails I could find were a little over 4", which wouldn't be long enough (since a 2x4 is 3.5" wide). I could find lag screws that were longer (up to 7" or 8"), but then I would have needed to drill countersinks for the large lag screws heads (which I thought was a little too much work). So I decided to try stainless steel ties. I'm glad that I did, because this thing is built like a rock.
Here is a view of the inside corners after I added the "legs":
Here is a shot of the outside corner after I added the "legs":
Here is the stand after I added the top support:
You'll also notice that I decided to add some more strength to the center supports as well:
Stay tuned: More to come...