what you need
1. an ebay account
2. soldering stuff(soldering iron, solder[just about any works], and a wet sponge[one made for soldering(regular ones melt and stink up the place)])
3. Patience
4. a hacksaw(preferably one with a hanging blade[kobalt mabe])
5. a prototype PCB board(i'll show you what it is in update)
6. power supply
7. acrylic resin (you don't need it but it comes in handy) (you can buy it at walmart in the floral section where it's called acrylic water)
8. aluminum foil or a small plastic container heavily lubricated with petroleum jelly
9. a power supply(and all that it needs)
10. other stuff...
step 1
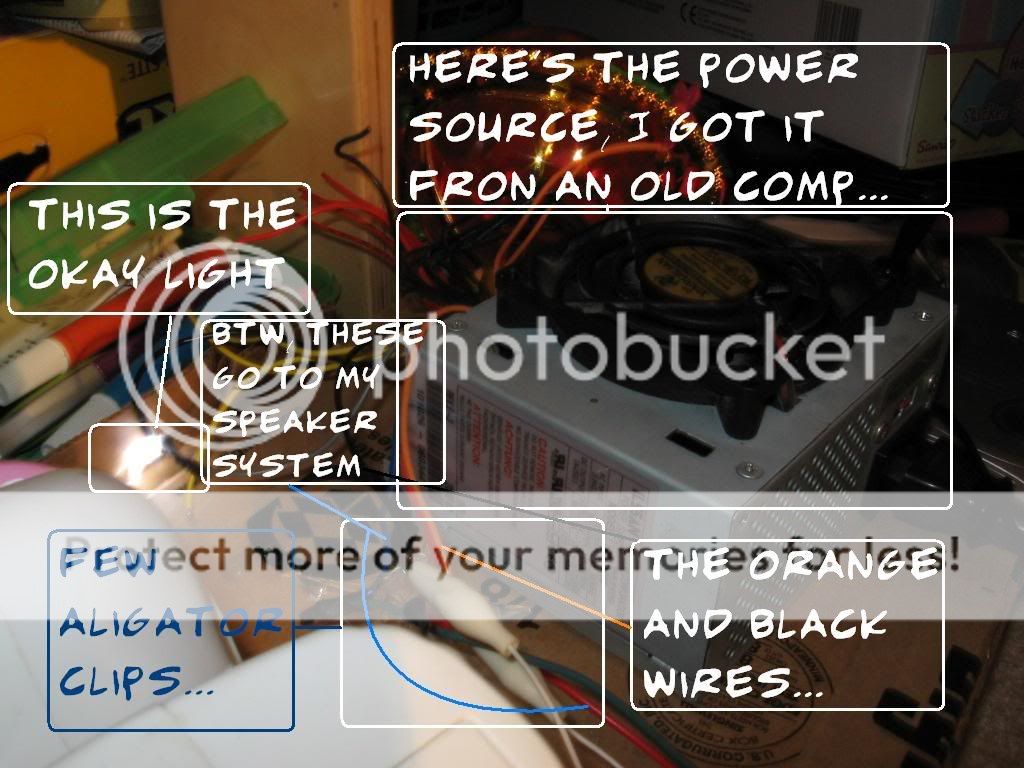
get a power supply
pretty simple if you know electronics
you can use batteries of you want, LEDs consume so little power 20 of them will last months on 2 D cells
pics of mine are coming soon
you can make your own using an old computer's http://www.wikihow.com/Convert-a-Computer-ATX-Power-Supply-to-a-Lab-Power-Supply
connect it to the orange wire
step 2
get some LEDs
this is the easiest part
you get some LEDs
to get cheaper ones go onto ebay I prefer sureelectronics
thats who I got my LEDs from....:devil:
LOL i still don't know wy I do that...
STEP 3 (sorry caps was on but I'm keeping it)
making the LED element:grinyes:
this is hard, it took me 5 hours(less than that I'm exaggerating)
get the prototype PCB & solder the LEDs to it in a parallel way (isn't this standard california curriculum?)
mix some of the acrylic water in a disposable cup
(the pics should explain all the rest[they come tomorrow])
step 4
mounting the LED thingy
I haven't done this yet so...
I'll do it on Friday
1. an ebay account
2. soldering stuff(soldering iron, solder[just about any works], and a wet sponge[one made for soldering(regular ones melt and stink up the place)])
3. Patience
4. a hacksaw(preferably one with a hanging blade[kobalt mabe])
5. a prototype PCB board(i'll show you what it is in update)
6. power supply
7. acrylic resin (you don't need it but it comes in handy) (you can buy it at walmart in the floral section where it's called acrylic water)
8. aluminum foil or a small plastic container heavily lubricated with petroleum jelly
9. a power supply(and all that it needs)
10. other stuff...
step 1
get a power supply
pretty simple if you know electronics
you can use batteries of you want, LEDs consume so little power 20 of them will last months on 2 D cells
pics of mine are coming soon
you can make your own using an old computer's http://www.wikihow.com/Convert-a-Computer-ATX-Power-Supply-to-a-Lab-Power-Supply
connect it to the orange wire
step 2
get some LEDs
this is the easiest part
you get some LEDs
to get cheaper ones go onto ebay I prefer sureelectronics
thats who I got my LEDs from....:devil:
LOL i still don't know wy I do that...
STEP 3 (sorry caps was on but I'm keeping it)
making the LED element:grinyes:
this is hard, it took me 5 hours(less than that I'm exaggerating)
get the prototype PCB & solder the LEDs to it in a parallel way (isn't this standard california curriculum?)
mix some of the acrylic water in a disposable cup
(the pics should explain all the rest[they come tomorrow])
step 4
mounting the LED thingy
I haven't done this yet so...
I'll do it on Friday