
I am never really happy with anything stock.
The Fluval Edge is an awesome, modular nano tank with a perfectly able stock filter and lighting set up. However, I like to tinker and modify just about everything I can get my hands on. Using spare materials i had lying around the garage, I transformed the 6-gallon Fluval Edge into a 16-gallon combined system.
The first step I took was to create an extra lip so the water level could overflow in a controlled fashion. (others have just cut holes in the stock rim of the tank but I initially decided to choose a different approach.)

^The first piece of acrylic I cut to fabricate a taller rim.

^After a few patient attempts with a heat gun the final product turned out swell.
The next piece of the puzzle was to design a "gate" or filter for the water to overflow through without the fish fitting as well.

^I started this project after an all-nighter and after i finished cutting it up I realized I needed to leave a space on either side. The final product was based off this design, however.
I got lazy and distracted and was poor to take pictures for a while.
At this point I had the basic design for the top portion of the overflow. I moved on to scrapping up some wood and more acrylic (not sure why I had so much acrylic in the garage to spare..)
Anyways to fit within the space below the nightstand on which the Fluval is located, I had to construct a custom ~10gallon tank. :headshake2:
The dimensions I cam up with were ~14"x~18"x~9" roughly. (had to make minor adjustments here and there..

^Much work later, this is just before i installed the corner supports.

^This picture shows how tight the acrylic came together, and shows off the grooves I created within the frame ~1/4" deep. Oh yeah...the longer sides are made from 1/4" thick acrylic and the bottom & smaller fronts are from 1/8". (this is the main reason i created the corner supports out of fear the fronts would bulge out too much.

^All corners secured and ready for silicone.
By this point in the build I was pretty ...bored and impatient. I started to make unorthodox decisions with regard to how I was going to set up the bottom tank as a sump/refugium.

^Initial design with baffles and current controlling baffles for the bottom tank. I found out later that wood was a terrible choice for this...

^Where the majority of filtration occurs.

^Overflow pipe(left), return pipe (right). I didn't take any pictures of me building the top "bowl" step-by-step, sorry. I used some screws hot glued in a ladder-like fashion to keep the two from moving too much.

^The "bowl/return tray".

^Drilling the holes for the plumbing. Extremely messy. Also had to trim a couple of the tongues that help hold the Fluval's back column in place.

^How the tank looks from behind with the drain pipe installed.

^Front of apparatus(left), Rear(right). First application of expandafoam.

^Plumbing installed and expandafoam doing its thing.

^Other side foam starting to expand.

^Final result after heatbending some tubing to allow the return to fit snugly up top there.

^"Refugium" set up with a few plants along the flow path.
At this point I was just happy to be done(ish) with the whole fiasco. Within a few days I noticed some gross gooey algae/mold/whoknowswhat growing off the wood. I assume it was because it was pressed wood and contained a glue that some microorganisms were having a hoedown with.

^Best seen here.
Frustrated as I was by the nasty growth, the pieces of wood kept trying to float off anyways. Time to think of something new.
The ultimate decision was to leave the back baffles as they were and greatly reduce the complexity of the front while greatly increasing its aesthetics.
I found a bunch of pavers leftover from a pool decking construction and decided they would be a good material that wouldn't try to float away.

^Pavers being stacked like legos.
^End result for the "refugium"ish contraption. Most of the filtration business happens in the rear while the front remains ALMOST stagnant. There is a minute circular current within the display zone.

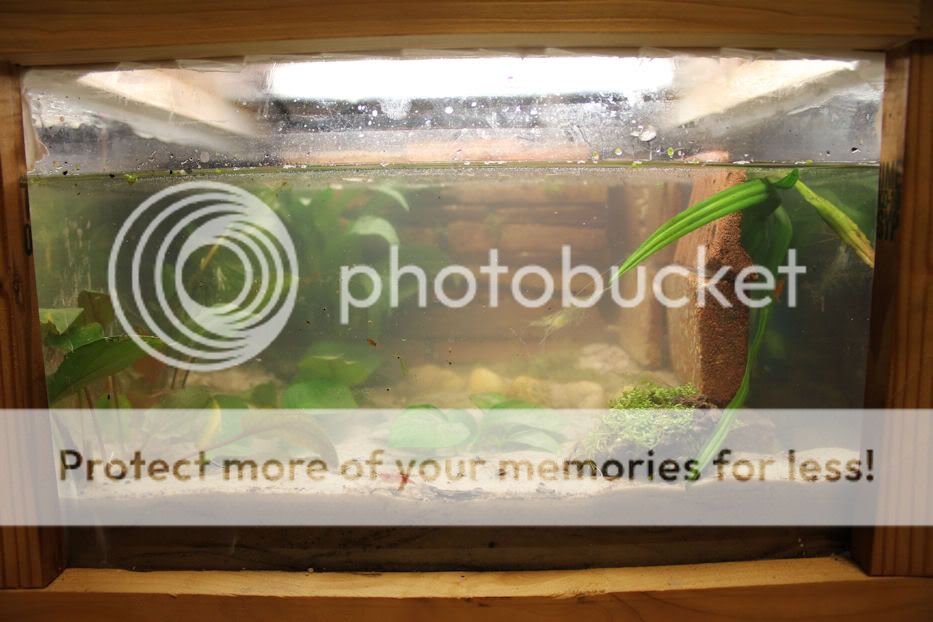
^Final Product for now about a week in the making.
This write up took a bit longer than expected and I've lost track of any details I have said or left out.. Any and all questions are welcome! ^_^
Enjoy!
The Fluval Edge is an awesome, modular nano tank with a perfectly able stock filter and lighting set up. However, I like to tinker and modify just about everything I can get my hands on. Using spare materials i had lying around the garage, I transformed the 6-gallon Fluval Edge into a 16-gallon combined system.
The first step I took was to create an extra lip so the water level could overflow in a controlled fashion. (others have just cut holes in the stock rim of the tank but I initially decided to choose a different approach.)
^The first piece of acrylic I cut to fabricate a taller rim.
^After a few patient attempts with a heat gun the final product turned out swell.
The next piece of the puzzle was to design a "gate" or filter for the water to overflow through without the fish fitting as well.
^I started this project after an all-nighter and after i finished cutting it up I realized I needed to leave a space on either side. The final product was based off this design, however.
I got lazy and distracted and was poor to take pictures for a while.
At this point I had the basic design for the top portion of the overflow. I moved on to scrapping up some wood and more acrylic (not sure why I had so much acrylic in the garage to spare..)
Anyways to fit within the space below the nightstand on which the Fluval is located, I had to construct a custom ~10gallon tank. :headshake2:
The dimensions I cam up with were ~14"x~18"x~9" roughly. (had to make minor adjustments here and there..
^Much work later, this is just before i installed the corner supports.
^This picture shows how tight the acrylic came together, and shows off the grooves I created within the frame ~1/4" deep. Oh yeah...the longer sides are made from 1/4" thick acrylic and the bottom & smaller fronts are from 1/8". (this is the main reason i created the corner supports out of fear the fronts would bulge out too much.
^All corners secured and ready for silicone.
By this point in the build I was pretty ...bored and impatient. I started to make unorthodox decisions with regard to how I was going to set up the bottom tank as a sump/refugium.
^Initial design with baffles and current controlling baffles for the bottom tank. I found out later that wood was a terrible choice for this...
^Where the majority of filtration occurs.
^Overflow pipe(left), return pipe (right). I didn't take any pictures of me building the top "bowl" step-by-step, sorry. I used some screws hot glued in a ladder-like fashion to keep the two from moving too much.
^The "bowl/return tray".
^Drilling the holes for the plumbing. Extremely messy. Also had to trim a couple of the tongues that help hold the Fluval's back column in place.
^How the tank looks from behind with the drain pipe installed.
^Front of apparatus(left), Rear(right). First application of expandafoam.
^Plumbing installed and expandafoam doing its thing.
^Other side foam starting to expand.
^Final result after heatbending some tubing to allow the return to fit snugly up top there.
^"Refugium" set up with a few plants along the flow path.
At this point I was just happy to be done(ish) with the whole fiasco. Within a few days I noticed some gross gooey algae/mold/whoknowswhat growing off the wood. I assume it was because it was pressed wood and contained a glue that some microorganisms were having a hoedown with.
^Best seen here.
Frustrated as I was by the nasty growth, the pieces of wood kept trying to float off anyways. Time to think of something new.
The ultimate decision was to leave the back baffles as they were and greatly reduce the complexity of the front while greatly increasing its aesthetics.
I found a bunch of pavers leftover from a pool decking construction and decided they would be a good material that wouldn't try to float away.
^Pavers being stacked like legos.
^End result for the "refugium"ish contraption. Most of the filtration business happens in the rear while the front remains ALMOST stagnant. There is a minute circular current within the display zone.
^Final Product for now about a week in the making.
This write up took a bit longer than expected and I've lost track of any details I have said or left out.. Any and all questions are welcome! ^_^
Enjoy!


