
Hey guys,
So I am going to be setting up a little 3 gallon rimless nano tank here pretty quick. I want to keep it low tech, low maintenance and low light. I already have an idea of the plants and fish that I want to keep in it and I already have the tank, filter, heater, substrate and a good idea of what I want the hardscape to look like. So all I needed was a sleek looking LED clip on light that would give me the amount of light I need. So i went onto ebay and just typed in " Nano LED clip on " and came across a product that seemed to fit the bill of what I needed, for a measly $11 shipped, so I hit the buy it now button.
I got the light in the mail today, first thing I want to go over this light really quickly. The packaging was hilarious, it was the light, in an unsealed box with a shopping lable on it. Zero styrofoam, zero packing of any kind,nothing, just the light in the box and thats it. Not to mention mine didnt come with a power supply, but I have a few extra power supplies laying around that are better than the one it would have come with anyway, so that didnt bother me too much. Plugged in the light and turned it on.... what a joke. This couldn't light up a glass of water let alone a fish tank of any kind. At about 12" from the bottom of the tank I was getting about 400 lumens with this light, divide that by 60 gets you a good estimate of PAR, that gives me about 6.6PAR, need a bit more than that. So this is the benchmark to beat, 400 lumens about about 6 PAR.
So I thought about returning it and pursuing a different solution, but the DIY'er in me said lets see what we can do with this little guy. It does have 3 things going for it, its sleek and small, fits on my aquarium perfectly and I really like the look of it. It has a pretty sweet little touch capacitive on/off switch which is kinda cool and it comes apart really easily and its super simple.
So I decided to remanufactured this thing to suit my needs.
Here is a couple pics of the product on the ebay page.


lol this one cracks me up, it would be less than useless over a reef

The goal. Increase light output to about 1500 lumens at 12" to get about 25 PAR, while keeping the appearance of the fixture identical and maintaining functionality of the capacative touch on/off switch.
So first thing I do is remove the 6 screws to get the cover off and cut the wires going to the LED PCB, sorry dont have pics of this, I was in the zone and didnt think to take pictures and document what I was doing.
With the cover and LEDs out, I took my dremel tool and made the opening as big as I could while keeping the holes for the screws, this way I can make as much room for LEDs as I can.

 [/IMG]
the next thing to do is figure out which wires I need. There is one hot and two ground. This fixture had optional on/off blue LEDs that you controlled by tapping the power switch to get the desired combination of LEDs: white, white + blue or just blue. So i figured out which ground I needed by stripping all of them and trying them on a strip of LEDs I had laying around. Got that figured out, switch still works so full speed ahead!

With that figured out, I put the led cover back on to make sure it still fits and get an idea of the surface area im working with for LEDs.

So now im at a stopping point until I figure out what ebay LED strips im going to use. I was going to flip through Hoppys DIY LED strip light thread and see what he used and go from there.
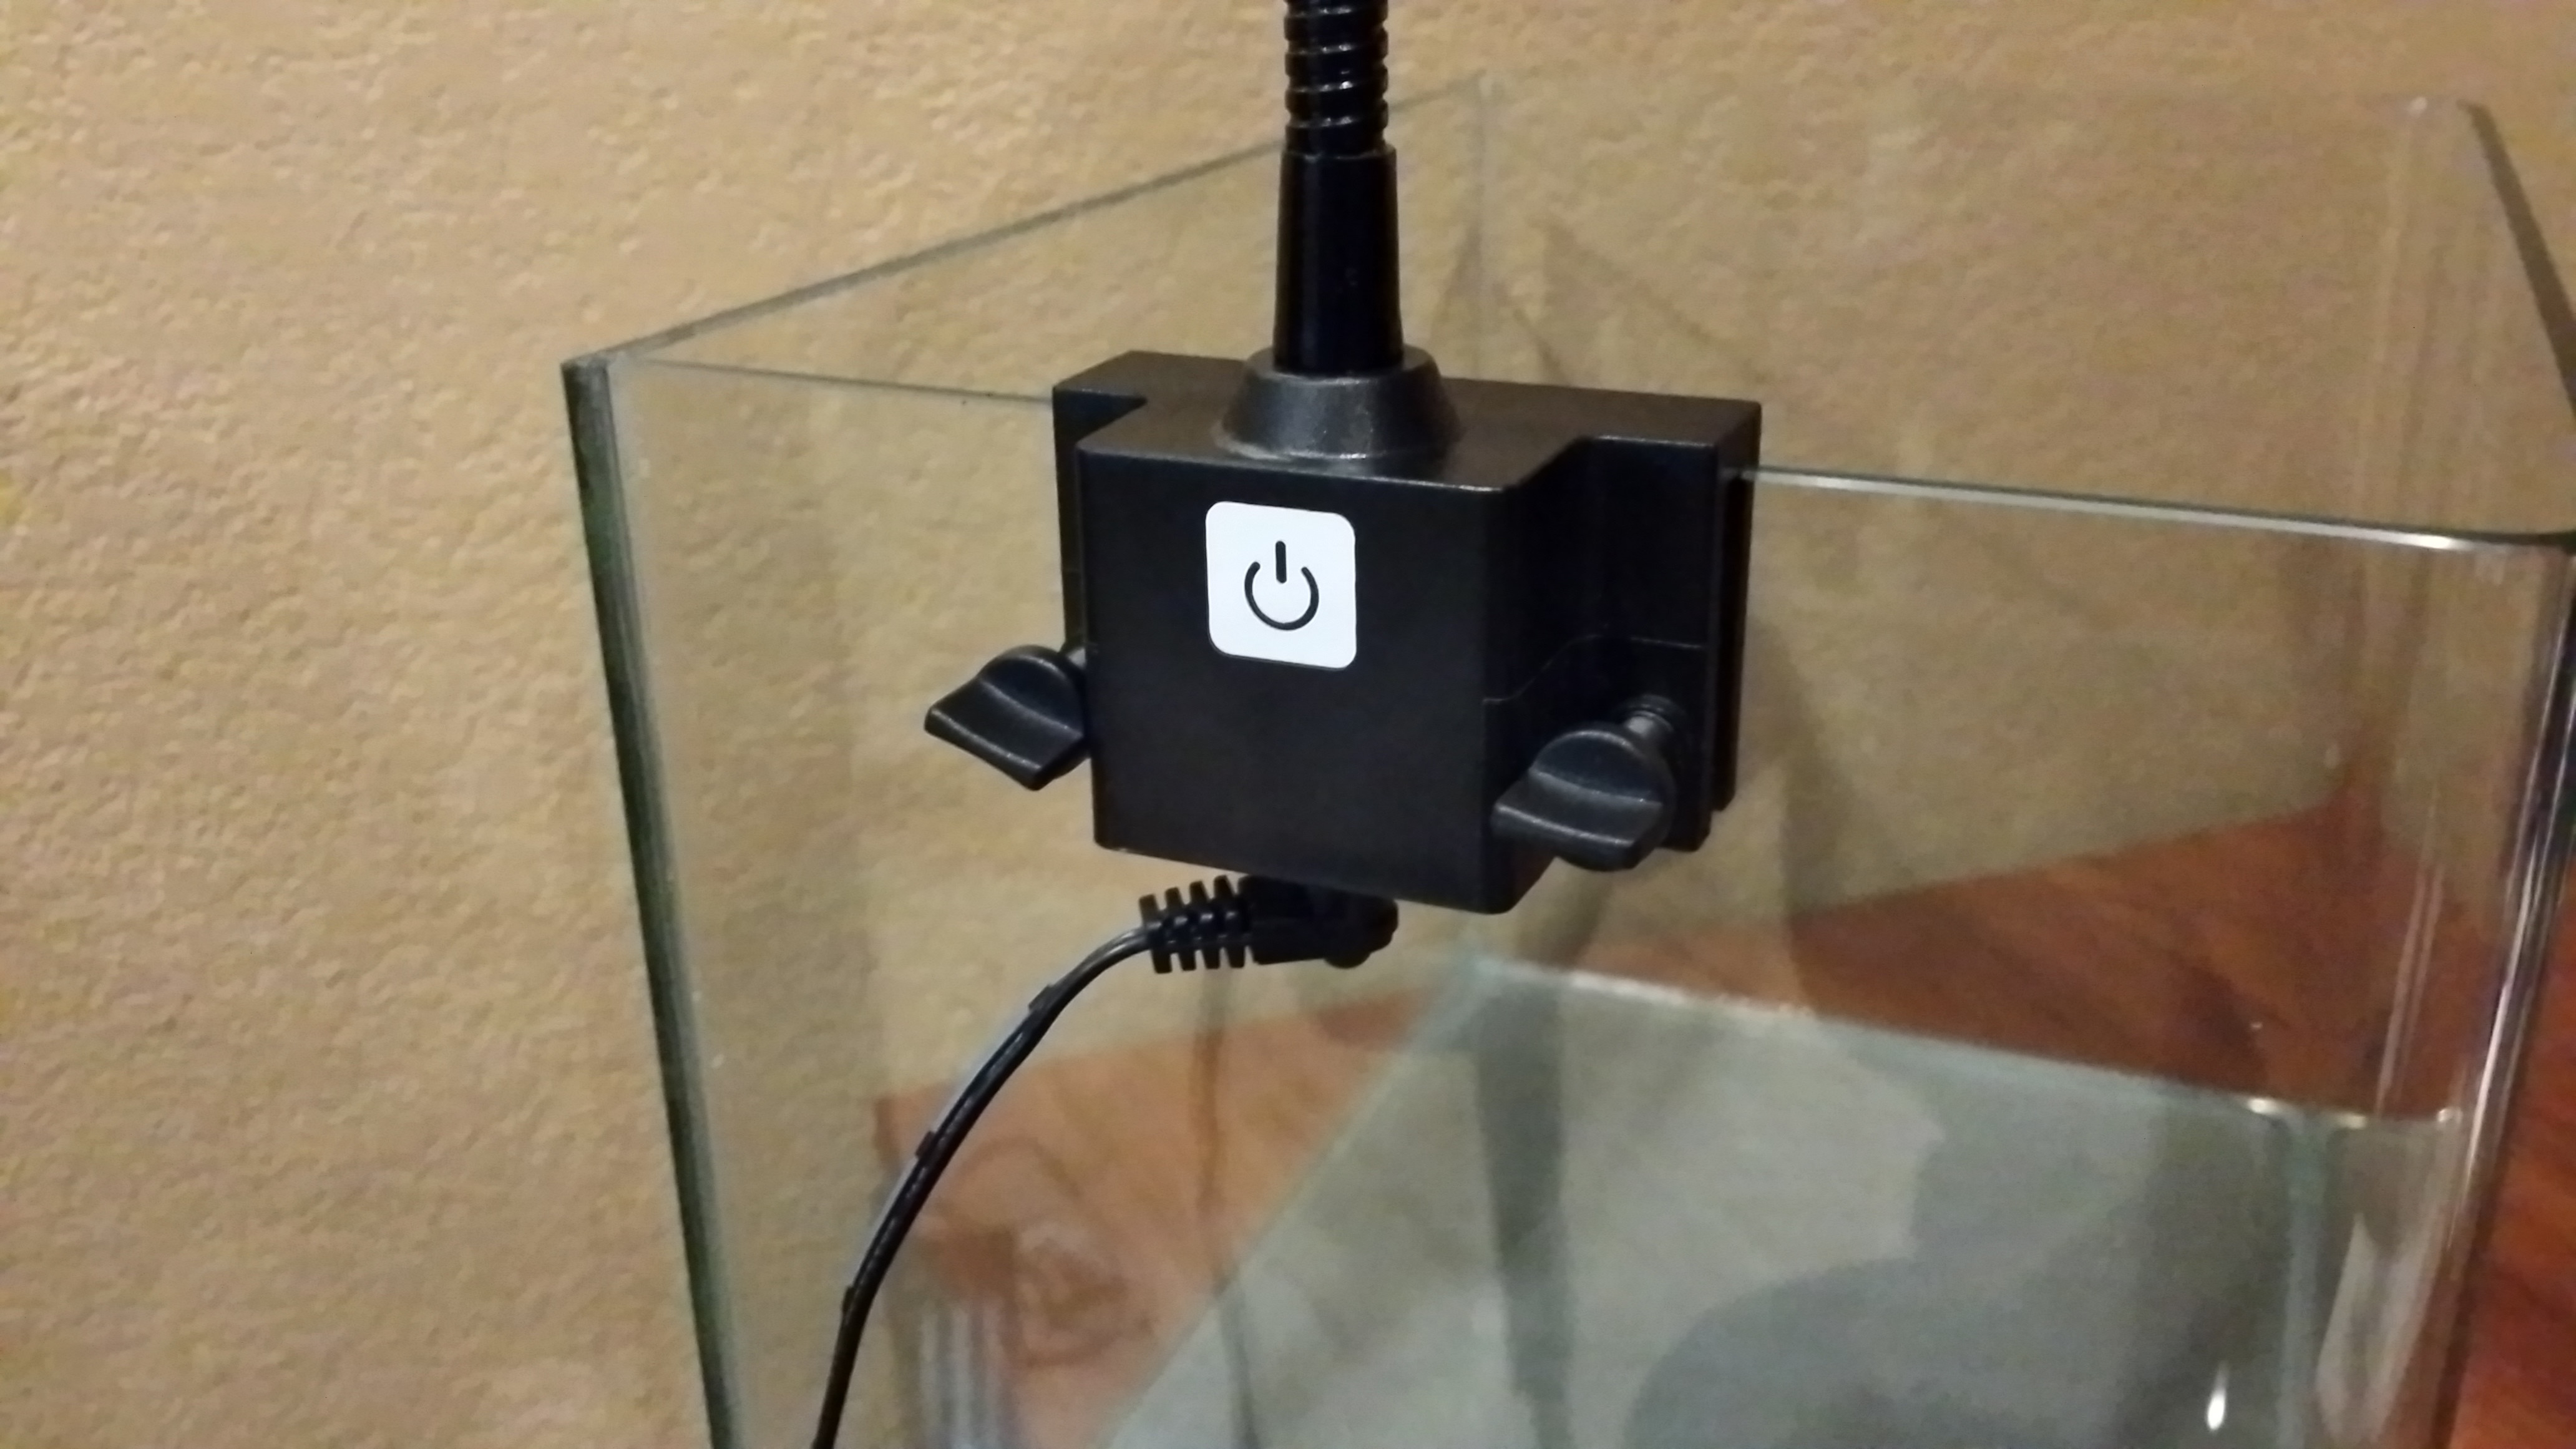
but here is the fixture on the tank.


So I am going to be setting up a little 3 gallon rimless nano tank here pretty quick. I want to keep it low tech, low maintenance and low light. I already have an idea of the plants and fish that I want to keep in it and I already have the tank, filter, heater, substrate and a good idea of what I want the hardscape to look like. So all I needed was a sleek looking LED clip on light that would give me the amount of light I need. So i went onto ebay and just typed in " Nano LED clip on " and came across a product that seemed to fit the bill of what I needed, for a measly $11 shipped, so I hit the buy it now button.
I got the light in the mail today, first thing I want to go over this light really quickly. The packaging was hilarious, it was the light, in an unsealed box with a shopping lable on it. Zero styrofoam, zero packing of any kind,nothing, just the light in the box and thats it. Not to mention mine didnt come with a power supply, but I have a few extra power supplies laying around that are better than the one it would have come with anyway, so that didnt bother me too much. Plugged in the light and turned it on.... what a joke. This couldn't light up a glass of water let alone a fish tank of any kind. At about 12" from the bottom of the tank I was getting about 400 lumens with this light, divide that by 60 gets you a good estimate of PAR, that gives me about 6.6PAR, need a bit more than that. So this is the benchmark to beat, 400 lumens about about 6 PAR.
So I thought about returning it and pursuing a different solution, but the DIY'er in me said lets see what we can do with this little guy. It does have 3 things going for it, its sleek and small, fits on my aquarium perfectly and I really like the look of it. It has a pretty sweet little touch capacitive on/off switch which is kinda cool and it comes apart really easily and its super simple.
So I decided to remanufactured this thing to suit my needs.
Here is a couple pics of the product on the ebay page.
lol this one cracks me up, it would be less than useless over a reef
The goal. Increase light output to about 1500 lumens at 12" to get about 25 PAR, while keeping the appearance of the fixture identical and maintaining functionality of the capacative touch on/off switch.
So first thing I do is remove the 6 screws to get the cover off and cut the wires going to the LED PCB, sorry dont have pics of this, I was in the zone and didnt think to take pictures and document what I was doing.
With the cover and LEDs out, I took my dremel tool and made the opening as big as I could while keeping the holes for the screws, this way I can make as much room for LEDs as I can.
the next thing to do is figure out which wires I need. There is one hot and two ground. This fixture had optional on/off blue LEDs that you controlled by tapping the power switch to get the desired combination of LEDs: white, white + blue or just blue. So i figured out which ground I needed by stripping all of them and trying them on a strip of LEDs I had laying around. Got that figured out, switch still works so full speed ahead!
With that figured out, I put the led cover back on to make sure it still fits and get an idea of the surface area im working with for LEDs.
So now im at a stopping point until I figure out what ebay LED strips im going to use. I was going to flip through Hoppys DIY LED strip light thread and see what he used and go from there.
but here is the fixture on the tank.


