Ok, I finally decided to resize all these photos.
Anyways, heres how to make your own very excellent DIY filter system for under $80, and considering the price of canister filters these days thats a pretty good bargin :grinyes:.
WARNING: THIS IS AN INTENSE DIY PROJECT, SERIOUS INJURY COULD RESULT IN THE EVENT OF IMPROPER PROCEDURES AND LACK OF SAFETY AROUND POWER TOOLS.
ATTENTION: I CAN NOT AND WILL NOT BE HELD RESPONSIBLE SHOULD SOMETHING GO WRONG, PROCEED AT YOUR OWN RISK.
Now that thats out of the way, here is the parts break down.
QuietOne $25 1200 pump (300GPH, a bigger pump may be required)
Canister $10 (in my case, I used a welding rod holder)
PVC Pipes and fittings and other assorted stuff $30
PCV Grommets $4 (no, that stands for Positive Crankcase Ventilation, goes on cars but works well for our purposes)
Media $15 (this price REALLY VARIES depending on what you employ)
Tools
No project can proceed without tools
Drill
Drill bits 7/8"-1" paddle
3/16" drill bit for the spray bar
Hacksaw
I should alert you to one problem with the Q1 pumps, all them have this internal chamber, and air frequently gets trapped, cause an annoying rattle. Thankfully I have devised a fix for this shown later on.
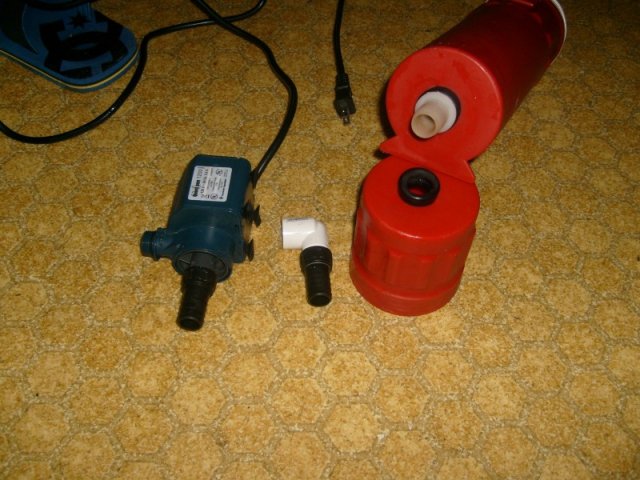
Start by getting your pieces together.
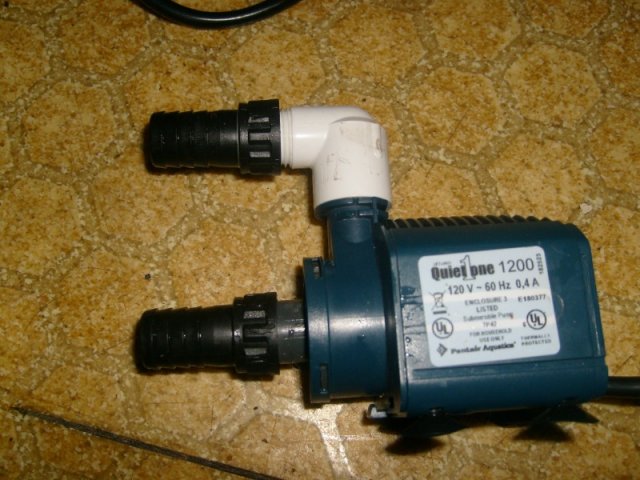
The simple solution to the Q1 pump rattle is to mount the pump in a vertical position, behold, my ingenious at work :grinyes:
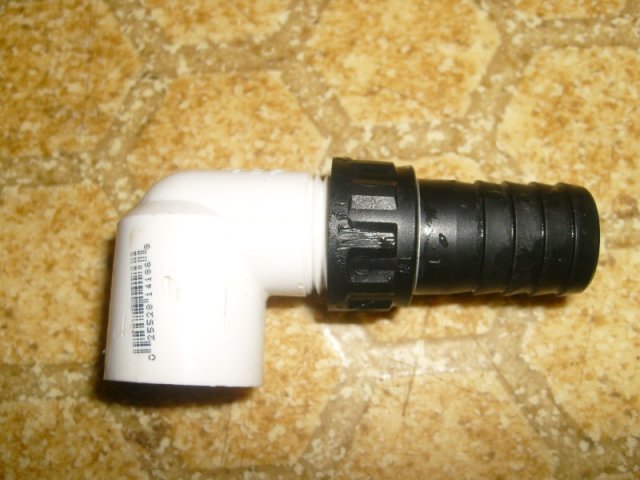
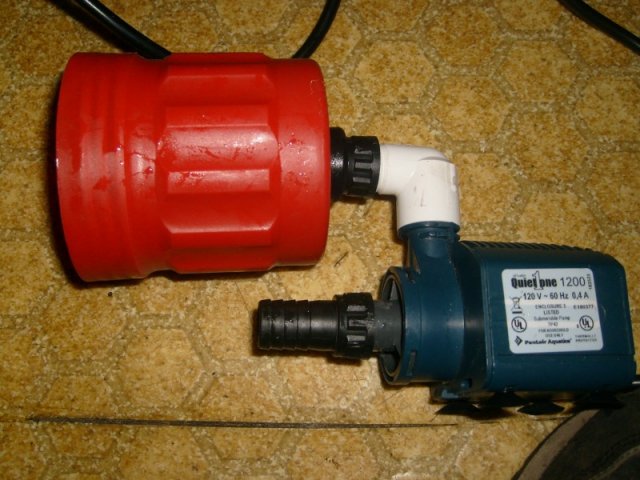
What I've done is simply taken off the barb on the pump and attached it to a 1/2" corner with external threads on one end and internal threads on the other. Screw on to pump. Remove the stupid back plate off the pump, it just creates noise.
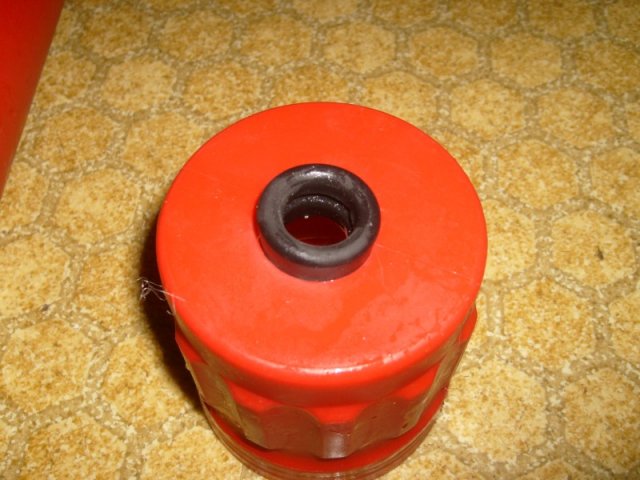
Now, Move on to the bottom of the filter, Drill a 7/8" or a 1" hole into the center, and insert the PCV grommet.
NOTE: start at 7/8" and if'n it don't fit quite right, drill bigger.
Attach the bottom to the pump (whichever end you decide to use as the bottom, I chose the cap so I could compact the floss, allowing for better filtration). It should go on semi-easy, but may take some force.
Now, drill the same size diameter hole at the top and insert the grommet then the barb. You may have to hammer the barb in but once it, its in there, and its mighty difficult to remove once in.
NOTE: Insert the grommet into the top before attaching the grommet to the barb.
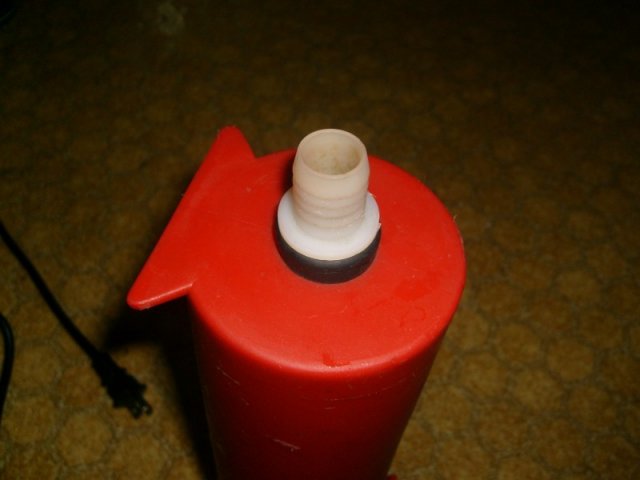
Now, add PLENTY of teflon tape around the threads, failure to do so could result in leaks.
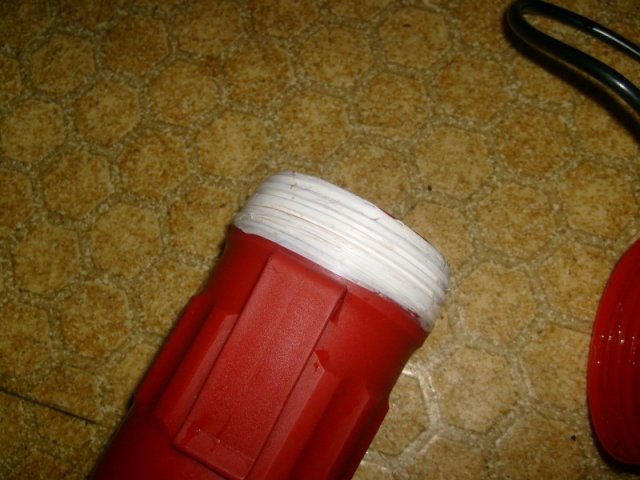
Now all that needs to be done is insert media and attach to your intake and outtake system (whether by flexible tubing or PVC pipe)
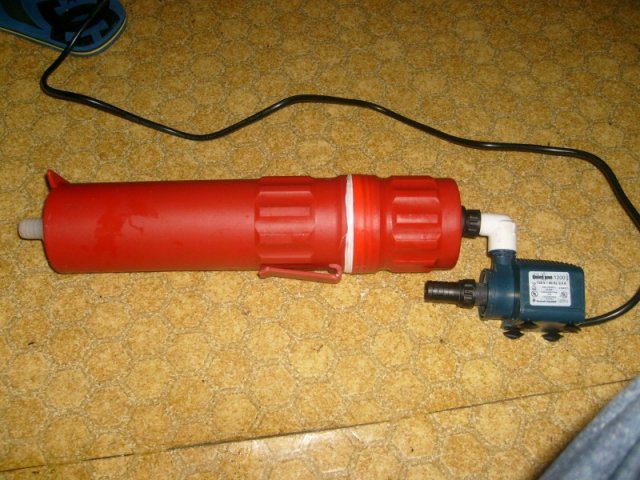
NOTE: a pumps flow is dependent on several factors, including how much resistance to flow (media, clogged or otherwise) it has and how high it has to pump, otherwise known as head. Take this into account when choosing your pump and designing your intake and outtake.
Here is my system though.
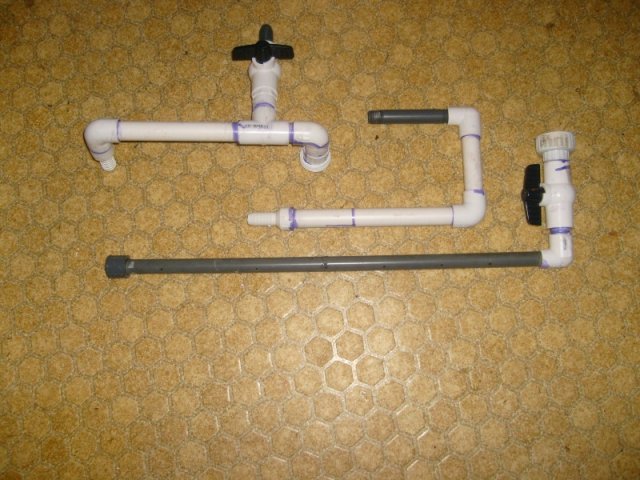
Intake
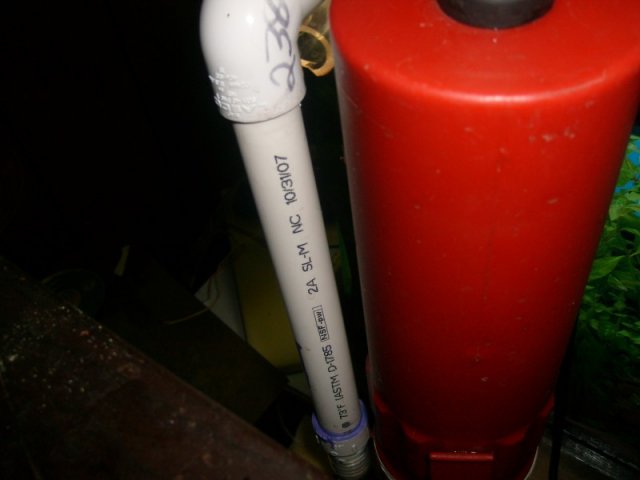
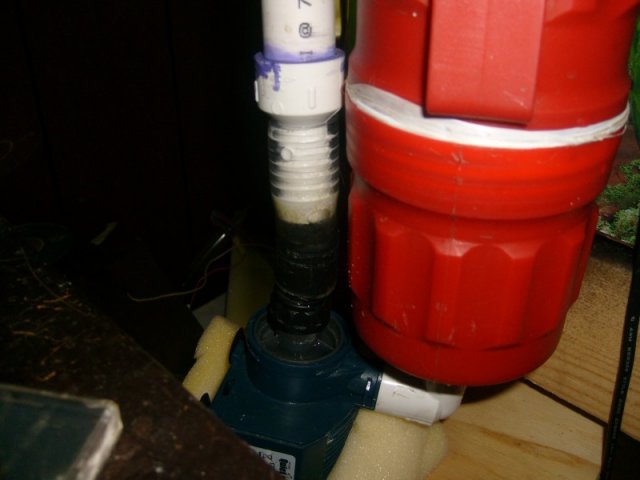
Outtake at the front (note the valve with barb going off to the side, will explain)
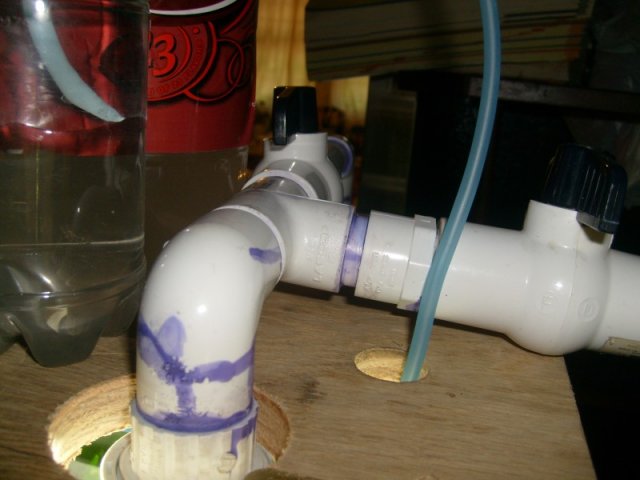
Back view.
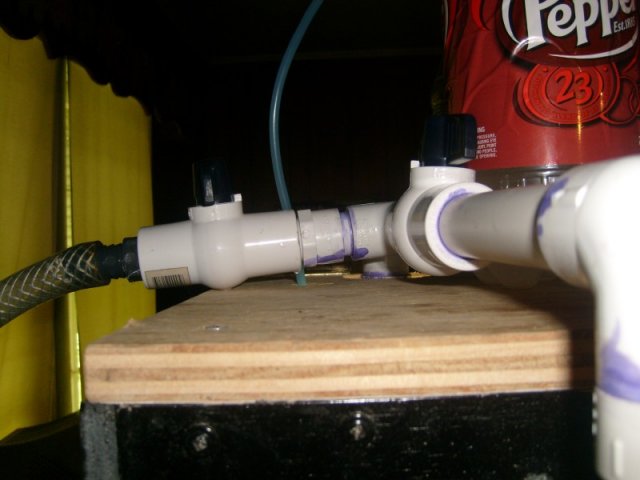
Outtake in the hood. This valve controls water flow, to prevent the filter from blowing the fish away.
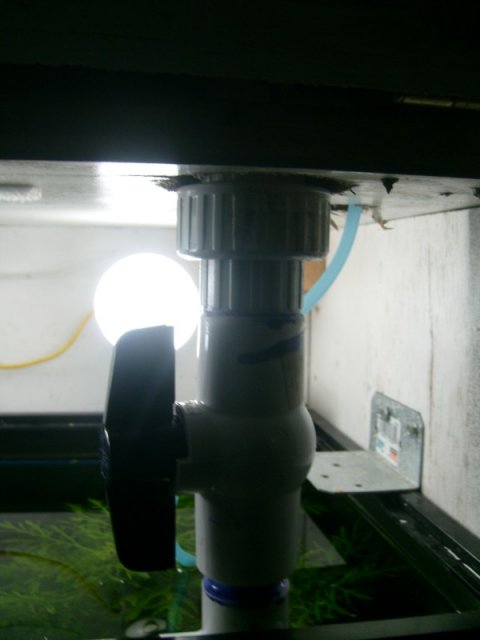
Now to explain the barb and valve. This is my WC Inlet/Outlet Valve, depending if I'm draining water or pumping water back in. Now, when I need to do a WC, I simply attach a hose, open this valve, close the one in the hood (Lower Output Valve), wait till desired amount is removed, open valve under the hood close this valve. To add water I use a second pump, attach hose to pump, part way close the Top Outlet valve coming from the filter, then open the other two valves, turn on pump until desired water level is achieved, close WC valve, open the Top Outlet valve and adjust the water flow the the LO Valve in the hood. :grinyes: I have not quite perfected this operation, so it takes me a little bit longer to do it till I get the hang of it.
Future projects include getting the heater inline (already purchased stealth) and a 2 micron water filter inline (for super clean water)


Anyways, heres how to make your own very excellent DIY filter system for under $80, and considering the price of canister filters these days thats a pretty good bargin :grinyes:.
WARNING: THIS IS AN INTENSE DIY PROJECT, SERIOUS INJURY COULD RESULT IN THE EVENT OF IMPROPER PROCEDURES AND LACK OF SAFETY AROUND POWER TOOLS.
ATTENTION: I CAN NOT AND WILL NOT BE HELD RESPONSIBLE SHOULD SOMETHING GO WRONG, PROCEED AT YOUR OWN RISK.
Now that thats out of the way, here is the parts break down.
QuietOne $25 1200 pump (300GPH, a bigger pump may be required)
Canister $10 (in my case, I used a welding rod holder)
PVC Pipes and fittings and other assorted stuff $30
PCV Grommets $4 (no, that stands for Positive Crankcase Ventilation, goes on cars but works well for our purposes)
Media $15 (this price REALLY VARIES depending on what you employ)
Tools
No project can proceed without tools
Drill
Drill bits 7/8"-1" paddle
3/16" drill bit for the spray bar
Hacksaw
I should alert you to one problem with the Q1 pumps, all them have this internal chamber, and air frequently gets trapped, cause an annoying rattle. Thankfully I have devised a fix for this shown later on.
Start by getting your pieces together.

The simple solution to the Q1 pump rattle is to mount the pump in a vertical position, behold, my ingenious at work :grinyes:

What I've done is simply taken off the barb on the pump and attached it to a 1/2" corner with external threads on one end and internal threads on the other. Screw on to pump. Remove the stupid back plate off the pump, it just creates noise.

Now, Move on to the bottom of the filter, Drill a 7/8" or a 1" hole into the center, and insert the PCV grommet.
NOTE: start at 7/8" and if'n it don't fit quite right, drill bigger.

Attach the bottom to the pump (whichever end you decide to use as the bottom, I chose the cap so I could compact the floss, allowing for better filtration). It should go on semi-easy, but may take some force.

Now, drill the same size diameter hole at the top and insert the grommet then the barb. You may have to hammer the barb in but once it, its in there, and its mighty difficult to remove once in.
NOTE: Insert the grommet into the top before attaching the grommet to the barb.

Now, add PLENTY of teflon tape around the threads, failure to do so could result in leaks.

Now all that needs to be done is insert media and attach to your intake and outtake system (whether by flexible tubing or PVC pipe)

NOTE: a pumps flow is dependent on several factors, including how much resistance to flow (media, clogged or otherwise) it has and how high it has to pump, otherwise known as head. Take this into account when choosing your pump and designing your intake and outtake.
Here is my system though.

Intake


Outtake at the front (note the valve with barb going off to the side, will explain)

Back view.

Outtake in the hood. This valve controls water flow, to prevent the filter from blowing the fish away.

Now to explain the barb and valve. This is my WC Inlet/Outlet Valve, depending if I'm draining water or pumping water back in. Now, when I need to do a WC, I simply attach a hose, open this valve, close the one in the hood (Lower Output Valve), wait till desired amount is removed, open valve under the hood close this valve. To add water I use a second pump, attach hose to pump, part way close the Top Outlet valve coming from the filter, then open the other two valves, turn on pump until desired water level is achieved, close WC valve, open the Top Outlet valve and adjust the water flow the the LO Valve in the hood. :grinyes: I have not quite perfected this operation, so it takes me a little bit longer to do it till I get the hang of it.
Future projects include getting the heater inline (already purchased stealth) and a 2 micron water filter inline (for super clean water)


Last edited:


