Part 4 of 4
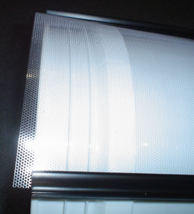
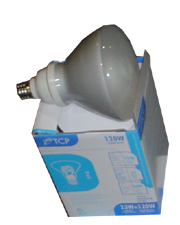
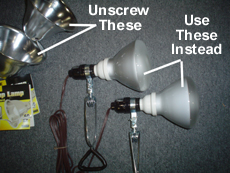
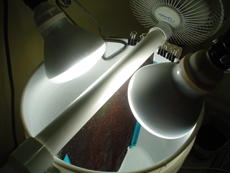
Any "grow light" used for plants should work. And the brighter, the better. If your screen size is very small, you may be able to use a light on just one side, and a mirror on the other.
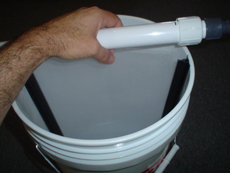
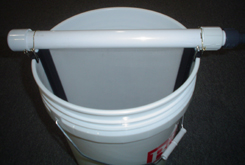
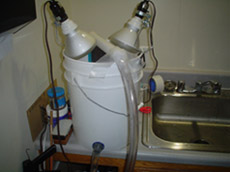
Now put the pump and tubes in your tank/sump, clip the fan on the bucket, and go! You should start seeing algae in a few days! If you already have a skimmer or refugium or other devices, just add your new turf algae filter to your system. Then you can start reducing or turning off your other filters one by one. Just be sure to test for nitrate and phosphate daily as you do this. And do post your pics and stories!
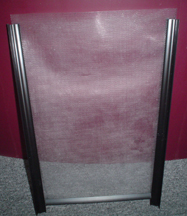
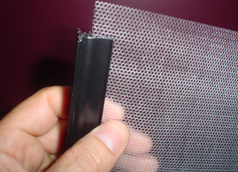
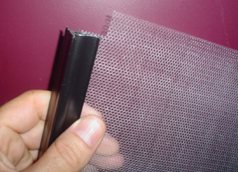
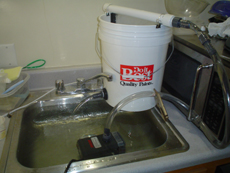
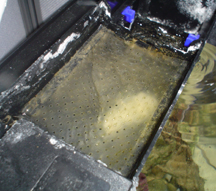
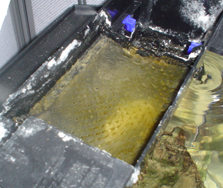
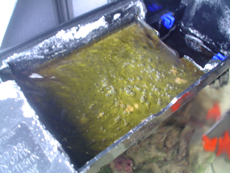
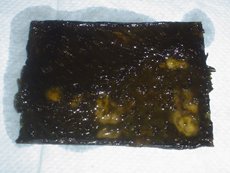
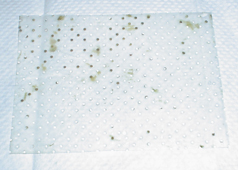
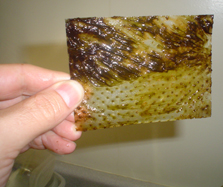
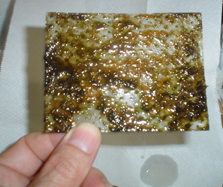
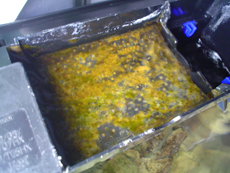
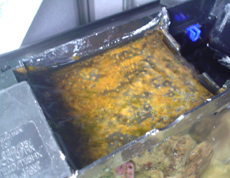
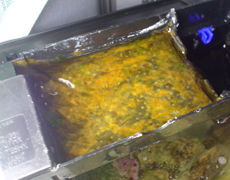
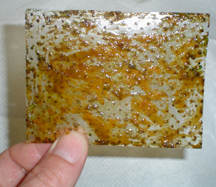
The screen usually starts out with green hair algae first, and after a few months you should start seeing a dark brown/red stiff "turf" algae. The only maintenance is to remove ("harvest") some of the algae from ONE HALF of the screen once a week. Thus, since this screen has two sides, you just do one side per week. If you choose a one-sided sump screen (described below), then you just do half of that side per week. Remember you will see mostly a green hair algae to start with (for several weeks), but eventually you will have a stiff reddish brown turf (a few months). So when you do your weekly harvesting, remove/washoff the green algae first, and leave behind any reddish turf you find. Do this by "scrubbing" or "massaging" the green algae in your sink with tap water running over it, kind of like you are washing your hair. This will remove the green, but will leave the brown/red. And even when you are removing the green, don't clean it completely... try to leave a little bit so it can start growning again quickly. Do this for several months until reddish/brown turf fills the screen, like this:
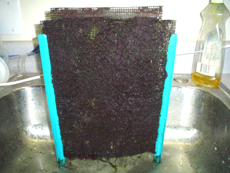
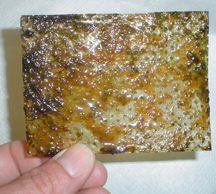
At this point you can start removing the turf itself along with the green hair; do this by "scraping" it using a razor blade or metal scraper (it is much harder to remove this reddish/brown stuff). Don't scrape it super clean though; leave some roughness behind. And remove less of the turf, and less often, than you have been the green. The red/brown turf is a much stronger filter, and it grows much slower, so you want to keep a lot of it on your screen to do most of the filtering. But it can only do it's job if the light is not blocked out by the green, so always keep the green "rubbed" or "massaged" off of the red/brown.
Always throw the scraped material away; this is the nitrate and phosphate that was taken out of your tank! You never want to put it back (or feed it) to your tank. Also, always use tap water (fresh water) to do your screen washings/scrapings, because the fresh water will kill any pods living in the turf (pods eat turf.) Lastly, to make the turf grow even faster, you can try adding Kent's Iron liquid to the tank water, per instructions.
Here are some $ options to make your turf work better:
o Put a timer on the lights: 18 hours on, 6 hours off. This will give the algae time to
"rest". Make sure it's on during the overnight when your tank lights are off.
o Use metal halide or sodium plant-grow lights; the more light the better, and the lower
their K rating (more "red") the better. Don't melt the plastic parts though.
o Put a wavemaker (on-off-on) timer on the pump to simulate waves; gives the algae more
air between the flows. I used the JBJ Ocean Pulse Duo timer ($50 new), and set it to 30
seconds. (note: this timer has a quirk: if you cut the power to it, then restore it, it
keeps the pump "on"; to get the on-off-on function working again, you have to turn the
dial to the left and back again.)
o Hang the bucket up high, so it can drain right into your display; all the live pods that
grow in the screen will flow down right to your corals. Remember this height will reduce
your pump flow, so choose your pump accordingly.
o Get a screen with red/brown turf algae already growing on it; will save you months of waiting
for the high-power red/brown turf to grow (it will start working instantly; this is what I
did). Call Mike at Inland Aquatics 812-232-9000, and get a turf screen overnighted to you.
They charge $10 for 16 square inches (4 X 4), so just tell him how many square inches you
need. Then you'll need to pay for overnight delivery to your location. Already have your
bucket operating, though, so you can throw the screen right in; it will need lights and flow
immediately upon arrival.
How to build the in-sump versions:
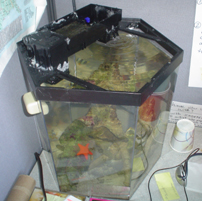
There are three sump versions to choose from. Version 1 is the easiest to build, but less powerful because the screen is only one-sided, and also because the water is not flowing evenly across the screen. But it's the only one where you can keep your bio balls (maybe for a heavy fish waste load) if you want to. And it's so easy to build that you may as well start with it if you already have a sump with a "media tray" in it:

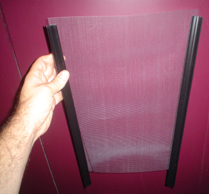
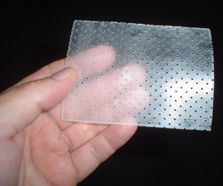
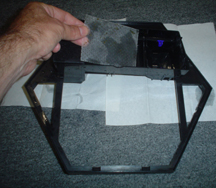
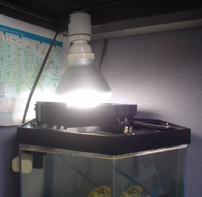
First, size the screen to fit in the media tray in your sump. Now, based on what kind of lid you have on the media tray (where the overflow pipe connects), you will need to drill out that lid so air and light can get through. If that lid is clear, then you need just enough holes to get air in. But if the lid is not clear and it blocks light, you'll need to make many large holes or cutouts in it (or replace it with a clear one). And that's it for version 1! Just clip on the light and fan, and you are done. Use the same light as the bucket version above.
In-Sump Version 2:

This version allows a more even flow of air/water over the screen, since the overflow is not pouring directly on the screen like version 1. Version 2 needs the same openings on the lid as version 1, however, and of course the bio balls must be removed. The media tray will spread out the water from the overflow into an even-drip across the screen. The screen must still get air, however, so if the media tray does not allow enough air from the fan to pass through, you'll need to enlarge the holes in it.
In-Sump Version 3:

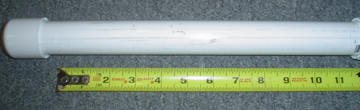
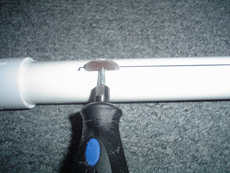
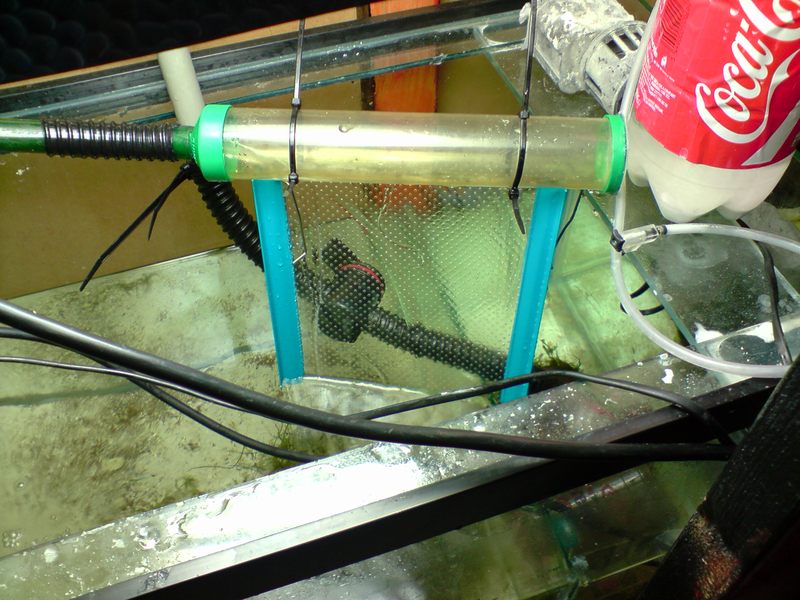
This version is basically the same as the bucket version described above, but it is contained in the sump. You need to cut away most or all of the lid and the media tray, and connect the overflow directly to a waterflow pipe (shown in the pic as a green "spraybar"). This version is also the only one that allows lighting from both sides of the screen, thus doubling the filtering power of it, as well as being more open for light and air.
The advantages of a sump version are:
o No extra space needed outside of tank.
o Can be set up in a limited fashion in a few minutes, as a test.
o Can make use of the wasted space once used by bio balls.
o No pump required!
Disadvantages:
o Since it is fed from overflow, you get no option to use a timer on the pump for on-off-on
wave action.
o Pods have to flow through your return pump to get to your tank.
o If the top of your sump is opaque (blocks light), it will need to be drilled or cut open
for air.
o It is not portable.
That's it! I hope some folks give it a try! Do post your pics and stories...
Any "grow light" used for plants should work. And the brighter, the better. If your screen size is very small, you may be able to use a light on just one side, and a mirror on the other.
Now put the pump and tubes in your tank/sump, clip the fan on the bucket, and go! You should start seeing algae in a few days! If you already have a skimmer or refugium or other devices, just add your new turf algae filter to your system. Then you can start reducing or turning off your other filters one by one. Just be sure to test for nitrate and phosphate daily as you do this. And do post your pics and stories!
The screen usually starts out with green hair algae first, and after a few months you should start seeing a dark brown/red stiff "turf" algae. The only maintenance is to remove ("harvest") some of the algae from ONE HALF of the screen once a week. Thus, since this screen has two sides, you just do one side per week. If you choose a one-sided sump screen (described below), then you just do half of that side per week. Remember you will see mostly a green hair algae to start with (for several weeks), but eventually you will have a stiff reddish brown turf (a few months). So when you do your weekly harvesting, remove/washoff the green algae first, and leave behind any reddish turf you find. Do this by "scrubbing" or "massaging" the green algae in your sink with tap water running over it, kind of like you are washing your hair. This will remove the green, but will leave the brown/red. And even when you are removing the green, don't clean it completely... try to leave a little bit so it can start growning again quickly. Do this for several months until reddish/brown turf fills the screen, like this:
At this point you can start removing the turf itself along with the green hair; do this by "scraping" it using a razor blade or metal scraper (it is much harder to remove this reddish/brown stuff). Don't scrape it super clean though; leave some roughness behind. And remove less of the turf, and less often, than you have been the green. The red/brown turf is a much stronger filter, and it grows much slower, so you want to keep a lot of it on your screen to do most of the filtering. But it can only do it's job if the light is not blocked out by the green, so always keep the green "rubbed" or "massaged" off of the red/brown.
Always throw the scraped material away; this is the nitrate and phosphate that was taken out of your tank! You never want to put it back (or feed it) to your tank. Also, always use tap water (fresh water) to do your screen washings/scrapings, because the fresh water will kill any pods living in the turf (pods eat turf.) Lastly, to make the turf grow even faster, you can try adding Kent's Iron liquid to the tank water, per instructions.
Here are some $ options to make your turf work better:
o Put a timer on the lights: 18 hours on, 6 hours off. This will give the algae time to
"rest". Make sure it's on during the overnight when your tank lights are off.
o Use metal halide or sodium plant-grow lights; the more light the better, and the lower
their K rating (more "red") the better. Don't melt the plastic parts though.
o Put a wavemaker (on-off-on) timer on the pump to simulate waves; gives the algae more
air between the flows. I used the JBJ Ocean Pulse Duo timer ($50 new), and set it to 30
seconds. (note: this timer has a quirk: if you cut the power to it, then restore it, it
keeps the pump "on"; to get the on-off-on function working again, you have to turn the
dial to the left and back again.)
o Hang the bucket up high, so it can drain right into your display; all the live pods that
grow in the screen will flow down right to your corals. Remember this height will reduce
your pump flow, so choose your pump accordingly.
o Get a screen with red/brown turf algae already growing on it; will save you months of waiting
for the high-power red/brown turf to grow (it will start working instantly; this is what I
did). Call Mike at Inland Aquatics 812-232-9000, and get a turf screen overnighted to you.
They charge $10 for 16 square inches (4 X 4), so just tell him how many square inches you
need. Then you'll need to pay for overnight delivery to your location. Already have your
bucket operating, though, so you can throw the screen right in; it will need lights and flow
immediately upon arrival.
How to build the in-sump versions:
There are three sump versions to choose from. Version 1 is the easiest to build, but less powerful because the screen is only one-sided, and also because the water is not flowing evenly across the screen. But it's the only one where you can keep your bio balls (maybe for a heavy fish waste load) if you want to. And it's so easy to build that you may as well start with it if you already have a sump with a "media tray" in it:
First, size the screen to fit in the media tray in your sump. Now, based on what kind of lid you have on the media tray (where the overflow pipe connects), you will need to drill out that lid so air and light can get through. If that lid is clear, then you need just enough holes to get air in. But if the lid is not clear and it blocks light, you'll need to make many large holes or cutouts in it (or replace it with a clear one). And that's it for version 1! Just clip on the light and fan, and you are done. Use the same light as the bucket version above.
In-Sump Version 2:
This version allows a more even flow of air/water over the screen, since the overflow is not pouring directly on the screen like version 1. Version 2 needs the same openings on the lid as version 1, however, and of course the bio balls must be removed. The media tray will spread out the water from the overflow into an even-drip across the screen. The screen must still get air, however, so if the media tray does not allow enough air from the fan to pass through, you'll need to enlarge the holes in it.
In-Sump Version 3:
This version is basically the same as the bucket version described above, but it is contained in the sump. You need to cut away most or all of the lid and the media tray, and connect the overflow directly to a waterflow pipe (shown in the pic as a green "spraybar"). This version is also the only one that allows lighting from both sides of the screen, thus doubling the filtering power of it, as well as being more open for light and air.
The advantages of a sump version are:
o No extra space needed outside of tank.
o Can be set up in a limited fashion in a few minutes, as a test.
o Can make use of the wasted space once used by bio balls.
o No pump required!
Disadvantages:
o Since it is fed from overflow, you get no option to use a timer on the pump for on-off-on
wave action.
o Pods have to flow through your return pump to get to your tank.
o If the top of your sump is opaque (blocks light), it will need to be drilled or cut open
for air.
o It is not portable.
That's it! I hope some folks give it a try! Do post your pics and stories...
Last edited by a moderator: