
I couldn't figure out where to put this thread...DIY or planted! Since it is a picture story I am putting it here. 
SUPER LONG POST!!!
I got a 5.5g for free but it needed some serious help & was leaking so I decided to try removing the frame.


Can anyone say furry chewing critters?

Not sure what happened here but you can see the water on the table from the leak.

They tried double sided tape to hold the base on....

Most importantly, the COOL sticker! It is fuzzy too! :
:

This is what the inside looked like BEFORE I started scraping it out! (I actually took them after I started removing the rim though)


Tools for the job!

Before I started working on the silicone I wanted to remove the top rim just to make my life easier! I left the bottom on till after the new silicone was added to help keep it together. Even the silicone between the glass was coming apart!
So I dremelled a line just about down to the top of the glass, very carefully! That plastic coming off it was HOT! I had a nice tiny burn for a good week.


Then I did the outside & inside corners too. I ran my razor blade under the rim, inside & outside again, to loosen it. Worked awesome!


I kinda stopped taking pictures at this point though, sorry. I cleaned all the silicone off of it with a straight razor and rubbing alcohol.

I then reapplied new silicone. I did not use tape to mark it out or the little handy dandy tool though. Mostly cause I thought it wasn't gonna hold anyways! For more info on how I did the silicone job you can check my 72g thread, it is the same procedure.
I did keep the cool sticker on until I was doing final clean up of all the silicone though.")
I tested it for like a week and it didn't leak so....

(Plant is just for depth!)
Now is where I wanted to throw the thing out the window! Long story short, I am throwing out $170 worth of colorquartz! I cleaned it with bleach, vinagear, even actually cleaning agents just to see if it was possible for it to NOT make water cloudy and super oily! (colorquartz was not added to the tank after I tried real cleaners)
I had to empty the tank completely 3 times & clean it with vinagear before I got the oil out of it. :swear::swear::swear:
MOVING ON!
Once I finally got the tank clean & clear I ordered some plants from Msjinkzd (Thanks!). I added some leftover Tahitian moon sand. This tank is just going to be ferns, anubias & moss so no fancy substrate needed. (crypt went into my 10g & water sprite is just for nutrient absorption later)


Then I got some wood from Manzanitadude (Thank you!!). I didn't take pictures of the arriving wood but here is the rough draft.
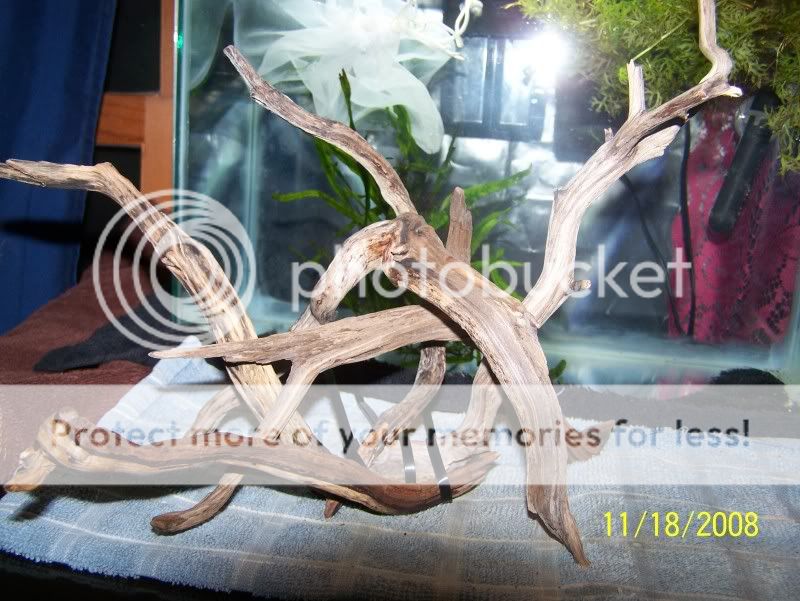
(and that's not all of it & yes I was using the towel as a floorplan!)
After a few days of weighing the wood down (still slightly floaty)


Top view is a little crappy (shaky hands & poor lighting once the light it moved)

My first time with Manzanita but I am proud! I am not sure what I want to do with the right side yet though. I like the way the moss looks on the rocks (although they will be covered at some point) so I was thinking of just making a small stack of stones in the corner with very little moss on it. I might make a cave actually! Just thought of that.
So there it is! This tank will be housing my Betta and maybe some shrimp is he behaves. Here he is in a 1.7g holding tank.


SUPER LONG POST!!!
I got a 5.5g for free but it needed some serious help & was leaking so I decided to try removing the frame.
Can anyone say furry chewing critters?
Not sure what happened here but you can see the water on the table from the leak.
They tried double sided tape to hold the base on....
Most importantly, the COOL sticker! It is fuzzy too!
:
This is what the inside looked like BEFORE I started scraping it out! (I actually took them after I started removing the rim though)
Tools for the job!
Before I started working on the silicone I wanted to remove the top rim just to make my life easier! I left the bottom on till after the new silicone was added to help keep it together. Even the silicone between the glass was coming apart!
So I dremelled a line just about down to the top of the glass, very carefully! That plastic coming off it was HOT! I had a nice tiny burn for a good week.
Then I did the outside & inside corners too. I ran my razor blade under the rim, inside & outside again, to loosen it. Worked awesome!
I kinda stopped taking pictures at this point though, sorry. I cleaned all the silicone off of it with a straight razor and rubbing alcohol.
I then reapplied new silicone. I did not use tape to mark it out or the little handy dandy tool though. Mostly cause I thought it wasn't gonna hold anyways! For more info on how I did the silicone job you can check my 72g thread, it is the same procedure.
I did keep the cool sticker on until I was doing final clean up of all the silicone though.
I tested it for like a week and it didn't leak so....
(Plant is just for depth!)
Now is where I wanted to throw the thing out the window! Long story short, I am throwing out $170 worth of colorquartz! I cleaned it with bleach, vinagear, even actually cleaning agents just to see if it was possible for it to NOT make water cloudy and super oily! (colorquartz was not added to the tank after I tried real cleaners)
I had to empty the tank completely 3 times & clean it with vinagear before I got the oil out of it. :swear::swear::swear:
MOVING ON!
Once I finally got the tank clean & clear I ordered some plants from Msjinkzd (Thanks!). I added some leftover Tahitian moon sand. This tank is just going to be ferns, anubias & moss so no fancy substrate needed. (crypt went into my 10g & water sprite is just for nutrient absorption later)
Then I got some wood from Manzanitadude (Thank you!!). I didn't take pictures of the arriving wood but here is the rough draft.
(and that's not all of it & yes I was using the towel as a floorplan!)
After a few days of weighing the wood down (still slightly floaty)
Top view is a little crappy (shaky hands & poor lighting once the light it moved)
My first time with Manzanita but I am proud! I am not sure what I want to do with the right side yet though. I like the way the moss looks on the rocks (although they will be covered at some point) so I was thinking of just making a small stack of stones in the corner with very little moss on it. I might make a cave actually! Just thought of that.
So there it is! This tank will be housing my Betta and maybe some shrimp is he behaves. Here he is in a 1.7g holding tank.


