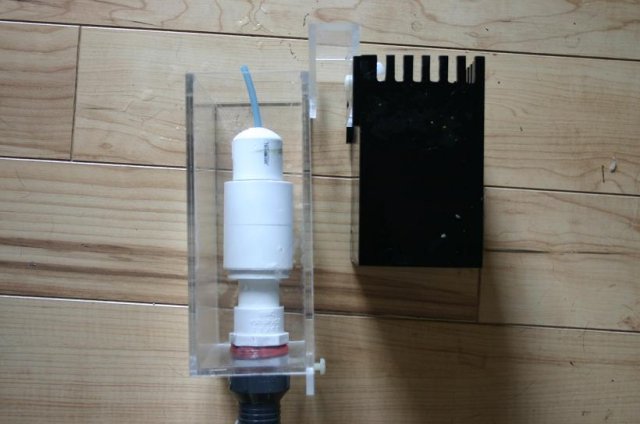
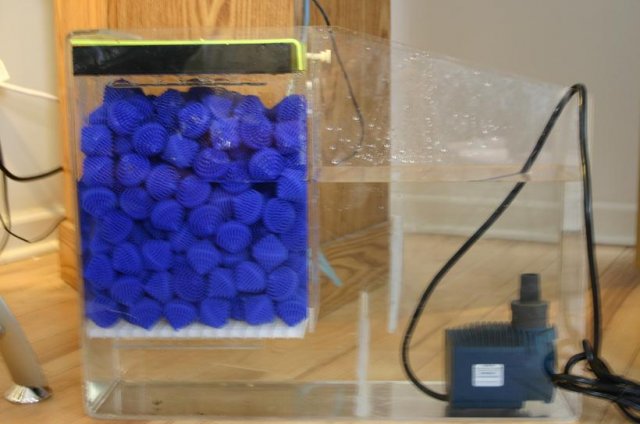
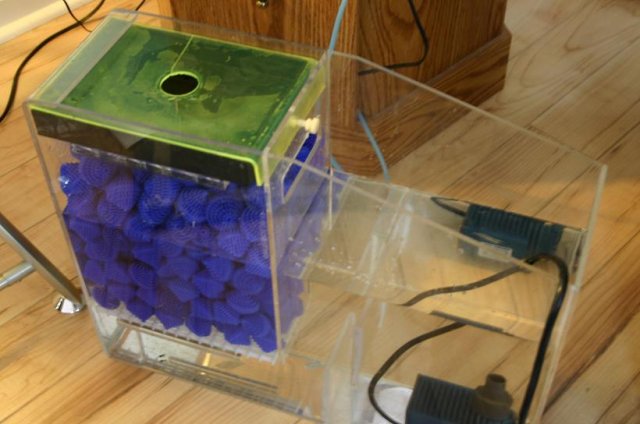
Recently I built a HOB overflow out of scrap acrylic I had lying around in order to connect my tank to a Proclear 75 wet/dry filter (I picked up the Proclear for $30 on CL :thm . Since I broke everything down today to make some improvements, I figured I'd post some pics of the system.

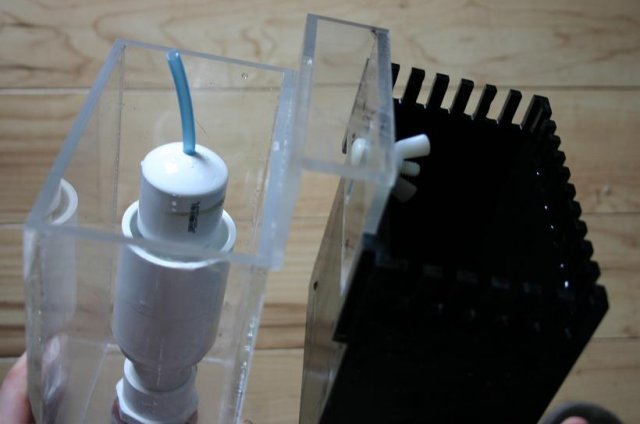
The overflow and HOB drain box are constructed out 3/16" acrylic and sealed using Weld-On #4 which I ordered online. I painted the overflow box and return pipe black with Krylon Fusion spray paint. All of the acrylic pieces were cut with a Dremel tool using a reinforced cutting wheel. Even with my epic dremeling skills , I still found this to be quite a tedious process (getting everthing to fit dead square without a miter saw is very frustrating). The entire system is modeled after the overflow found here, since it is designed to work with the Proclear 75 W/D. In constructing the acrylic boxes, I found these instructions for working with acrylic very helpful.

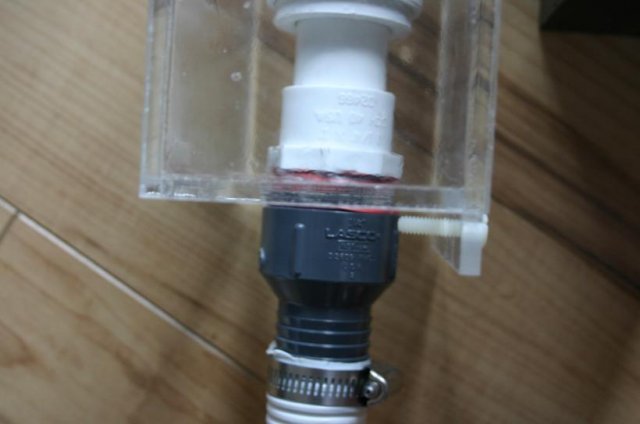
I used 1/4" nylon screws for both the leveling screw and the water height adjustment. The acrylic is tapped using a normal drill type tap set for the leveling screw, and the water height screw is secured using a wingnut.The stand pipe used to drain from the HOB box is a Hofer Gurgle Buster. It was easy to make and is dead silent.

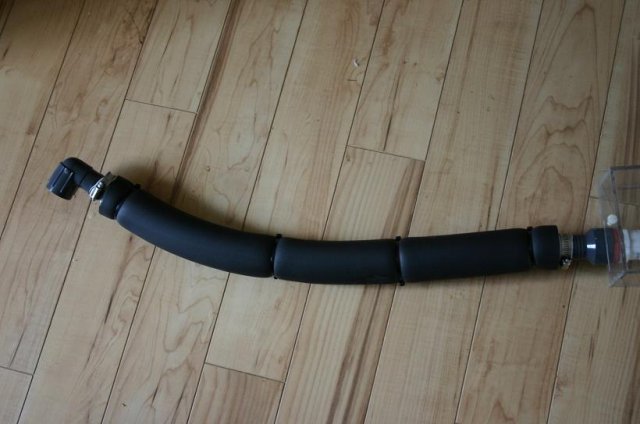
The reason I took everything down was to silence the drainpipe, which is made out a of 1.25" bilge tube. I simply wrapped foam pipe insulator around it.

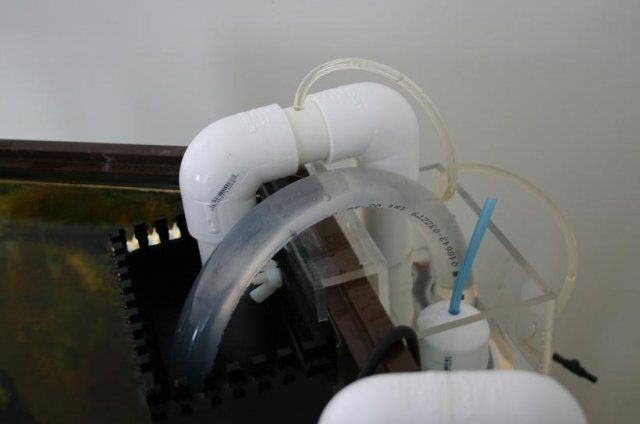
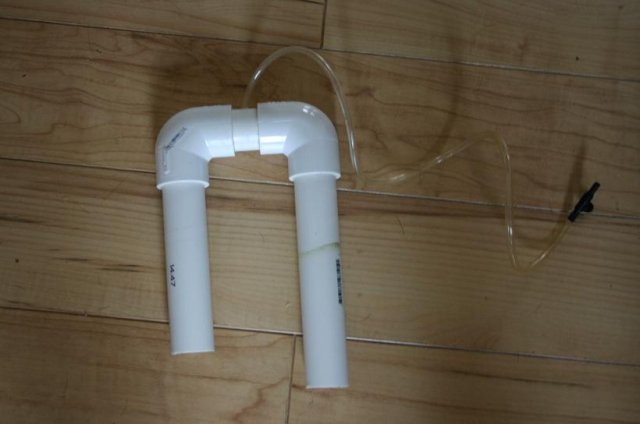
For the siphon tube, I used 1" PVC with 2 90 degree connectors. I included a built in primer tube in the middle of the pipe. However the flow with this u-tube was not quite enough, so I ended up throwing in a piece of 3/4" vinyl tubing to fix it.

Here is the overflow installed on my tank:

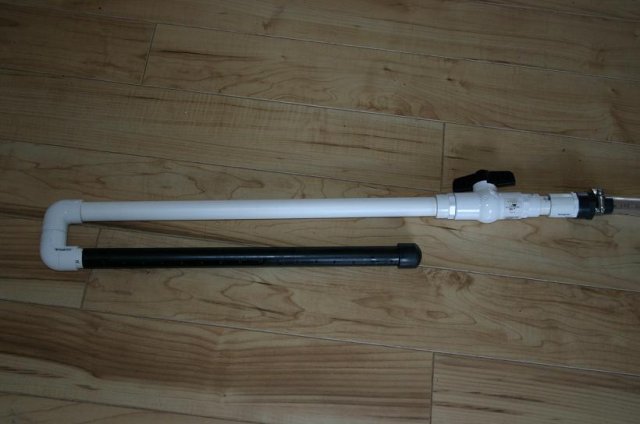
For the return, I used 3/4" PVC and 3/4" ID vinyl tubing. The sytem attaches to the tank with a store bought heater holder, and returns through a DIY PVC spray bar.

Everything it connected to a Proclear Aquatics 75 Wet/Dry filter and is powered by a 581gph QuietOne 2200 pump. The flow rate of the system should be right around 300gph.


Now everything is hooked up and is running smoothly. The whole system is very quiet and has absolutly no leaks. :thm:
Estimated total cost (just ballparking here, cant remember exactly what i paid for everything):
Proclear 75: $30
QuietOne 2200: $46-$15 coupon = $31
Scrap acrylic: $free
3/4" Ball valve: $4
Foam pipe insulation: $5
3/4" vinyl tubing: $2
1.25" bilge tube: $4
PVC, fittings, and other stuff: ~$15
Total est cost: ~$91

The overflow and HOB drain box are constructed out 3/16" acrylic and sealed using Weld-On #4 which I ordered online. I painted the overflow box and return pipe black with Krylon Fusion spray paint. All of the acrylic pieces were cut with a Dremel tool using a reinforced cutting wheel. Even with my epic dremeling skills
I used 1/4" nylon screws for both the leveling screw and the water height adjustment. The acrylic is tapped using a normal drill type tap set for the leveling screw, and the water height screw is secured using a wingnut.The stand pipe used to drain from the HOB box is a Hofer Gurgle Buster. It was easy to make and is dead silent.
The reason I took everything down was to silence the drainpipe, which is made out a of 1.25" bilge tube. I simply wrapped foam pipe insulator around it.
For the siphon tube, I used 1" PVC with 2 90 degree connectors. I included a built in primer tube in the middle of the pipe. However the flow with this u-tube was not quite enough, so I ended up throwing in a piece of 3/4" vinyl tubing to fix it.
Here is the overflow installed on my tank:
For the return, I used 3/4" PVC and 3/4" ID vinyl tubing. The sytem attaches to the tank with a store bought heater holder, and returns through a DIY PVC spray bar.
Everything it connected to a Proclear Aquatics 75 Wet/Dry filter and is powered by a 581gph QuietOne 2200 pump. The flow rate of the system should be right around 300gph.
Now everything is hooked up and is running smoothly. The whole system is very quiet and has absolutly no leaks. :thm:
Estimated total cost (just ballparking here, cant remember exactly what i paid for everything):
Proclear 75: $30
QuietOne 2200: $46-$15 coupon = $31
Scrap acrylic: $free
3/4" Ball valve: $4
Foam pipe insulation: $5
3/4" vinyl tubing: $2
1.25" bilge tube: $4
PVC, fittings, and other stuff: ~$15
Total est cost: ~$91


