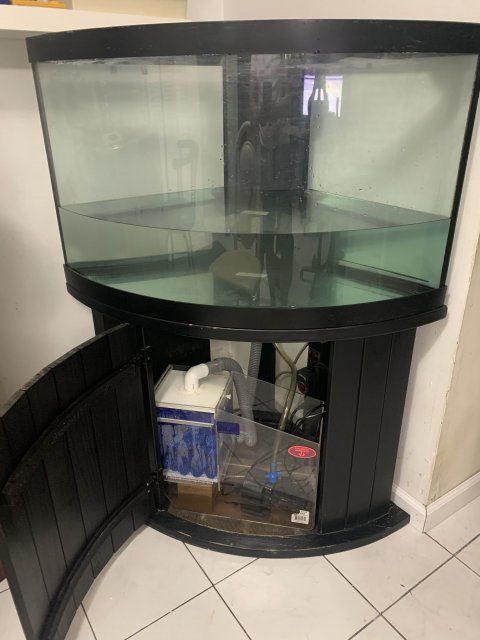
Just bought a used tank, but can't seem to figure out where everything goes

White Knight

AC Members
Sep 23, 2005
27
5
3
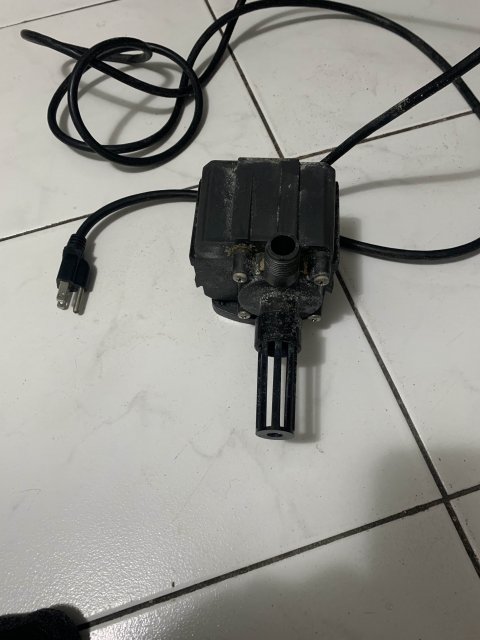
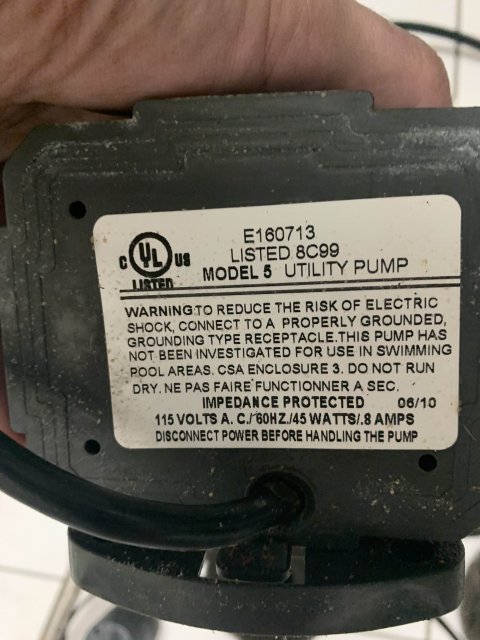
Long story short, I bought this setup (a 54 gallon corner tank and stand) yesterday off Craigslist for $120. I was in the guy's house for almost an hour, as he was explaining everything. However, it seems like it was too much info at once, and I should have recorded him instead. Since it's been over a decade since I've had an aquarium, it seems some it it went over my head. I can figure out a few things, but can't figure out how to actually pump water. There's a E160713 pump, but don't see a hose for it.

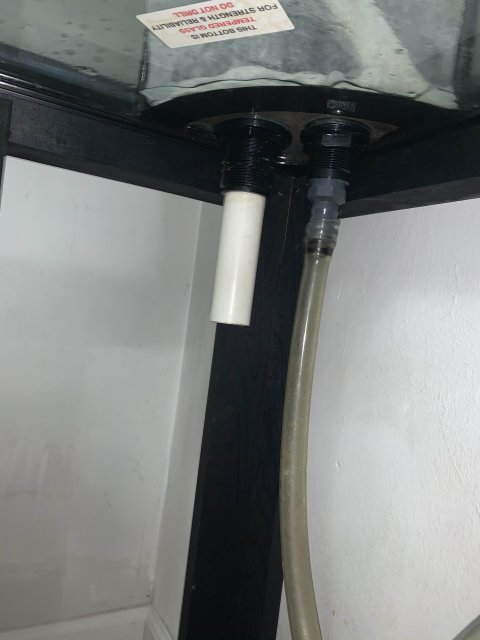
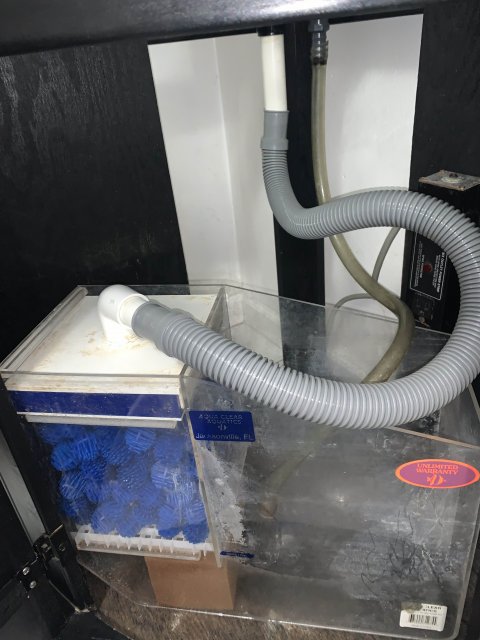
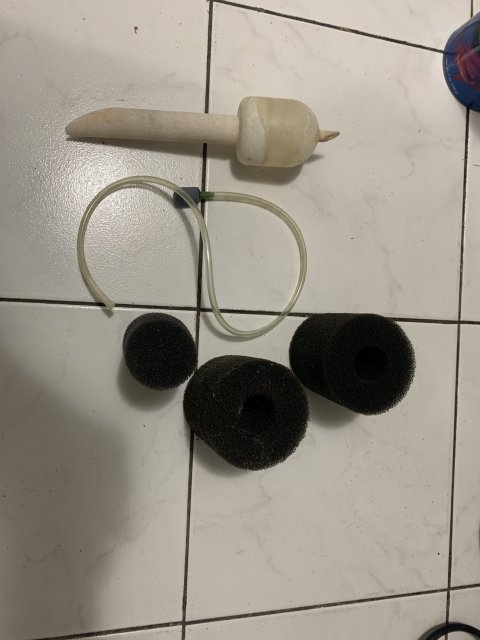
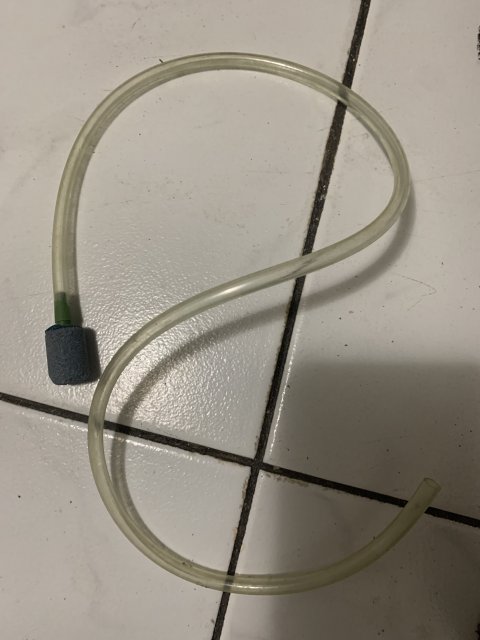
Anyway, it's probably best to show you a few pics of what I have. If it's not enough, I will gladly make a YouTube video. The large grey hose clearly hooks up to the underneath of the tank and into that filter with the strange blue things in it. The fairly large clear hose next to it (also coming from underneath the tank) presumably goes into that filter-tank (I don't even know what to call it). No idea where the E160713 pump goes. Presumably it's not submergible. What could possibly be hooked up to it? Am I missing something? Finally, there's a very small hose in the last pic which looks like it has a sharpening stone on the end. No idea where this goes. I do remember where the heater goes though.

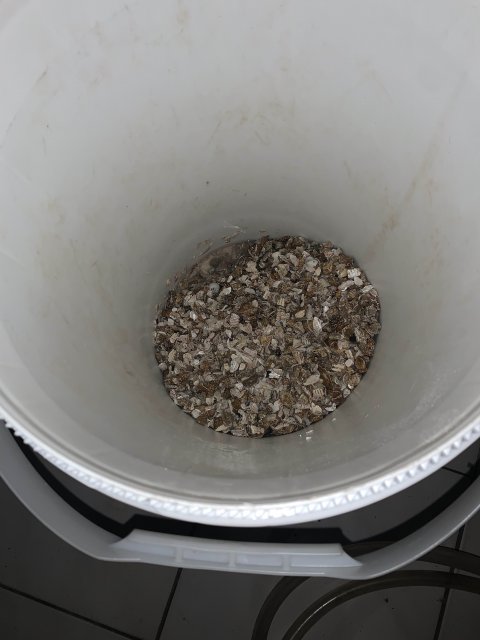
I'll just show you everything the guy gave me. I won't be keeping the gravel, but he insisted that I take it because it was "expensive." Thanks everyone!

P.S.: Don't mind the mess, I currently have paper towels inside of it soaked in vinegar because of hard water buildup. I have a lot of cleaning to do. :)
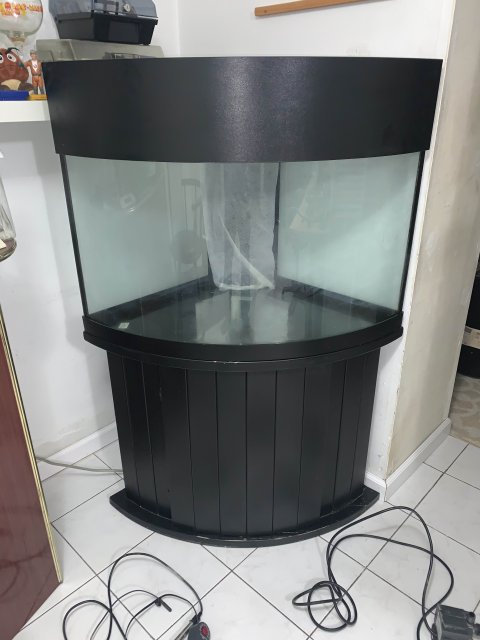
IMG_3392.jpg

IMG_3382.jpg

IMG_3381.jpg

IMG_3385.jpg

IMG_3386.jpg

IMG_3387.jpg

IMG_3388.jpg

IMG_3389.jpg

IMG_3390.jpg

IMG_3391.jpg

IMG_3393.jpg
 
Isn't buy used equipment without a manual fun! I quoted your post and inserted my comments above your pics to identify what I could so just expand your quoted post to see them.

Any chance you can remove the canopy on the aquarium and provide a couple pics of the overflow (where the paper towel is) so we can see how the interior looks?

Long story short, I bought this setup (a 54 gallon corner tank and stand) yesterday off Craigslist for $120. I was in the guy's house for almost an hour, as he was explaining everything. However, it seems like it was too much info at once, and I should have recorded him instead. Since it's been over a decade since I've had an aquarium, it seems some it it went over my head. I can figure out a few things, but can't figure out how to actually pump water. There's a E160713 pump, but don't see a hose for it.

Anyway, it's probably best to show you a few pics of what I have. If it's not enough, I will gladly make a YouTube video. The large grey hose clearly hooks up to the underneath of the tank and into that filter with the strange blue things in it. The fairly large clear hose next to it (also coming from underneath the tank) presumably goes into that filter-tank (I don't even know what to call it). No idea where the E160713 pump goes. Presumably it's not submergible. What could possibly be hooked up to it? Am I missing something? Finally, there's a very small hose in the last pic which looks like it has a sharpening stone on the end. No idea where this goes. I do remember where the heater goes though.

I'll just show you everything the guy gave me. I won't be keeping the gravel, but he insisted that I take it because it was "expensive." Thanks everyone!

P.S.: Don't mind the mess, I currently have paper towels inside of it soaked in vinegar because of hard water buildup. I have a lot of cleaning to do. :)
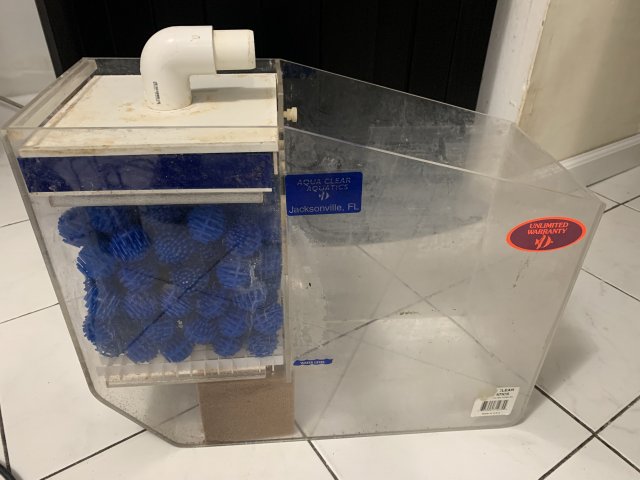
View attachment 227614

The below picture is the sump and the blue spiky things are bio-balls and considered bio-media. Water from the aquarium travels through the big hose which is slid onto the elbow fitting on top of the sump. Below that fitting looks to be some type of filter media which collects any large debris and there should be a drip tray that disperses the water over the bio-balls.
View attachment 227615

The smaller diameter hose on the right should hook up to the water pump that is usually located in the sump right side chamber and returns the water to the aquarium.
View attachment 227617

View attachment 227618


I can't tell what brand that pump is but it appears that it is submersible due to the build up on the pump. Can you see a label with a name on it?
View attachment 227619


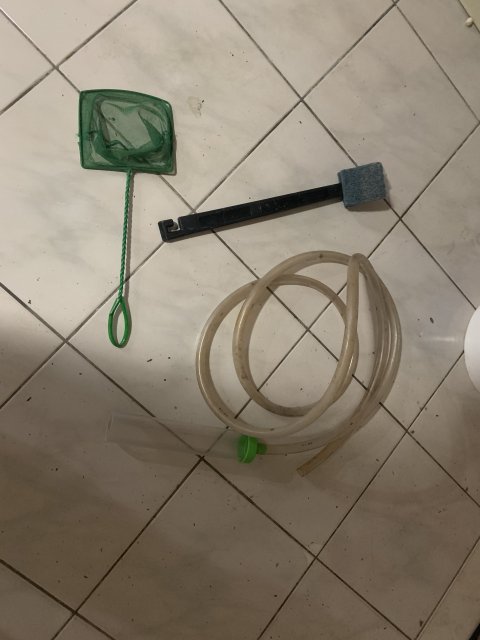
One of those sponges should fit over the intake guard on the pump to prevent 'stuff' from damaging the pump. I am not sure what the white thing is but it appears to have 2 different diameters of pipe coming out of either end. Can you look through the pipe to see it it's open all the way through?
View attachment 227620

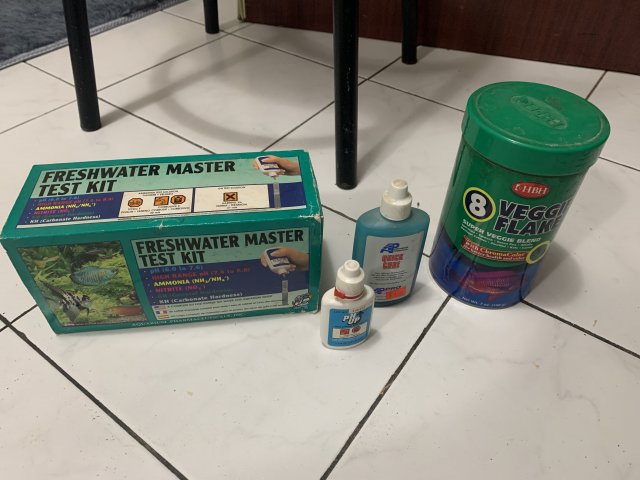
The test kit looks rather old, see if you can check if it has an expiration date on it. I would toss the pH up and Quick Cure as they also look old.
View attachment 227621

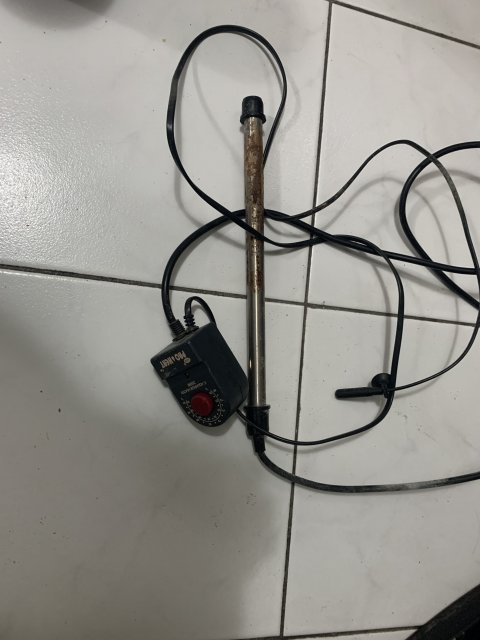
The heater looks to be a Won brand heater, you may be able to find info online about it. Definitely needs to be cleaned AND checked to see if it works prior to putting any fish in the tank.
View attachment 227622

The hose with the green cap is a hand siphon or substrate type siphon, not sure of the brand but might be a Python brand though you may be missing the part that attaches to the faucet.
View attachment 227623

View attachment 227624

View attachment 227625
 
  • Like
Reactions: the loach
Isn't buy used equipment without a manual fun! I quoted your post and inserted my comments above your pics to identify what I could so just expand your quoted post to see them.

Any chance you can remove the canopy on the aquarium and provide a couple pics of the overflow (where the paper towel is) so we can see how the interior looks?

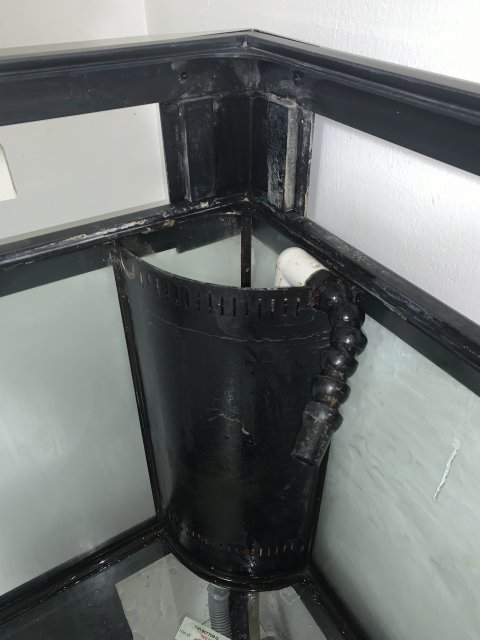
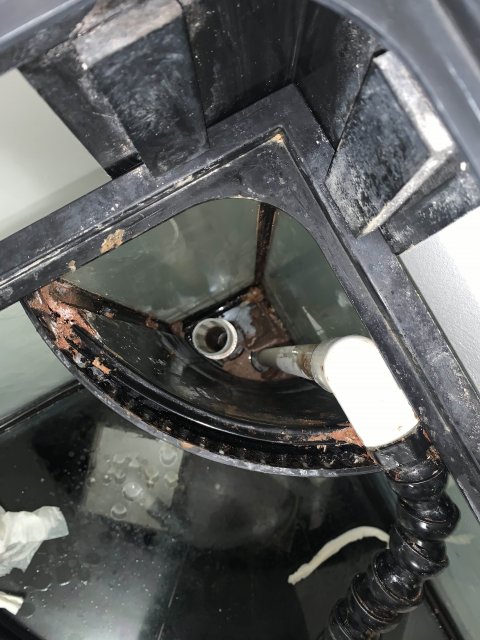
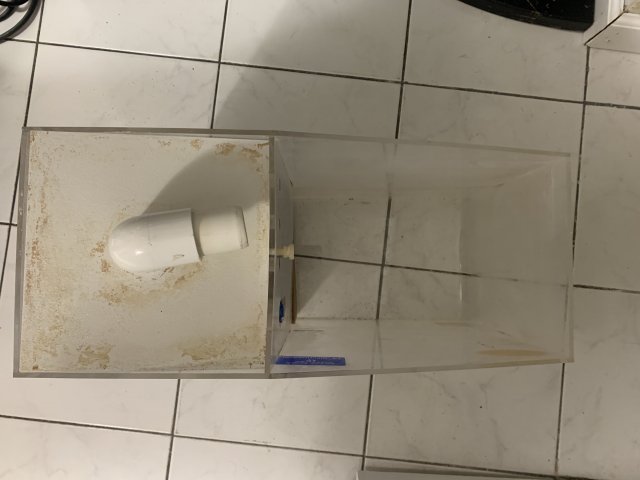
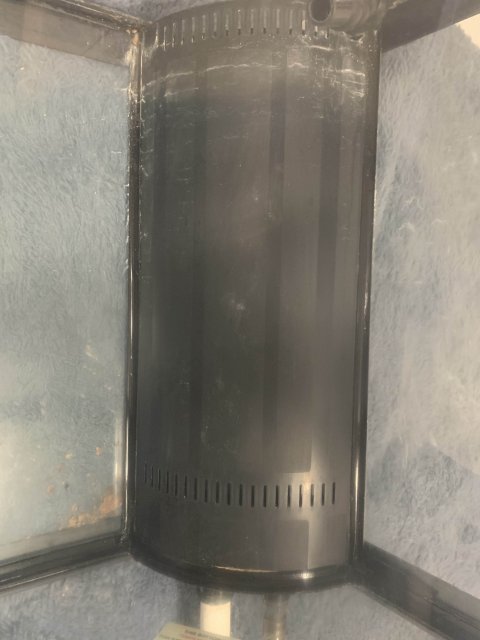
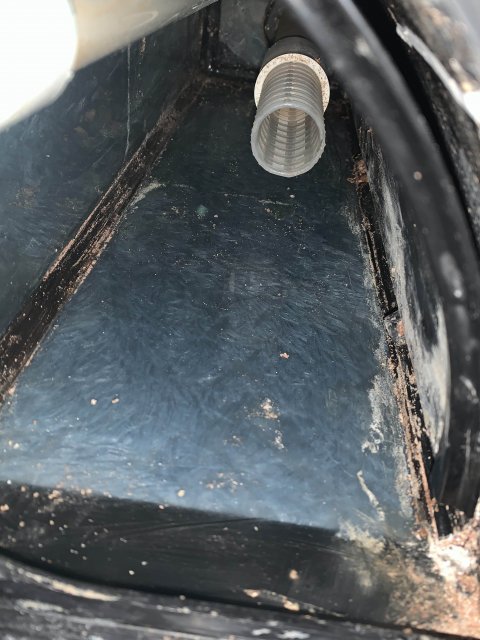
Thank you very much for the reply! You have been a great help so far. I took the pics you requested, including a top-down pic. I have added a pic of the model number to the pump as well, which is E160713 .

The smaller diameter hose on the right should hook up to the water pump that is usually located in the sump right side chamber and returns the water to the aquarium.

I've also included a top-down pic of the sump. So the E160713 pump goes in there, and the smaller hose goes into the top?

I am not sure what the white thing is but it appears to have 2 different diameters of pipe coming out of either end. Can you look through the pipe to see it it's open all the way through?

I think that white thing attaches to the siphon, for smaller, precision cleaning. It's open all the way through.

Also, any idea what that small hose with the stone-like thing on one end is? Thanks again!

IMG_3376.jpg

IMG_3394.jpg

IMG_3395.jpg

IMG_3396.jpg

IMG_3397.jpg
 
Thanks for the additional pics, very helpful.

I 'think' your pump is a Danner Mag 5 pump, you may want to check on their website for clarification. I also 'think' it is an older model because next to the words Impedance Protection is the numbers 6/10 which is usually the year it was made. I don't see the fitting on the hose that screws onto the threaded portion of the pump though, do you have a pic of that?

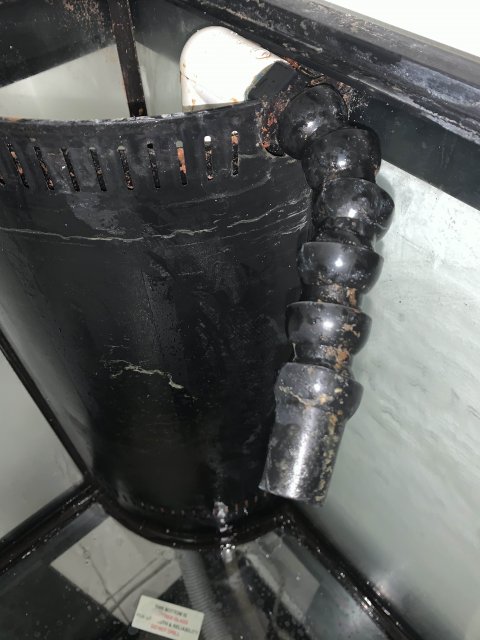
Yes the smaller diameter hose connects to the fitting on the pump and then to the bulkhead fitting under the tank. The water from the sump is then pumped up to the tank and comes out the Loc-Line fitting (black flexible fitting) at the top of the overflow weir and back to the tank. The pump sets in the open cavity in the sump, opposite the side with the blue bio balls.

The small diameter hose has an airstone attached at one end. I'm not sure why the seller included it. It's possible he was using an air pump in either the tank or the sump.

I'm not sure what the white thing is with the 2 different pipe sizes coming out of it. It seems odd it would be used as a siphon.

I have never set up a sump or wet/dry filter so I can't help you with the details. However there should be some basic set ups on you tube or similar videos. There is a bit of a learning curve to determine how much water you need in the sump and tuning the flows correctly.

Also, I'm not sure if you are missing a stand pipe in the overflow for the drain back to the sump. A stand pipe in the overflow can vary in height depending on how the system is set up.

Maybe someone with more experience using a sump or wet/dry filter will offer advice on how to set it up correctly.
 
Thank you for the reply! I think I'm ready to set it up now, as I am almost finished cleaning. Just have to get some sand today.

There is no fitting for the pump that he included. It seems like he just shoved the hose onto the threads, as I can see the indents on the hose. I'd love to buy a fitting, but where? Pet store? Home Depot?

As for me maybe missing a stand pipe, I think you're right. I did a quick search. Seems I can run it without one, but it'll be noisier. I'll have to find one. Should I put a sponge filter on the pipe in the overflow, or does that not matter?

I'll search YouTube for how much water I will need in the sump, and experiment a bit myself. I'm assuming I put some water into both sides of the sump. and that the pump should be fully submerged.

Anyway, thanks again!
 
You will need the fitting on the pump to connect to the hose otherwise you risk the chance of the water forcing the hose out of the pump and up into the air. I don't think Home Depot would have it, better off at a pet store that sells that brand pump or may have a fitting that works. Take the pump with you to double check as well as the hose.

Before doing all that though, I would open the pump up to make sure the impeller and shaft are there, clean it out to remove any deposits and then test the pump in a bucket of water to make sure it works. Or you can fill the sump with water and pump the water over the bio-balls that way you don't have to worry about having enough water to test it.

I would also remove all the bio-balls and other media from the sump and rinse off any deposits. Clean the inside of the sump itself using vinegar and water. Try not to remove any exterior labels on the sump including the original torn mfg. white label that identifies the brand model as you may be able to find out more info about that particular unit.

I'm not sure if putting a sponge on the pipe inside the overflow is a good idea. It will collect debris, might be a pain to clean frequently and if it gets clogged, you will run the sump dry and burn out the pump and overflow the tank.

I did notice your overflow chamber has slots at the bottom and top of the front cover so you don't want to block the openings at the bottom with substrate. If you will be using sand as a substrate, you will have to put a taller standpipe in the overflow.
 
Last edited:
You will need the fitting on the pump to connect to the hose otherwise you risk the chance of the water forcing the hose out of the pump and up into the air. I don't think Home Depot would have it, better off at a pet store that sells that brand pump or may have a fitting that works. Take the pump with you to double check as well as the hose.

Before doing all that though, I would open the pump up to make sure the impeller and shaft are there, clean it out to remove any deposits and then test the pump in a bucket of water to make sure it works. Or you can fill the sump with water and pump the water over the bio-balls that way you don't have to worry about having enough water to test it.

I would also remove all the bio-balls and other media from the sump and rinse off any deposits. Clean the inside of the sump itself using vinegar and water. Try not to remove any exterior labels on the sump including the original torn mfg. white label that identifies the brand model as you may be able to find out more info about that particular unit.

I'm not sure if putting a sponge on the pipe inside the overflow is a good idea. It will collect debris, might be a pain to clean frequently and if it gets clogged, you will run the sump dry and burn out the pump and overflow the tank.

I did notice your overflow chamber has slots at the bottom and top of the front cover so you don't want to block the openings at the bottom with substrate. If you will be using sand as a substrate, you will have to put a taller standpipe in the overflow.

Hey, just want to let you know that I thoroughly cleaned out the sump, bio balls, and sponges (although I'm likely gonna replace the sponges). I also got a fitting for the pump in Home Depot ( Petco didn't have it), cleaned the heater, and replaced the switch on the aquarium light.

I am also including two more pics, so you can get a better measurement of the overflow chamber's slots and the pipe in the chamber. The bottom slot is 3 inches from the glass. If that's not enough room for sand, I'll just use gravel.

Tonight after work I plan on filling the sump and tank with water and testing everything. I will post pics if all goes well.

IMG_3400.jpg

IMG_3401.jpg
 
Glad you were able to find a fitting to hook the hose to the pump!

I didn't realize the bottom slots were 3 inches from the bottom of the tank so you should be good for a sand substrate.

If you were interested in cleaning the overflow chamber a bit better, you could use Gorilla tape to close up the slots on the front and raise the connected hoses above the rim of the tank, tie them up or clamp to the tank rim and fill the chamber with vinegar to loosed more deposits. Just a thought if it bothered you.

Took your advice and soaked the overflow chamber. I didn't even need to cover the slots with tape. Behind the slots about a quarter inch is another cover that goes from top top bottom. By filling the overflow chamber, water stays in up until the length of the pipe that's in there. Once it's over that pipe, it goes into the sump.

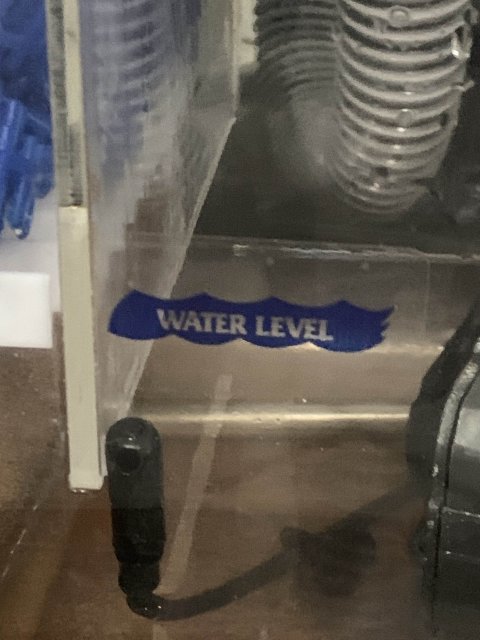
I even found a water level sign on the sump, so I know exactly how much water to use. Right now I'm exhausted from work, and I made like 8 trips via bucket into the tank (ouch!). I'm just testing for leaks, and so far so good. I'll fill it to the top tomorrow night if there aren't any leaks.

I also briefly tested the pump. It works great, as the water came out of the black, bendy pipe at the top of the tank. No idea if the heater works yet, and I'm not entirely sure where the piece with the wire and suction cup goes (see second pic). Well, here's two pics. It's not much, but I'm excited! :)

IMG_3404.jpg

IMG_3405.jpg
 
Are you saying there is a gap or slot between the front slotted overflow 'cover' and the rear inner portion of the 'cover'? I didn't notice that before in your pics but went back and looked at it in post #3. If there is a gap between those 2 sections, make sure it isn't blocked by crud buildup otherwise it may impact the way the water flows through.

This is the 1st time I've see a pic of the black thing attached to a wire. Is it possible it is a float that is used to determine water height? What is it hooked up to?

One other thing is the way the drain hose from the tank to the sump is laying below the top of the sump. Usually that hose slopes smoothly from the bottom of the tank to the 90 degree fitting at the top of the sump lid.
 
AquariaCentral.com