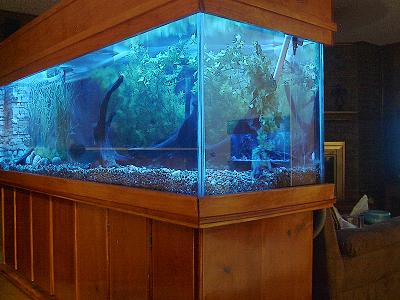
I was about to install a set of Blue Cathode Moon Lights on my newest set up and I figured it would make for a good DIY Moon Light "How To". Some of the pics are not the greatest and my descriptions may not be the best but here we go.
Materials Needed
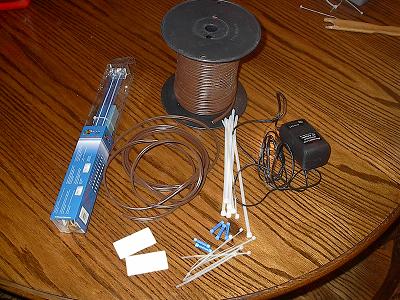
12" Dual Lamp Blue Cold Cathode Kit( The cheapest I found was on eBay $2.95 + 6.00 Shipping)
Universal 120V AC to 12V DC 1000ma Power Supply( You can find it at Wal-Mart, Radio Shack or any Retail Electronics store.)
10' of 16 gauge extension cord.(sold by the foot at Home Depot)
Blue Butt Splices(Home Depot)
Zip Tie Mounts(Home Depot)
Small Zip Ties(Home Depot)
Large Zip Ties(Home Depot)
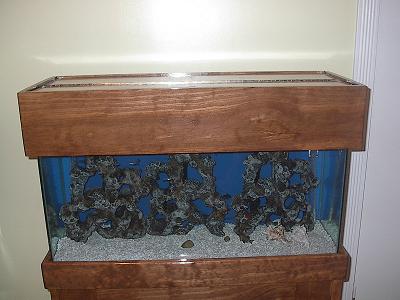 This is the aquarium I will be installing Moon Lights on
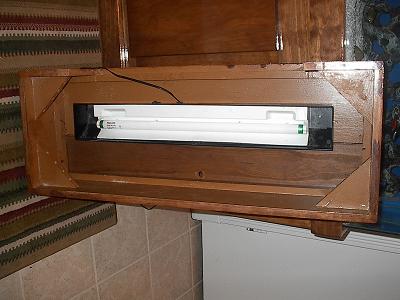 You don't need a Canopy to install the Moon Lights. As seen in this pic I have attached a standard hood light to my canopy and that is what I will be attaching the Cathode kit to.
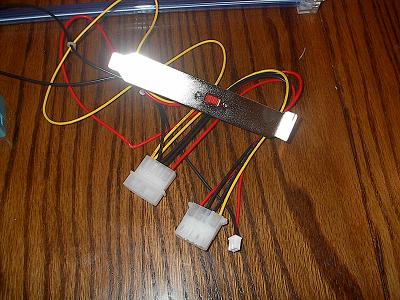 The Cold Cathode kit comes with wiring attached so it may be easily installed in a computer case for which it was intended. We don't need all the extra wiring, just cut off the connector that plugs into the inverter.
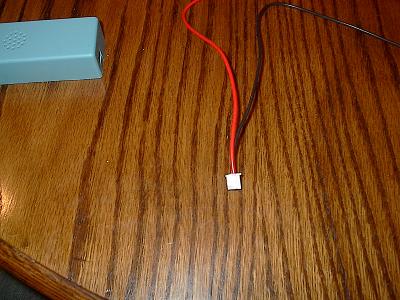 This is what you should have left after you cut all the unused wires off.
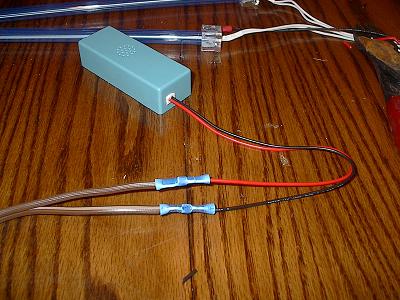 The first connection we will make will be connecting the Inverter power connector to one side of the Brown extension cord cable.
 Next we will connect the other end of the Brown extension cord cable to the 12V DC 1000ma universal power adapter. Make sure you check polarity before crimping on the connectors. If you have a test meter you can check it with that. If you don't have a meter what you should do is twist the wires, do not crimp the butt splice on yet. Plug in the power supply, if the lights come on you have the right polarity. If the lights do not come on unplug the power adapter and swap the wires around. Once you have determined the correct polarity go ahead and crimp on the Blue butt splices.
 The difficult part of the project is over!! You can plug in the power supply and the lights should look like this:
 Now we will attach the Cathode Kit to the hood light. I use Zip tie monts and zip ties to mount all of my Moon Light kits and they hold up really well.
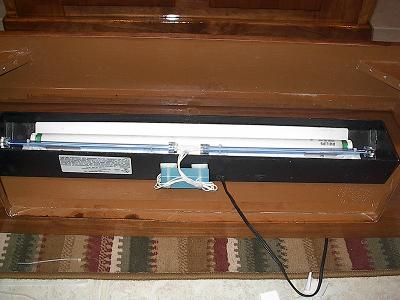 This is what the kit looks like installed on the hood light using Zip Tie mounts and Zip Ties.
 This is a close up of the Inverting mounting with the power cord attached.
 And that is it, all finished. I recommend using a small appliance timer to turn the lights on and off. But if you wanted you could leave the lights on all the time, they are rated for 30,000 hours of life and I don't think they produce enough light for any kind of algae to become a problem.
So there you have it, a custom Moon Light kit installed for under $30.00. You can buy the LED moon light kits pretty much anywhere aquariums are sold, but I have tried both and I recommend the Blue Cathode Kit. The LED Lights have a tendency to produce noticeable bright spots on the aquarium floor. The LEDs are more like spot lights where the Cold Cathode kits are like fluorescent lights, they flood the entire aquarium with even light.
Good Luck!!!!


Materials Needed
12" Dual Lamp Blue Cold Cathode Kit( The cheapest I found was on eBay $2.95 + 6.00 Shipping)
Universal 120V AC to 12V DC 1000ma Power Supply( You can find it at Wal-Mart, Radio Shack or any Retail Electronics store.)
10' of 16 gauge extension cord.(sold by the foot at Home Depot)
Blue Butt Splices(Home Depot)
Zip Tie Mounts(Home Depot)
Small Zip Ties(Home Depot)
Large Zip Ties(Home Depot)

 This is the aquarium I will be installing Moon Lights on
 You don't need a Canopy to install the Moon Lights. As seen in this pic I have attached a standard hood light to my canopy and that is what I will be attaching the Cathode kit to.
 The Cold Cathode kit comes with wiring attached so it may be easily installed in a computer case for which it was intended. We don't need all the extra wiring, just cut off the connector that plugs into the inverter.
 This is what you should have left after you cut all the unused wires off.
 The first connection we will make will be connecting the Inverter power connector to one side of the Brown extension cord cable.
 Next we will connect the other end of the Brown extension cord cable to the 12V DC 1000ma universal power adapter. Make sure you check polarity before crimping on the connectors. If you have a test meter you can check it with that. If you don't have a meter what you should do is twist the wires, do not crimp the butt splice on yet. Plug in the power supply, if the lights come on you have the right polarity. If the lights do not come on unplug the power adapter and swap the wires around. Once you have determined the correct polarity go ahead and crimp on the Blue butt splices.
 The difficult part of the project is over!! You can plug in the power supply and the lights should look like this:
 Now we will attach the Cathode Kit to the hood light. I use Zip tie monts and zip ties to mount all of my Moon Light kits and they hold up really well.
 This is what the kit looks like installed on the hood light using Zip Tie mounts and Zip Ties.
 This is a close up of the Inverting mounting with the power cord attached.
 And that is it, all finished. I recommend using a small appliance timer to turn the lights on and off. But if you wanted you could leave the lights on all the time, they are rated for 30,000 hours of life and I don't think they produce enough light for any kind of algae to become a problem.
So there you have it, a custom Moon Light kit installed for under $30.00. You can buy the LED moon light kits pretty much anywhere aquariums are sold, but I have tried both and I recommend the Blue Cathode Kit. The LED Lights have a tendency to produce noticeable bright spots on the aquarium floor. The LEDs are more like spot lights where the Cold Cathode kits are like fluorescent lights, they flood the entire aquarium with even light.
Good Luck!!!!


