Plant 125 Gal

  • Get the NEW AquariaCentral iOS app --> http://itunes.apple.com/app/id1227181058 // Android version will be out soon!

Satuno

AC Members
Dec 18, 2010
24
0
0
Real Name
Auston
if you want to make the stand look nice, I did a really simple trim out of 1x4 pine from local hardware store. it was maybe 4$ for 10ft of it, I used 4 of them.... maybe 5 because I made some bad cuts. just coat the stand in plywood(which will make it SUPER strong/prevent shearing forces) Then add the 1x4s to all the borders, it cleans up the look of your plywood real easy. I wish I took b4/after pics with my stand as I was building it.
 

achubbard

AC Members
Mar 13, 2009
21
0
0
West Greenwich RI
www.rimobiledj.com
Real Name
Alex
Hey Guys,

So I've got most of the stand together. I've taken quite a bit of pictures. I need to run out and buy a few longer carriage bolts for the center 2x6 braces. I bought 7" inch bolts, figuring that the (2) 2x6 pieces and the 4x4 sandwiched together would only be about 6inchs give or take, and it is just slightly over 6", however, the bolts I bought, even though they were sold as 7" inch bolts actually measure 6 and 3/4", so just sticks through enough, but not enough for the bolt to grab.

The bottom side of the "counter top" is poly'ed. Once it is dry, I'll bring the whole package downstairs and polyurethane the top. I also need to build the shelves in the bottom half, I'm hoping to get to that today.

I'll also be working on the doors. I'm taking a 1" wide piece of pine and cutting 2 grooves in it and will use some thin wood material as sliding doors to hide my filters etc.

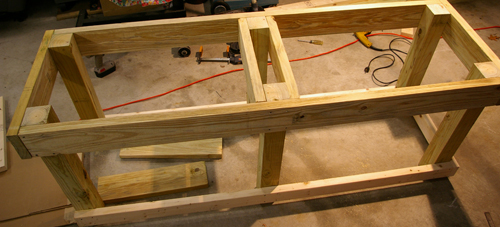
Back part of the stand is fastened together with wood screws.
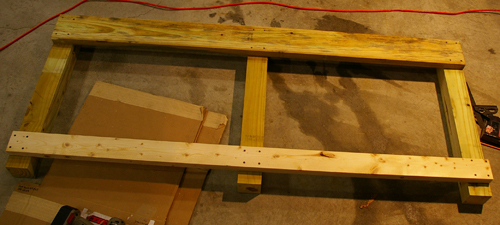
BackTogether.jpg

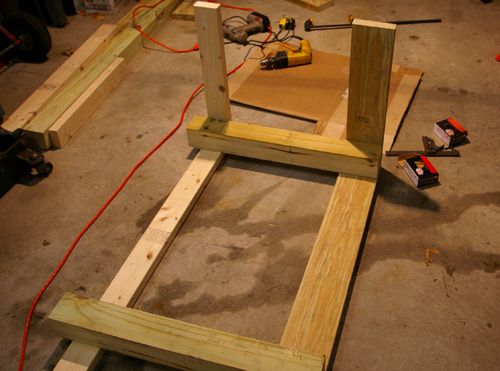
Putting the side braces on so I can line up the back half of the stand.
PuttingSidesOn.jpg

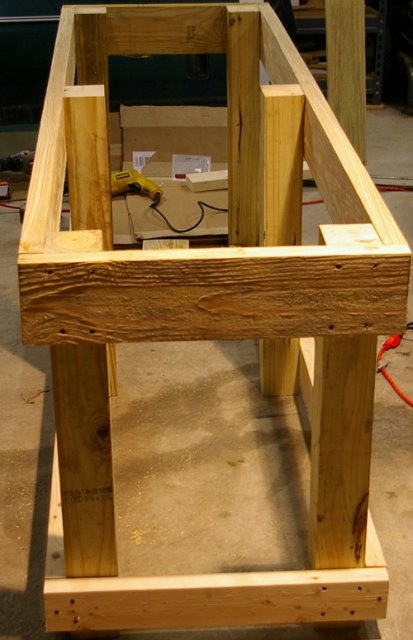
Stand is together.
Front.jpg

Stand is together.
StandSide.jpg

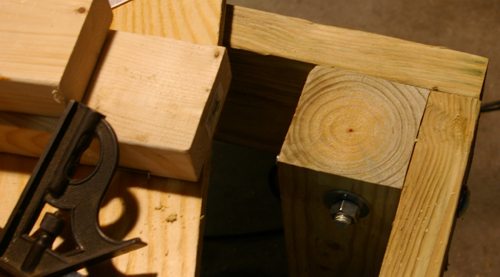
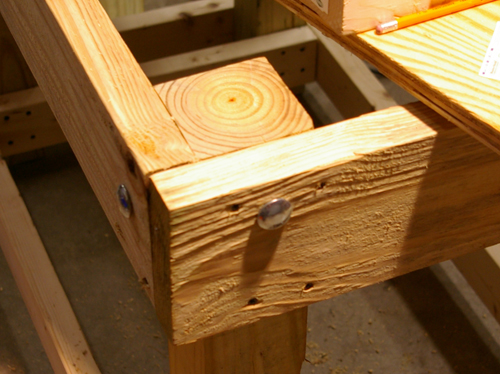
Carriage bolts are in. I ended up doubling up on them, so instead of the single bolt on each side shown in my picture, there are 2 through the side braces and one through the front brace.
Bolts1.jpg

Carriage bolts are in.
Bolts2.jpg

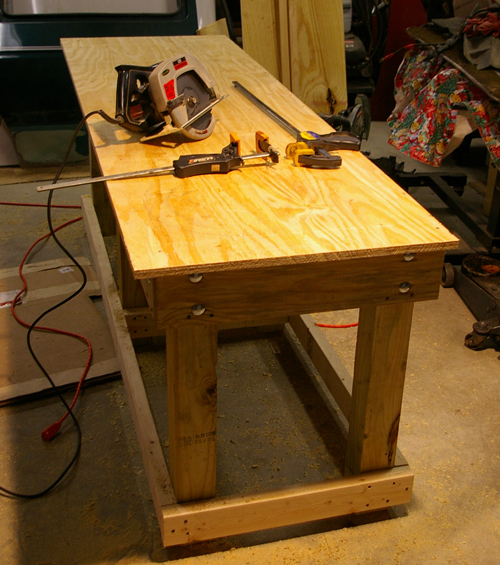
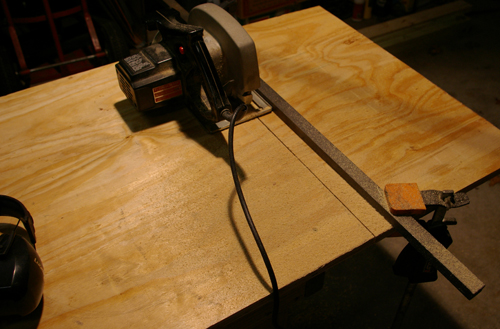
Cutting the top piece of plywood. I had Home Depot cut full sheet in half (26" wide one side and 22" the other.) since the top is slightly over 24" wide. I then trimmed up the ends.
CuttingTheTop.jpg

Top is cut and tacked into place.
TopCut.jpg

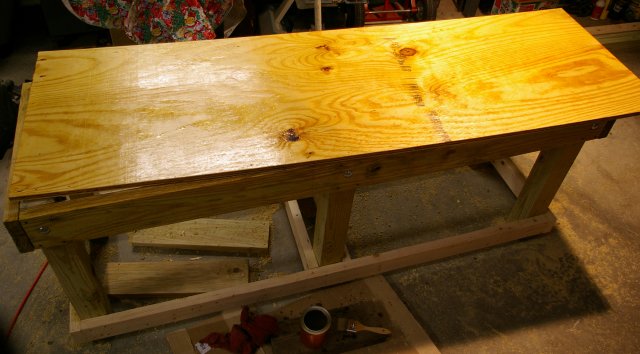
Top is unfastened, flipped over and being poly'ed on the bottom.
TopPollyed.jpg

Hook for my empty/fill-up bucket.
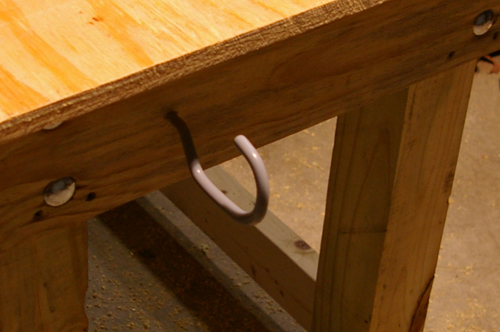
BucketHook.jpg

BackTogether.jpg Bolts1.jpg Bolts2.jpg BucketHook.jpg CuttingTheTop.jpg Front.jpg PuttingSidesOn.jpg StandSide.jpg TopCut.jpg TopPollyed.jpg
 

Satuno

AC Members
Dec 18, 2010
24
0
0
Real Name
Auston
Even if you dont care how it looks, a little wood sealer wouldnt hurt to protect it from water damage over time.
 

achubbard

AC Members
Mar 13, 2009
21
0
0
West Greenwich RI
www.rimobiledj.com
Real Name
Alex
Yea, I was actually thinking about that yesterday as I poly'ed the top sheet of plywood. I may end up going over the whole stand to protect it. The Minwax stuff I picked up at home depot is supposed to seal it. I've used it on work benches etc before and it does a pretty decent job for $10/can :)
 

achubbard

AC Members
Mar 13, 2009
21
0
0
West Greenwich RI
www.rimobiledj.com
Real Name
Alex
More pics for you guys :D

So the stand is together, half-poly'ed. I still need to put in the floor/shelf.
I'm also going a different route with the doors on the front. Since I ended up leaving a lip or edge in the plywood top, my dad said I should be able to put on regular cabinet-type doors instead of trying to build my own. Anyways, that is a project for another day.

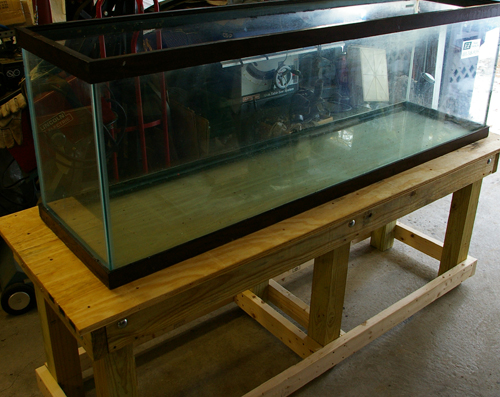
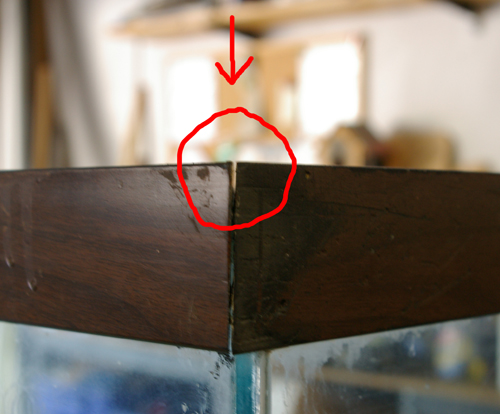
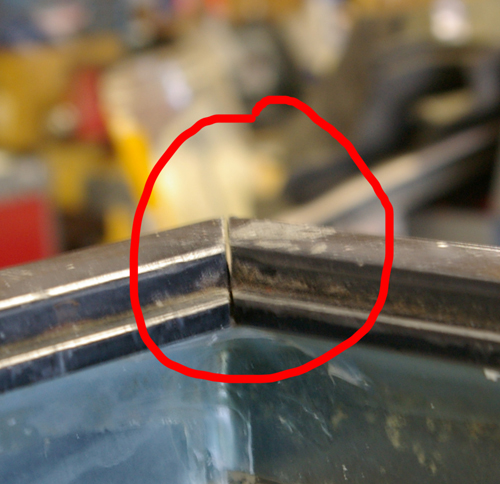
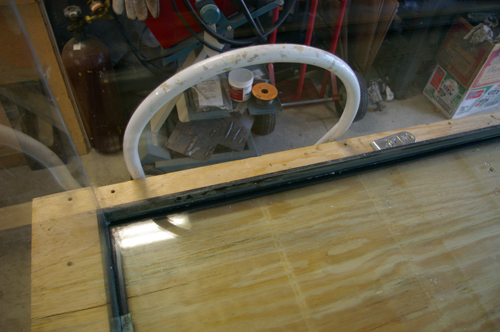
I got the tank on the stand, stripped out all the old silicone, cleaned it and began re-gluing. My dad noticed that one corner of the top trim is starting to come apart. Is this going to be a problem? (Pics below with red circle/arrow) How should I go about correcting it?

Also, some of you mentioned the lack of a center brace. Should I build one? What should I use?

I've been set back slightly, but I'm hoping to get this in place within the next week or so.

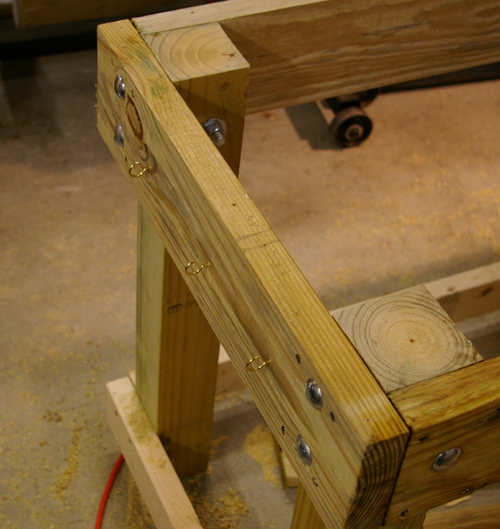
Double bolts and some brass hooks for hanging things on the end. I'm also going to get an under-the-counter type paper towel holder to bolt on as well for quick clean ups etc.
DoubleBolts-Hooks.jpg

Removing the old silicone.
RemoveSilicone.jpg

Tank on the stand. Still need to Poly the top of the plywood, but I wanted to get going on the re-gluing.
TankStand.jpg

The last 2 shots are of the trim separating. Think this will be a problem? How should I fix it? I found that the tank is made by a company called Scottix (sp?).
TrimCrack.jpg

TrimCrack2.jpg

DoubleBolts-Hooks.jpg RemoveSilicone.jpg TankStand.jpg TrimCrack.jpg TrimCrack2.jpg
 

Satuno

AC Members
Dec 18, 2010
24
0
0
Real Name
Auston
Making it rimless would be pretty rad!

as far as cabinet doors go, I looked pretty far/wide to find nice doors on a budget. I called cabinent shops, and most of them dont want to do just 2 custom doors. I ended up getting some nice ply wood cuts from a local lumber yard. I gave them the dimensions, and had them router the edges. I bought some cheap cabinent hinges, and slapped them on. I spent 25$ on 4 doors, and 10$ on hinges.
 
zoomed.com
hikariusa.com
aqaimports.com
Store