DIY Tank Stand (36"L x 18"D x 30") for 40 Gallon Breeder Tank

Status
Not open for further replies.
Looks good....

I think the only thing I might have done different with it is to make the front trim pieces cover the plywood sides raw edges in the front instead of letting them show. But I guess you could put some corner trim on the edges to hide it if you wanted.

That is part of the plan. I will be adding trim to the top, sides and bottom (when I get some time) to make it more "furniture like".

Thanks for looking...
 
Can you break down your costs for me? If you have that info. I need to build a 55 gallon stand. Did the metal braces help to keep every thing level and plumb while building?
 
that looks amazing.
i was actually about to build one for my 40 gal breeder, but then i went the lazy route and bought a board slightly bigger than the tank's footprint, painted it black, put it on top of a TV stand that was just 2" short on each side (hence the board), and called it a day.
 
Looks great and sturdy!

Building a top? PM me for measurements/pix of the one on my 40G Breeder.

FYI, those strong-tie connectors aren't all Stainless...most are galvanized steel-but plenty fine for a tank stand!
 
Can you break down your costs for me? If you have that info. I need to build a 55 gallon stand.

So far, I have spent about $240, but I still need to buy materials for the doors. So I will probably spend around $300-325 in total. I will have a better idea of the total costs once it's all done.

Did the metal braces help to keep every thing level and plumb while building?

As I stated at the beginning of the thread, I am no professional. Keeping everything plumb and making everything fit perfectly is something that I am still working at. Every piece of wood has warps, twists, bumps, etc., so you have to really work at getting things to fit correctly. I use clamps whenever I am attaching pieces together. This seems to help things fit better. Once the steel ties are attached, the pieces are pretty tight. But there were still one or two times when I had to "force fit" some pieces before they were nailed.

Hope that helps...
 
I finally got some more time to work on the tank stand this weekend.

I was able to install all of the trim/molding and I started to fill the nail holes and gaps with wood filler. I'm very pleased with the results so far.

Here are some of the the latest photos.

This shows all of the trim installed (except for the matching left side trim). You might notice that some of the trim has a lighter color, since it is made from pine and the main exterior pieces are made from red oak.

I used a miter saw to cut the corners of the trim at 45 degree angles so that they would fit snug:

86512874.jpg


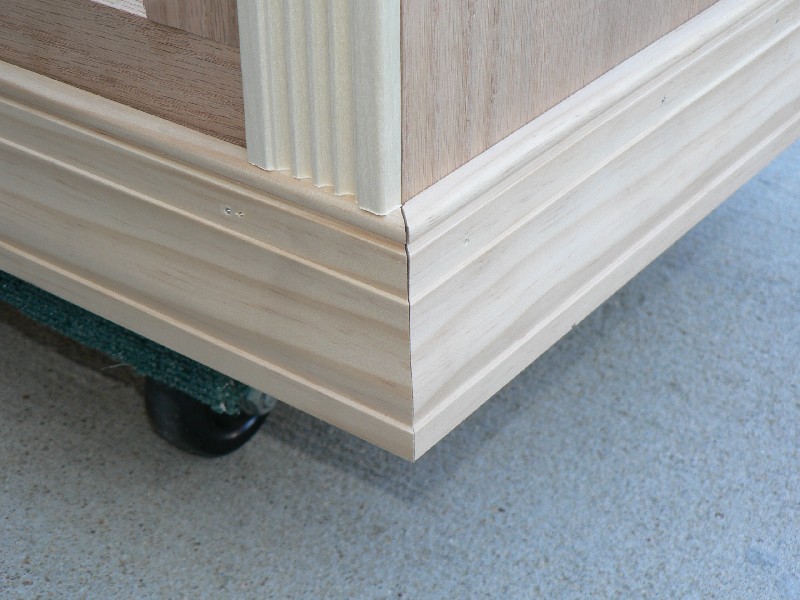
Here is a closeup showing the bottom trim and side trim. You will notice that there are two holes. I mistakenly drilled a hole that was larger than the nail. Oops! :duh: So I had to drill another hole that was smaller:

86512864.jpg


Here is another image showing the bottom trim and side trim.

86512866.jpg


Here is a photo of the top and side trim pieces. I used a 1"x3" for the top and then installed crown molding underneath to give it a "classy" look.

86512871.jpg


Here is another angle of the same thing:

original.jpg


Here is a look at the top trim from the back:

86512869.jpg


I will hopefully be able to finish filling the gaps with wood filler next weekend. I then have to sand, stain, and varnish everything.

Finally, I will make the two cabinet-style doors.

Stay tuned...
 
Looking good...keep us updated !!
 
Status
Not open for further replies.
AquariaCentral.com