My planted 110 gallon build log **update** plants!!
- Thread starter Sean W.
- Start date
You are using an out of date browser. It may not display this or other websites correctly.
You should upgrade or use an alternative browser.
You should upgrade or use an alternative browser.
Im getting tired of doing things twice...
Measure twice, cut once. It's a sucky lesson to learn! Re-cutting the 2 x 4s would indeed be the correct way I'm sorry to say, dude. At least you used screws and not nails right?
Gotta go over by an 1/8th of an inch on these....I learned that this way, too :/ as well as the silicone. Rescrew it, man, look at all the effort that's already gone in it! You can DO IT!!!!
:cheers:
:cheers:
Alright guys, a bit of an update.
Ive been going back and forth in my head about what to use as substrate in this tank. In a perfect world where money isnt an issue, id like to use the most premium stuff off the shelf, that solution would cost upwards of $300 because this tank is so large ( in the planted tank world ). So I have decided to get dirty with this tank. Using dirt with this tank is really the only way to get a good premium substrate for very little cost. Im going to be using the MTS or " Mineralized Top Soil " method with this tank. If you want to learn more about that, there is a great article to read HERE. That article shows step by step how to mineralize top soil and it is the article ill be following for my tank. Basically (in my undderstanding) Mineralizing top soil is a process of soaking and drying out the dirt to enrich the soil.
From the Article:
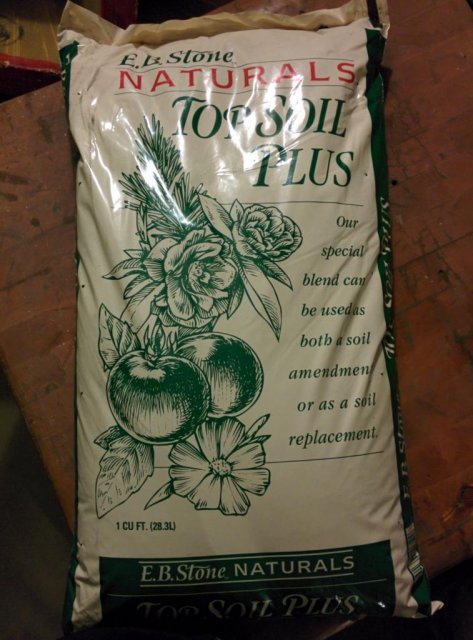
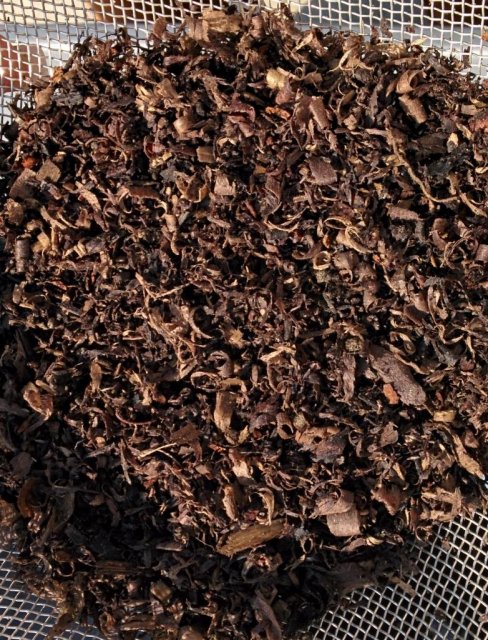
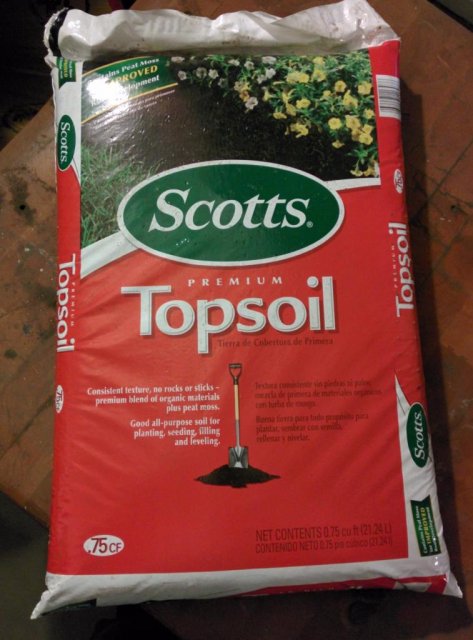
In the Article, the author says he just went to his local WalMart and got the cheapest top soil they had. Of course in my infinite wisdom, i went to Armstrong Garden center and got their cheapest organic top soil. Turns out it was 80% saw dust, so i returned that and did as i was told, went to WalMart and got what turned out to be their cheapest top soil, lo and behold, it is much better than what i originally got.
There are many different ways of using dirt in a planted tank, people will debate which is the best way until they are blue in the face, but in the end it all comes down to one thing, a cheap way of getting an awesome substrate for your plants to thrive in. There are two polar opposite ways of dirting a tank (from what ive read). Option one is to buy the soil, open the bag, dump it in, cap it with gravel and fill the tank with water. The other way is to do it the way im going to do, which is undeniable the harder of the two ways, but I think its going to pay off in the end. I open the bag, sift out all the debris, rocks, stones, sticks, wood chips, twigs etc etc and begin the mineralizing process. Which can take anywhere to 10 - 15 days. Im not going to go into depth of the mineralizing process, if you want to know more about that click on the article i posted earlier in this post. The reason im going through all this trouble is because i want as pure of a substrate as i can get, i dont want stones in it because they take up precious space that could be occupied by nutrient rich soil and i dont want any wood in one form or another because woods releases tannins into the water that make the water look yellow/brown.
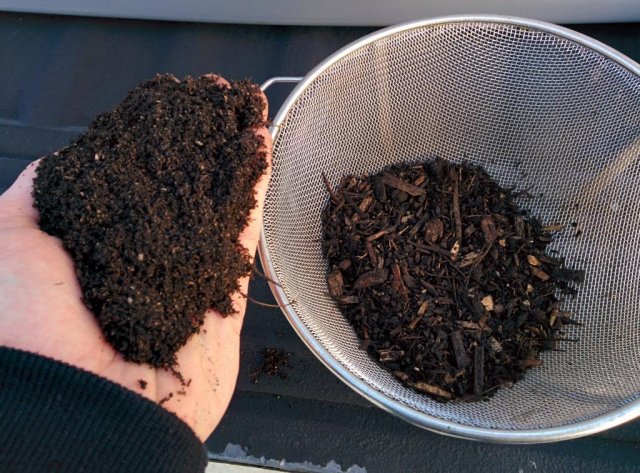
So today after i got home from WalMart i opened the bag and started sifting. The only thing i could find to use as a sifter was my moms spaghetti strainer... I spent probably 2 hours sifting and i only finished 3/4 of one bag, 3 more bags to go. So still a lot more work to do, but in the end, i think all the effort is going to pay off... I also have to give a huge thanks to " TheLub " and " InkBull ", both have been invaluable with my questions about dirting this tank. Thanks guys so much.
As far as other aspects of the project, i have removed 95% of the wrong silicone, i just need to go over the residue with acetone and a razor blade to remove the last of the residue. Also, i dropped and broke the center brace, so im having another one of those made. its not all bad, the original center brace was only 1/4" i think, if not thinner, and it was installed wrong by the previous owner and wasnt large enough to use as a proper center brace. So a new one was required anyway. I also have to dismantle the stand and make it wider.
Pictures!
The first soil i got from Armstrong that turned out to be more sawdust than anything

Here it is after the first scoop of sifting, i quickly realized this wasnt going to work

Here is the stuff i got form walmart

and a shot of whats left from sifting on the left and whats trash on the right. The finished sifted soil is so soft and fine, i have very high hopes for it.


Ive been going back and forth in my head about what to use as substrate in this tank. In a perfect world where money isnt an issue, id like to use the most premium stuff off the shelf, that solution would cost upwards of $300 because this tank is so large ( in the planted tank world ). So I have decided to get dirty with this tank. Using dirt with this tank is really the only way to get a good premium substrate for very little cost. Im going to be using the MTS or " Mineralized Top Soil " method with this tank. If you want to learn more about that, there is a great article to read HERE. That article shows step by step how to mineralize top soil and it is the article ill be following for my tank. Basically (in my undderstanding) Mineralizing top soil is a process of soaking and drying out the dirt to enrich the soil.
From the Article:
Mineralizing the soil beforehand helps to speed the breakdown of organic materials in the soil. In turn the mineralized soil will help shorten the initial algae outbreak period that many aquarists experience when using a soil substrate. Soil mineralization occurs from exposing bacteria, enzymes and other soil microbes to oxygen in a moist environment. The microbes break down the organic materials in the soil into bio-available minerals. As an added bonus these new bio-available forms of nutrients are generally only available to plants and not to algae.
In the Article, the author says he just went to his local WalMart and got the cheapest top soil they had. Of course in my infinite wisdom, i went to Armstrong Garden center and got their cheapest organic top soil. Turns out it was 80% saw dust, so i returned that and did as i was told, went to WalMart and got what turned out to be their cheapest top soil, lo and behold, it is much better than what i originally got.
There are many different ways of using dirt in a planted tank, people will debate which is the best way until they are blue in the face, but in the end it all comes down to one thing, a cheap way of getting an awesome substrate for your plants to thrive in. There are two polar opposite ways of dirting a tank (from what ive read). Option one is to buy the soil, open the bag, dump it in, cap it with gravel and fill the tank with water. The other way is to do it the way im going to do, which is undeniable the harder of the two ways, but I think its going to pay off in the end. I open the bag, sift out all the debris, rocks, stones, sticks, wood chips, twigs etc etc and begin the mineralizing process. Which can take anywhere to 10 - 15 days. Im not going to go into depth of the mineralizing process, if you want to know more about that click on the article i posted earlier in this post. The reason im going through all this trouble is because i want as pure of a substrate as i can get, i dont want stones in it because they take up precious space that could be occupied by nutrient rich soil and i dont want any wood in one form or another because woods releases tannins into the water that make the water look yellow/brown.
So today after i got home from WalMart i opened the bag and started sifting. The only thing i could find to use as a sifter was my moms spaghetti strainer... I spent probably 2 hours sifting and i only finished 3/4 of one bag, 3 more bags to go. So still a lot more work to do, but in the end, i think all the effort is going to pay off... I also have to give a huge thanks to " TheLub " and " InkBull ", both have been invaluable with my questions about dirting this tank. Thanks guys so much.
As far as other aspects of the project, i have removed 95% of the wrong silicone, i just need to go over the residue with acetone and a razor blade to remove the last of the residue. Also, i dropped and broke the center brace, so im having another one of those made. its not all bad, the original center brace was only 1/4" i think, if not thinner, and it was installed wrong by the previous owner and wasnt large enough to use as a proper center brace. So a new one was required anyway. I also have to dismantle the stand and make it wider.
Pictures!
The first soil i got from Armstrong that turned out to be more sawdust than anything

Here it is after the first scoop of sifting, i quickly realized this wasnt going to work

Here is the stuff i got form walmart

and a shot of whats left from sifting on the left and whats trash on the right. The finished sifted soil is so soft and fine, i have very high hopes for it.


bet your mom loves the fact that you're using her spaghetti strainer to sift your soil!!
What... its organic!
:woot:
I have zero experience with dirt in tanks but would one want to sterilize it too before putting into the tank?
I have zero experience with dirt in tanks but would one want to sterilize it too before putting into the tank?
The mineralizing process is in a way also a sterilizing process as well.


