Ok, some pictures first...
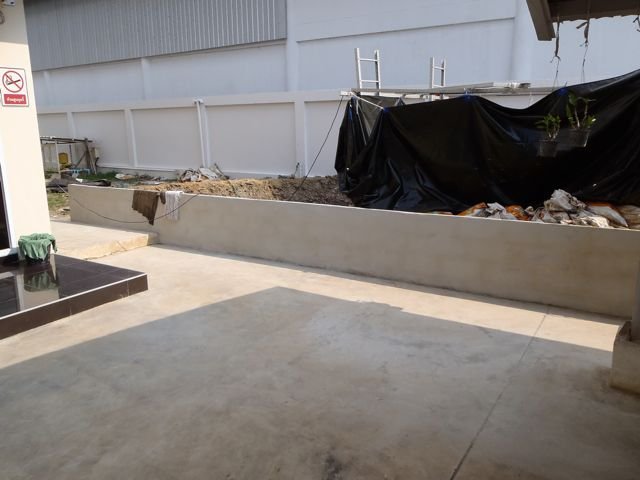
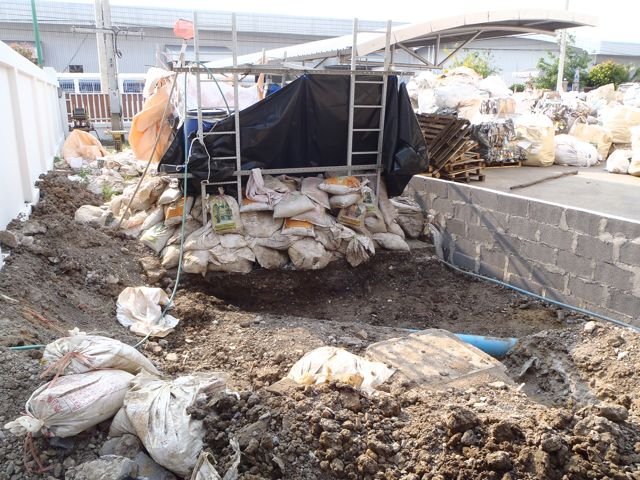
We've finished the concrete front, from the corners of this 10 meter long wall, the pond will be a half circle about 5 meters wide.
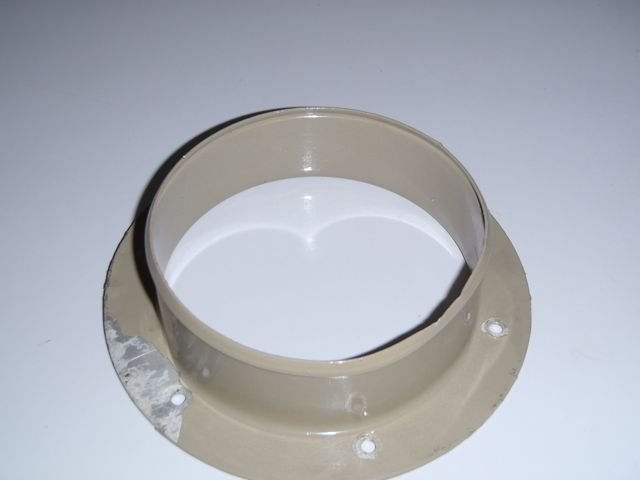
1x 4" bottomdrain, DIY...
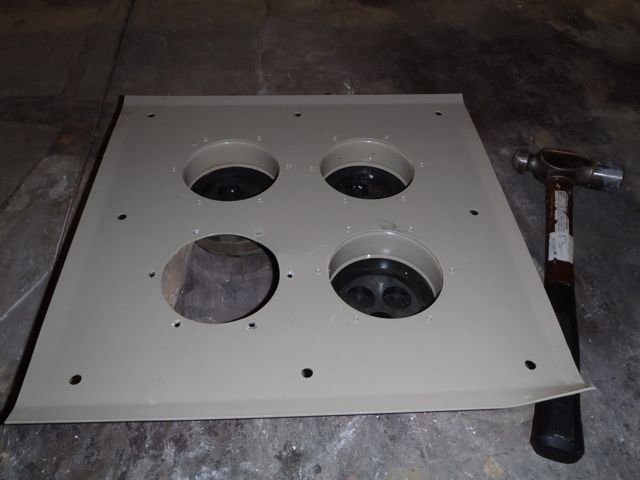
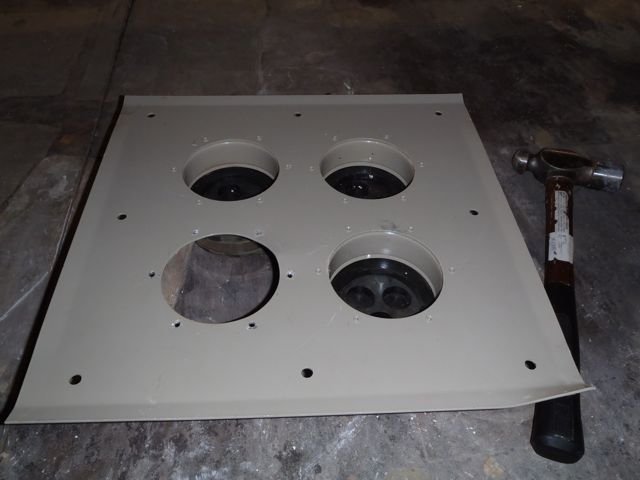
This is the plate with ducts..I have many of them, this is just to check and test.
Plan is to use this plate under the liner, 1 of the ducts connected to the PVC Drain.
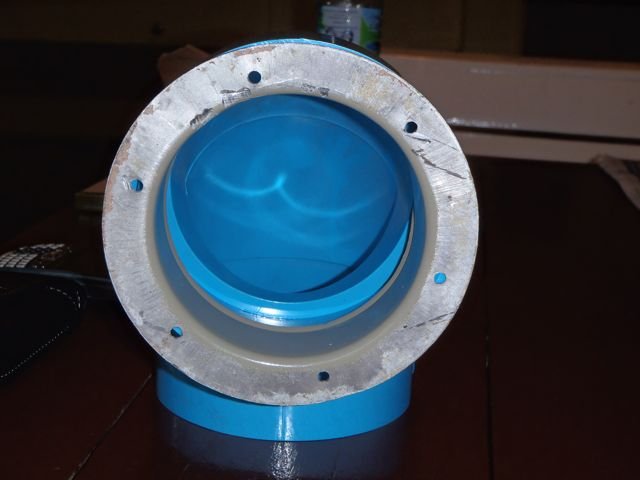
I found that if I use a pipe of 4", slide into the elbow with glue, then there's about 1mm space left between the PVC and the duct.
So likely, I will cut another slice of the pipe, cut it and then get that one in side as well.
Once all glued and sanded, put the duct in.
I can grind off the popnails and the openings would perfectly stay within the PVC.
So by using another ring for on top of the liner, I can simply screw it tight using existing popnail holes as pilots.
Also, by keeping the other ducts and poor them with concrete, the plate stays rock-solid, no movement at all, while providing good support for the liner...
I removed one of the ducts to easily check at a shop for fittings.
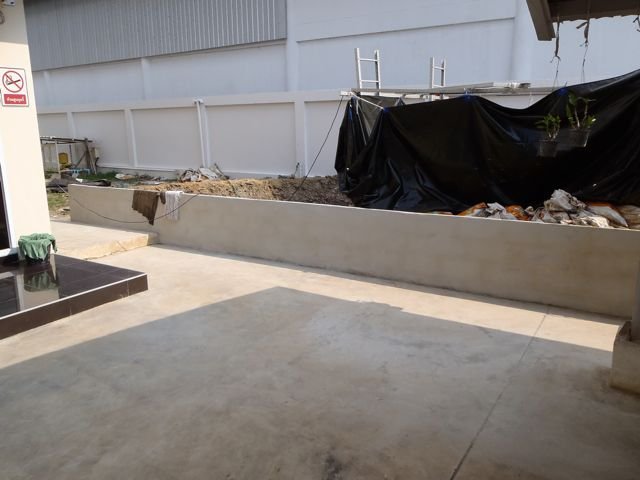
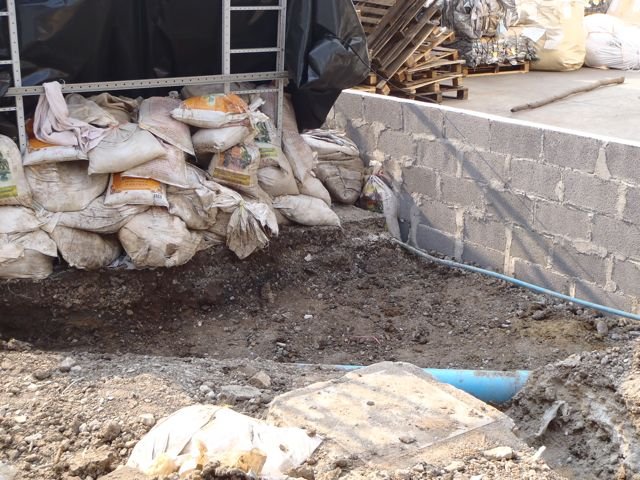
Oh, here's the front of the new pond.
As you can see, the old one is inside the new one.
We will roll liner from left to right up to the old pond.
Break down an opening in the sandbag wall.
slowly 'flush' the Arapaima and other fish to the deeper new pond.
Then put up temp-wall and remove the old pond and dig out the rest of the new pond.
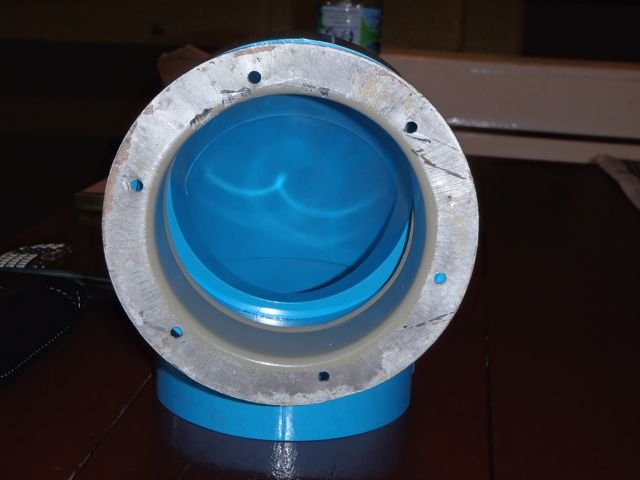
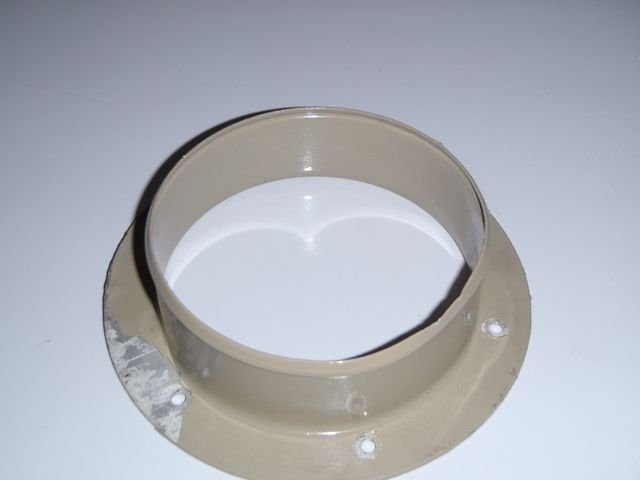
The duct-flange inside the PVC Elbow.
This will be a major cost saving. typical drains I've seen are like 100 - 150 USD.
Doing myself with these parts it will be around 10 USD...


We've finished the concrete front, from the corners of this 10 meter long wall, the pond will be a half circle about 5 meters wide.
1x 4" bottomdrain, DIY...

This is the plate with ducts..I have many of them, this is just to check and test.
Plan is to use this plate under the liner, 1 of the ducts connected to the PVC Drain.
I found that if I use a pipe of 4", slide into the elbow with glue, then there's about 1mm space left between the PVC and the duct.
So likely, I will cut another slice of the pipe, cut it and then get that one in side as well.
Once all glued and sanded, put the duct in.
I can grind off the popnails and the openings would perfectly stay within the PVC.
So by using another ring for on top of the liner, I can simply screw it tight using existing popnail holes as pilots.
Also, by keeping the other ducts and poor them with concrete, the plate stays rock-solid, no movement at all, while providing good support for the liner...

I removed one of the ducts to easily check at a shop for fittings.

Oh, here's the front of the new pond.
As you can see, the old one is inside the new one.
We will roll liner from left to right up to the old pond.
Break down an opening in the sandbag wall.
slowly 'flush' the Arapaima and other fish to the deeper new pond.
Then put up temp-wall and remove the old pond and dig out the rest of the new pond.

The duct-flange inside the PVC Elbow.
This will be a major cost saving. typical drains I've seen are like 100 - 150 USD.
Doing myself with these parts it will be around 10 USD...


