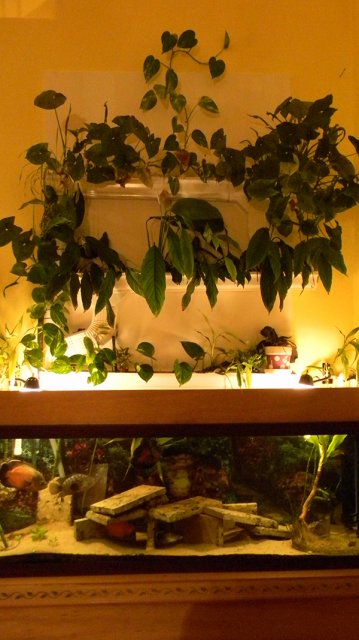
DIY Biotope
A few years ago my daughter bought me a 55g tank from a nucklehead friend of hers. It was overloaded with cichlids and catfish from allover the world. While it was a very thoughtful gift on her part it turned immediately into a rescue effort for me. The tiny hob filterkept much of the detritus out of the water but did nothing for the chemistry. In the 2 hours it took to move the tank and get somewater into it the 2 8” Electric Blue African cichlids died as did the two bright yellow Africans (I have never collected African Cichlids so I didn't know what kind they were).
I immediately installed a Magnum 350 as well as air in addition to the cute little hob. Regular water changes along with clean gravel and the unintentional bioload reduction helped the tank find some balance.
The original tank:
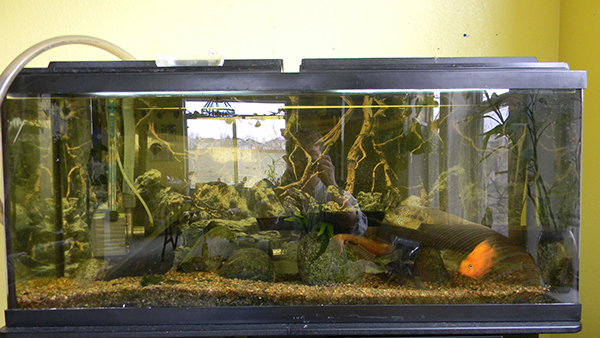
I took this picture as I began installing the biotope wall. TheMag-Drive 9.5 is not plugged in but would be used later that day.
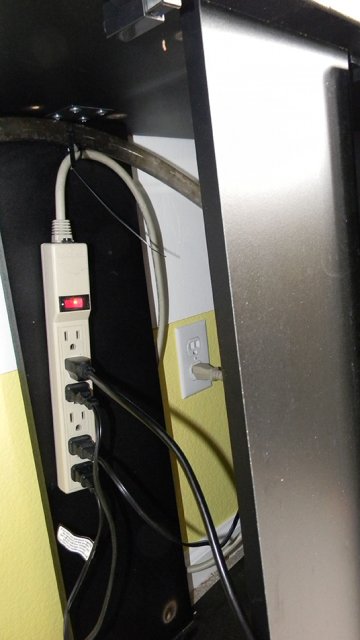
A note to anyone new: Always use drip loops in your electrical systems and always use power strips or gfi protected outlets. When your power cords hang down from their outlet if any water should get on them it will drip down the cord and onto the floor which is far better than dripping into your outlet where all sorts of horrible and painful things could happen.

I mounted the power strip off the ground and left enough slack in the cords to help stave off some potential disasters.
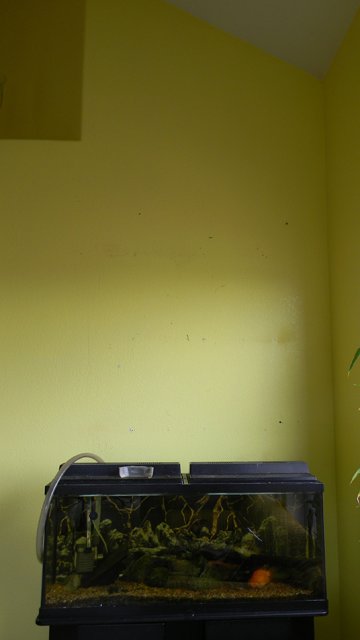
Here is the tank with an empty wall behind it.
Next I painted a 4x8 sheet of plywood with high-gloss white paint. I used 3 coats.

I mounted this to the wall using 6 weather-resistant deck screws. I mounted it directly into studs. I then covered the screw heads with silicone to keep the moisture barrier in tact. The last thing I want is water seeping through my drywall into my insulation and basement and everywhere else.
There is some great documentation on the web if you are interested in growing your own colony of black mold. All you need is dark and moisture so introducing nutrient-rich aquarium water into your crawlspace is a great start.
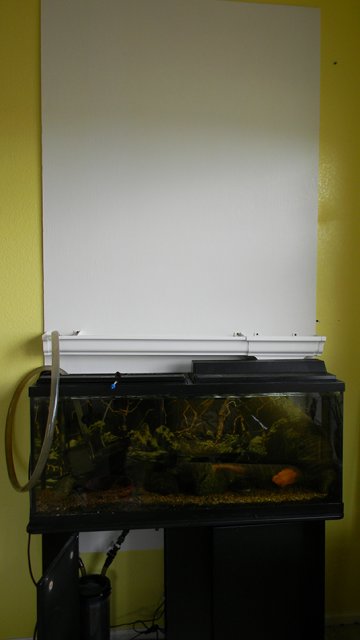
Here is the plywood mounted to the wall. The tank has been scooted back into place. The top of the plywood is very close to 9.5' high. The bottom of the plywood is just over the outlet (about 18” from the floor).
You can see the first trough just above the tank on this photo. The troughs are made from plastic gutter available at my local hardware store. I sealed them with aquarium-safe silicone.
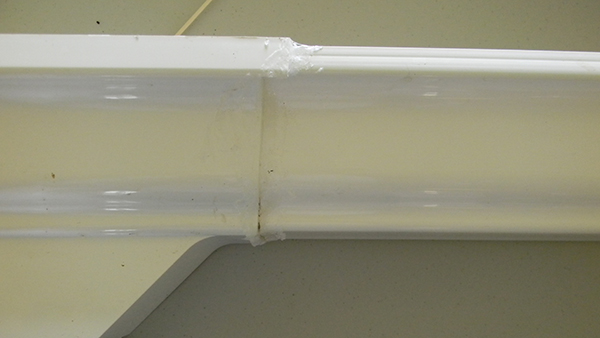
I sealed them both inside and outside.
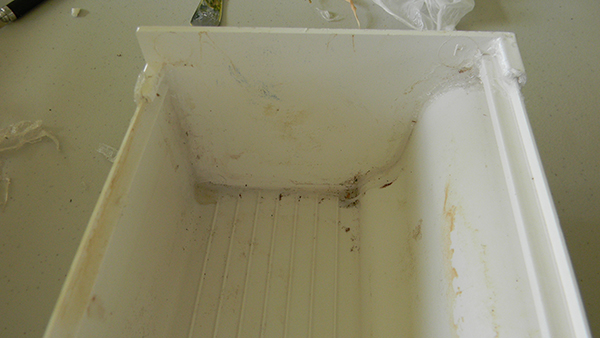
I was timid in my application of the goo. I had to take the whole thing down when it leaked badly from nearly every joint. I strongly recommend buying a box of latex gloves and smearing the silicone into the crevices of the gutter system with your fingers. There are always other uses for extra latex gloves. I haven't had any problems since doing that.
The finished system looked about like this:
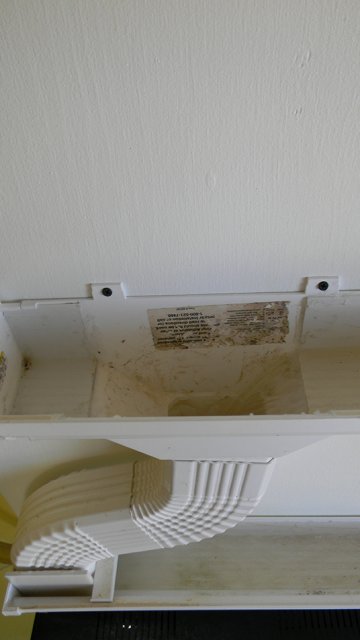
This is a view looking down from the second level to the first. The black strip at the bottom is the fish tank lid. The whole system is 3 tiers tall. The pump in the tank pumps the water to the top tier where it then makes its way down through all 3 tiers and finally cascades into the tank.
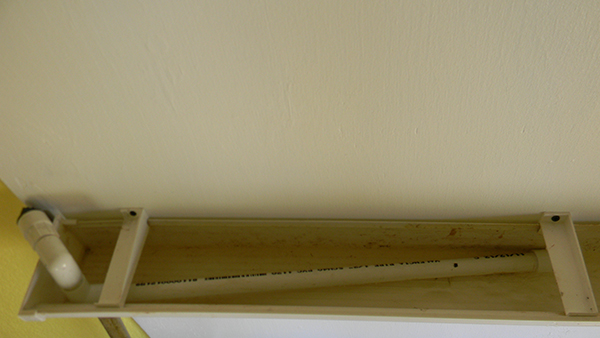
The Mag 9.5 put out just above 200 gph at this height. That was still too much flow to have splashing around so I added a 2' spray bar of 3/4” PVC piping with 2 rows of 1/4” holes drilled at 1/2”increments. The flow is pretty even.
Here is a photo with water running through the system:
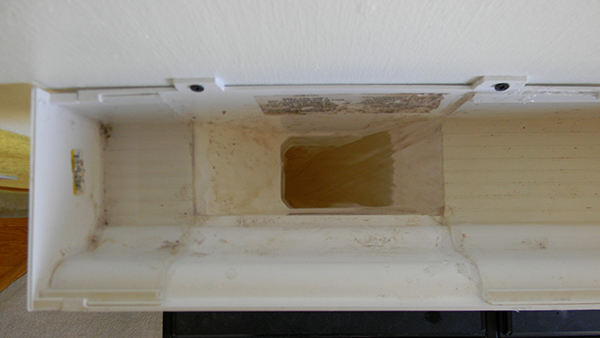
My wife and I agreed that I could build a living wall in our house as long as it made the soothing sound of a fountain. The trouble was that 200 gallons per hour through an all plastic gutter system is that it sounded more like Niagara Falls than a soothing zen fountain. We had to turn up the TV at the other end of the house to hear any dialogue. It was annoying even for me and I have kept fish for most of my life.

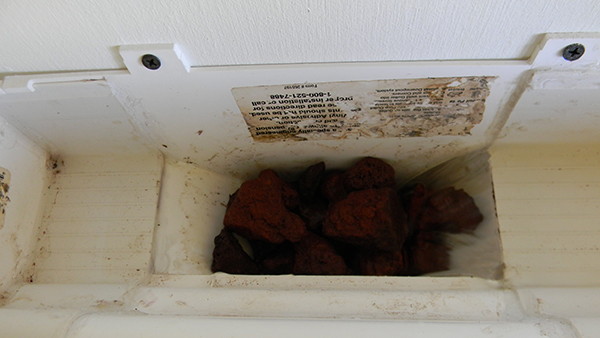
The next weekend I was hit by a stroke of genius (maybe the silicone fumes got to me). I would like to pretend that I had the idea of bio media all along but I didn't. I filled the downspouts with lava rock:
And then took a lid from a damaged storage tote and cut covers for the spouts to diffuse the water:
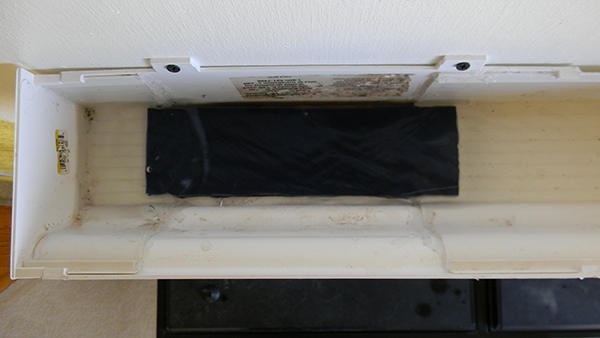
This cut down the sound by 90%. I purchased a 3 cubic foot bag of lava rock and filled each of the downspouts. I then took the remaining rock and divided it between the 3 troughs as a planting substrate. As a side note, always rinse your rocks before you use them especially if you have fish in the tank. I suppose if you are going for the red planet Mars look in your tank you could fill it with red lava dust but I wasn't so I rinsed mine.
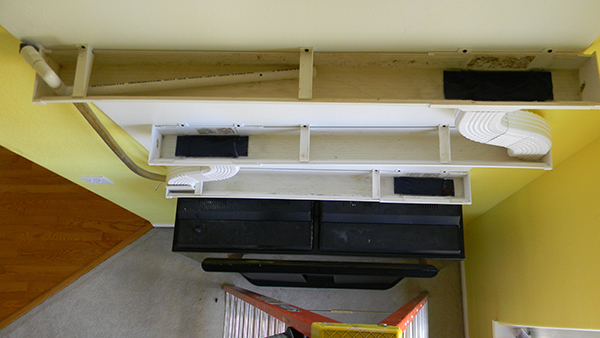
This photo was taken while I was standing near the top of a 10' ladder looking down. I let it run for a few days to look for leaks.
This time it was dry. If you do decide to make this or something similar it is smart to check it every day for the first few weeks. Watch the water level and really get to know your tank. This whole thing is flirting with a lot of potential water damage if you make any mistakes. Since the intake for the pump is about in the middle of the tank if the system broke it could pump 25 gallons of water onto your floor in the middle of the night. Should probably check all your seals as you go.
Here is the water flowing into the tank. Remember I added a Venturi intake to the pump to aerate the water:
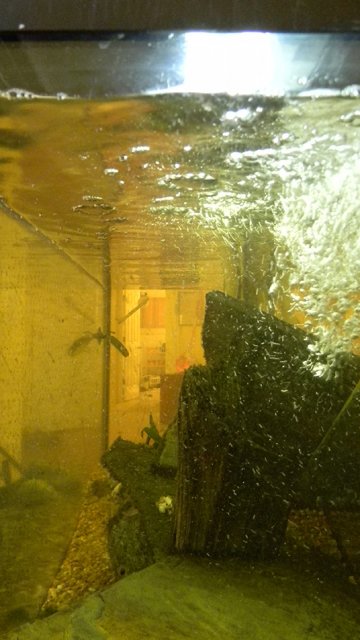
I don't like air pumps. I find them noisy and few air stones are able to continuously create beautiful small bubbles for any length of time.
Giovanni Venturi is the first to be credited with recognizing a fluid flow's effect on pressure in this way. It can be applied to aquarium pumps in the following way: Water being sucked into the pump will also suck air. If an air tube is introduced to the system before the pump impeller it will naturally suck air through the pump. An air tube with a valve to control how much air is allowed into the system will put just the right amount of air bubbles in the water just before the impeller.
The impeller will chop the bubbles into very tiny bubbles which then spend time in the 3/4” vinyl tube for several feet on the way to the topmost trough. The highly aerated water is very good for the roots of everything growing in the troughs and the fish are happy,too.
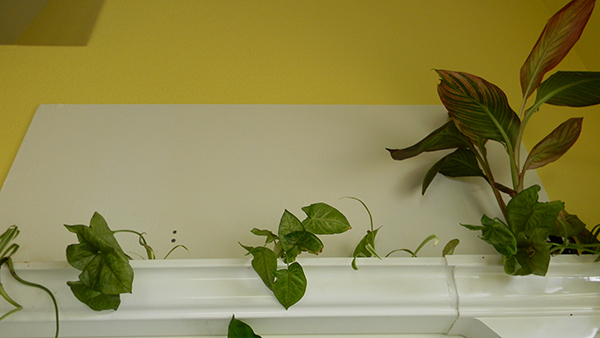
I found some plant clippings from around the house and whatever was on sale at the hardware store. The plant on the right died after a few months. Not all plants love the water but most do.
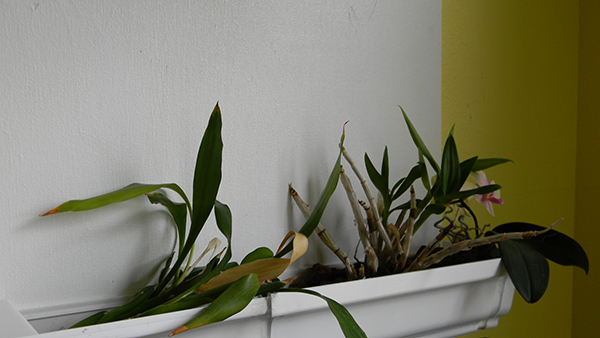
Bamboo = yes. Orchids = no.
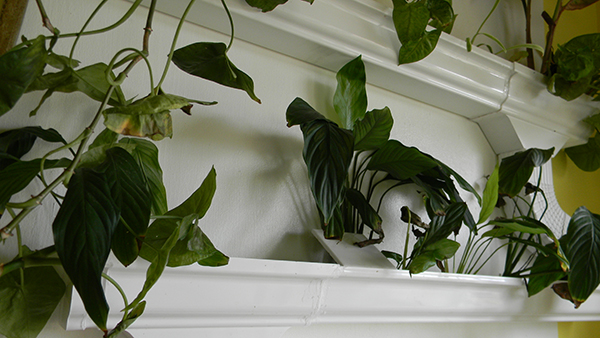
Pothos = very good. Peace lilies = very good.
Basically a lot of trial and error is a good thing. Stuff will die. Circle of life and all. Maybe I could sing that so the children could understand.
Here it is all finished:
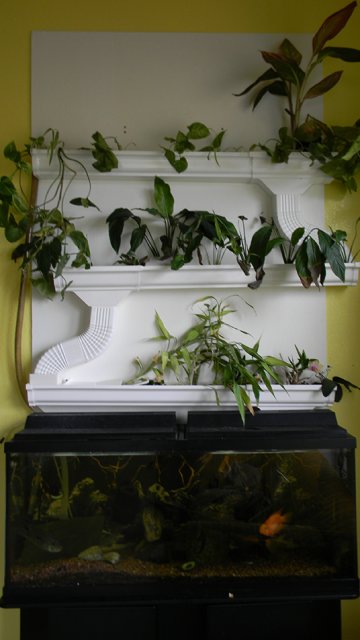
I still ran the Magnum 350 as 200 gph was not quite enough for a 55g tank with this bio load.
Bottom Line:
Gutter: < $40
Silicone < $15
Lava Rock: $5
Plants: Free
4x8 Plywood: $12 (thin floor substrate plywood was good for me)
Pump: I had it laying around (About $100)
Venturi Adapter: $15 ish
PVC piping: $5
Vinyl Tubing: $15
Total: $207 ish.
The tank by daughter bought for me has brought years of satisfaction and really inspired me to take things further than I ever had before. Thank you, Sam. It was time and money well spent and a very good gift that keeps giving.
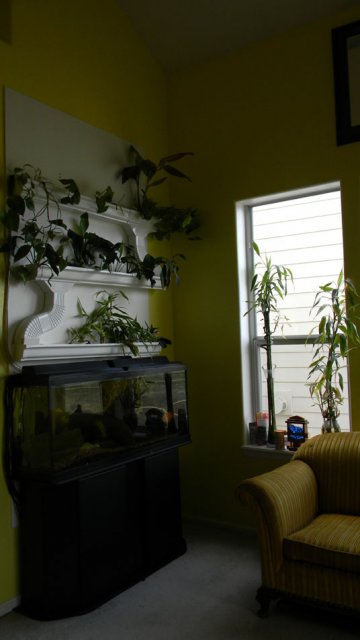
P.S.: I did this in April of 2013. Since then I have upgraded to a 135g and put together my own sump, sump return system, and some more plumbing. I'll see if I can get to that another time. If you decide to do this and have any questions please send me an email. I'd be happy to help you learn from my mistakes.


A few years ago my daughter bought me a 55g tank from a nucklehead friend of hers. It was overloaded with cichlids and catfish from allover the world. While it was a very thoughtful gift on her part it turned immediately into a rescue effort for me. The tiny hob filterkept much of the detritus out of the water but did nothing for the chemistry. In the 2 hours it took to move the tank and get somewater into it the 2 8” Electric Blue African cichlids died as did the two bright yellow Africans (I have never collected African Cichlids so I didn't know what kind they were).
I immediately installed a Magnum 350 as well as air in addition to the cute little hob. Regular water changes along with clean gravel and the unintentional bioload reduction helped the tank find some balance.
The original tank:

I took this picture as I began installing the biotope wall. TheMag-Drive 9.5 is not plugged in but would be used later that day.
A note to anyone new: Always use drip loops in your electrical systems and always use power strips or gfi protected outlets. When your power cords hang down from their outlet if any water should get on them it will drip down the cord and onto the floor which is far better than dripping into your outlet where all sorts of horrible and painful things could happen.

I mounted the power strip off the ground and left enough slack in the cords to help stave off some potential disasters.

Here is the tank with an empty wall behind it.

Next I painted a 4x8 sheet of plywood with high-gloss white paint. I used 3 coats.

I mounted this to the wall using 6 weather-resistant deck screws. I mounted it directly into studs. I then covered the screw heads with silicone to keep the moisture barrier in tact. The last thing I want is water seeping through my drywall into my insulation and basement and everywhere else.
There is some great documentation on the web if you are interested in growing your own colony of black mold. All you need is dark and moisture so introducing nutrient-rich aquarium water into your crawlspace is a great start.

Here is the plywood mounted to the wall. The tank has been scooted back into place. The top of the plywood is very close to 9.5' high. The bottom of the plywood is just over the outlet (about 18” from the floor).

You can see the first trough just above the tank on this photo. The troughs are made from plastic gutter available at my local hardware store. I sealed them with aquarium-safe silicone.

I sealed them both inside and outside.

I was timid in my application of the goo. I had to take the whole thing down when it leaked badly from nearly every joint. I strongly recommend buying a box of latex gloves and smearing the silicone into the crevices of the gutter system with your fingers. There are always other uses for extra latex gloves. I haven't had any problems since doing that.
The finished system looked about like this:

This is a view looking down from the second level to the first. The black strip at the bottom is the fish tank lid. The whole system is 3 tiers tall. The pump in the tank pumps the water to the top tier where it then makes its way down through all 3 tiers and finally cascades into the tank.
The Mag 9.5 put out just above 200 gph at this height. That was still too much flow to have splashing around so I added a 2' spray bar of 3/4” PVC piping with 2 rows of 1/4” holes drilled at 1/2”increments. The flow is pretty even.

Here is a photo with water running through the system:

My wife and I agreed that I could build a living wall in our house as long as it made the soothing sound of a fountain. The trouble was that 200 gallons per hour through an all plastic gutter system is that it sounded more like Niagara Falls than a soothing zen fountain. We had to turn up the TV at the other end of the house to hear any dialogue. It was annoying even for me and I have kept fish for most of my life.

The next weekend I was hit by a stroke of genius (maybe the silicone fumes got to me). I would like to pretend that I had the idea of bio media all along but I didn't. I filled the downspouts with lava rock:

And then took a lid from a damaged storage tote and cut covers for the spouts to diffuse the water:

This cut down the sound by 90%. I purchased a 3 cubic foot bag of lava rock and filled each of the downspouts. I then took the remaining rock and divided it between the 3 troughs as a planting substrate. As a side note, always rinse your rocks before you use them especially if you have fish in the tank. I suppose if you are going for the red planet Mars look in your tank you could fill it with red lava dust but I wasn't so I rinsed mine.

This photo was taken while I was standing near the top of a 10' ladder looking down. I let it run for a few days to look for leaks.
This time it was dry. If you do decide to make this or something similar it is smart to check it every day for the first few weeks. Watch the water level and really get to know your tank. This whole thing is flirting with a lot of potential water damage if you make any mistakes. Since the intake for the pump is about in the middle of the tank if the system broke it could pump 25 gallons of water onto your floor in the middle of the night. Should probably check all your seals as you go.
Here is the water flowing into the tank. Remember I added a Venturi intake to the pump to aerate the water:

I don't like air pumps. I find them noisy and few air stones are able to continuously create beautiful small bubbles for any length of time.
Giovanni Venturi is the first to be credited with recognizing a fluid flow's effect on pressure in this way. It can be applied to aquarium pumps in the following way: Water being sucked into the pump will also suck air. If an air tube is introduced to the system before the pump impeller it will naturally suck air through the pump. An air tube with a valve to control how much air is allowed into the system will put just the right amount of air bubbles in the water just before the impeller.
The impeller will chop the bubbles into very tiny bubbles which then spend time in the 3/4” vinyl tube for several feet on the way to the topmost trough. The highly aerated water is very good for the roots of everything growing in the troughs and the fish are happy,too.

I found some plant clippings from around the house and whatever was on sale at the hardware store. The plant on the right died after a few months. Not all plants love the water but most do.

Bamboo = yes. Orchids = no.

Pothos = very good. Peace lilies = very good.
Basically a lot of trial and error is a good thing. Stuff will die. Circle of life and all. Maybe I could sing that so the children could understand.
Here it is all finished:

I still ran the Magnum 350 as 200 gph was not quite enough for a 55g tank with this bio load.
Bottom Line:
Gutter: < $40
Silicone < $15
Lava Rock: $5
Plants: Free
4x8 Plywood: $12 (thin floor substrate plywood was good for me)
Pump: I had it laying around (About $100)
Venturi Adapter: $15 ish
PVC piping: $5
Vinyl Tubing: $15
Total: $207 ish.
The tank by daughter bought for me has brought years of satisfaction and really inspired me to take things further than I ever had before. Thank you, Sam. It was time and money well spent and a very good gift that keeps giving.

P.S.: I did this in April of 2013. Since then I have upgraded to a 135g and put together my own sump, sump return system, and some more plumbing. I'll see if I can get to that another time. If you decide to do this and have any questions please send me an email. I'd be happy to help you learn from my mistakes.


