Materials:
Fixture chain
4 x Eye hooks
36"x20" sheet aluminum.
4ish feet 1x6 board
7ish feet any board larger than 1x1
Tin snips or industrial scissors
Nails
Hammer
Clamp Lights or (see follow up posts for solid mounted ceramic sockets)
(If using solid mounted ceramic sockets)
Sockets,
15' lamp wire
crimps or wire nuts
electrical plugs
Materials

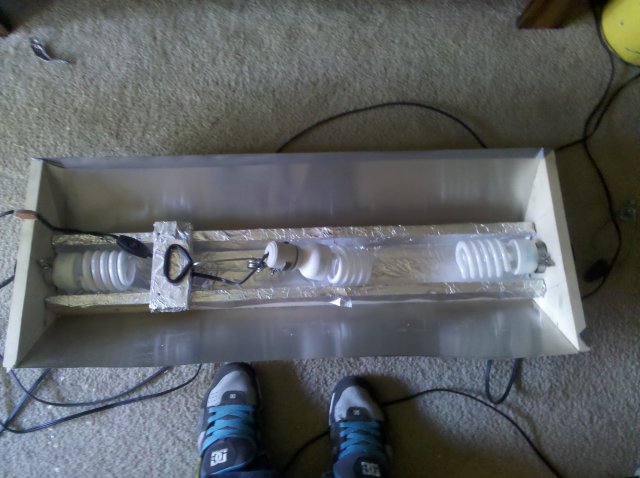
Cut wood into a frame to fit your tank. My trapezoid endcaps were made 7 inches on the angles and 5 inches on the flat to provide 1 inch overlap with the 20inch tin to provide for derping...wound up wishing I'd just gone 7"x6"x7"
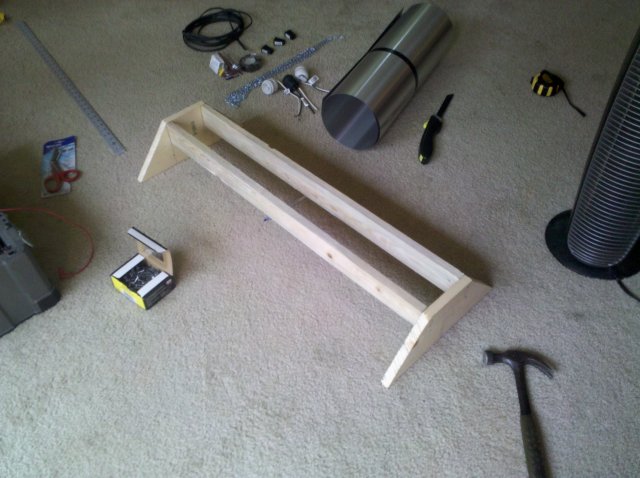
Make sure that whatever you use for your long boards are more shallow than what you cap with to provide room for your lights.
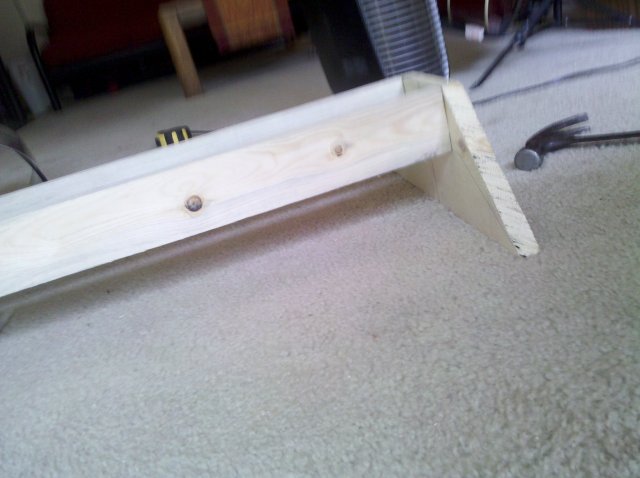
Begin attaching the aluminum on the square flat box provided by your wooden frame. Work from the center out to try to prevent warping.
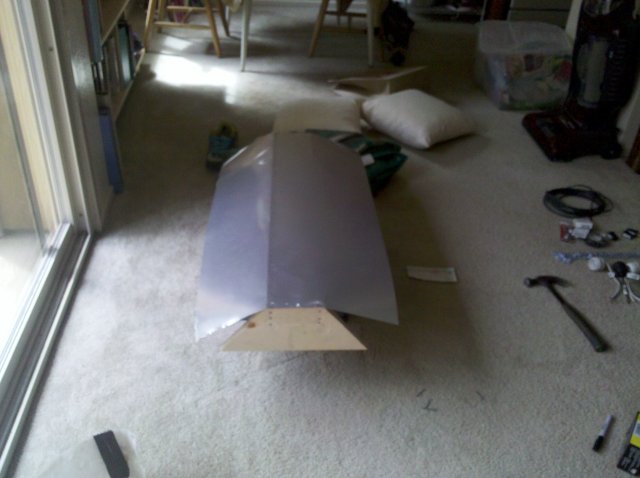
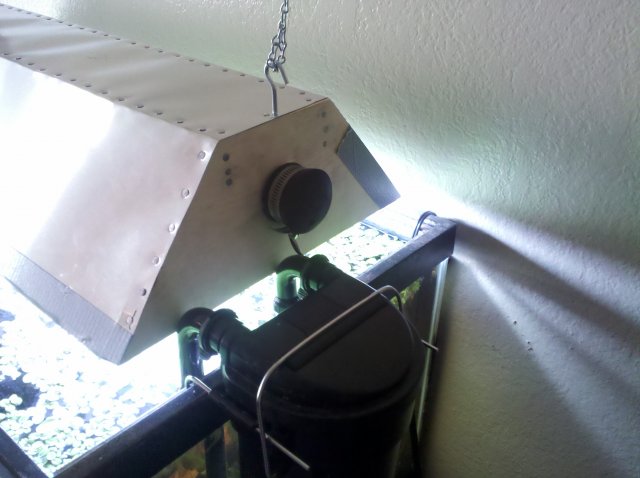
I chose to drive nails 1 inch apart across the whole thing to give it a pop-rivet WWII aircraft look...i'm partial to it in these types of applications. Screws can be used here, and spacing of up to 4-5 inches between fasteners would be appropriate. I used a yardstick and sharpie to quickly mark up.
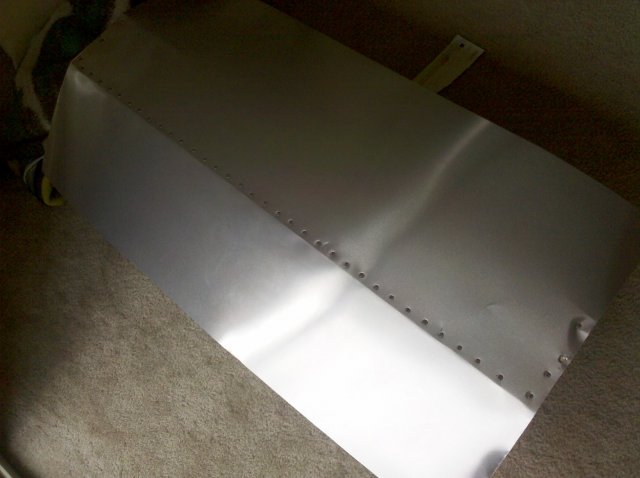
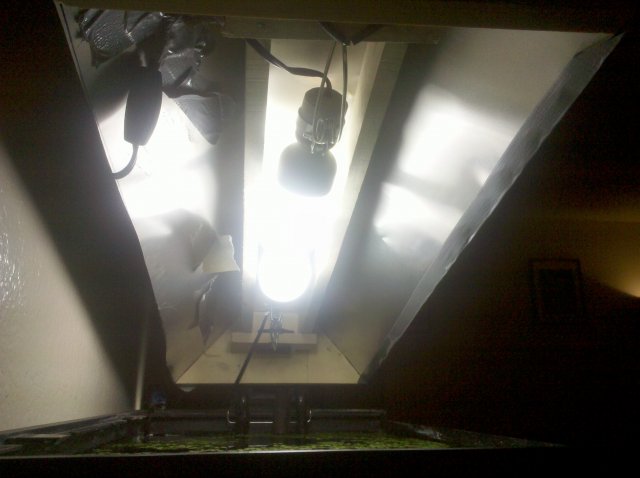
This part is stupidly simple. I don't have any good pictures of it...but using some left over scrap of my 1x2 board i drove in two platforms for the clamp lamp clamps at the ends of the hood. This way the clamp lamps are simply clamped into it and the wires duct-taped up.
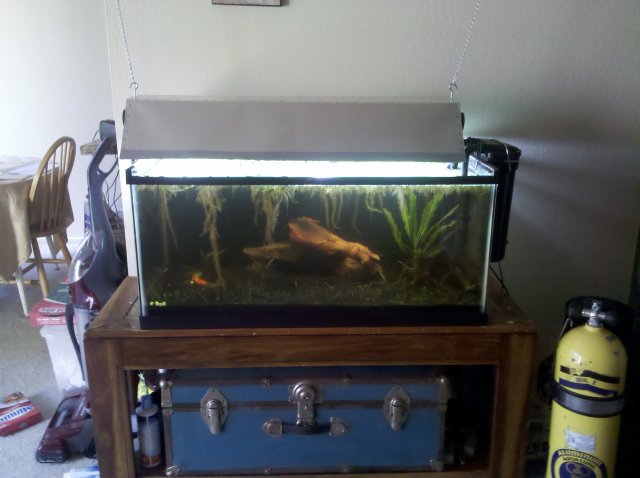
Attach eye-hooks to the hood and ceiling. Make sure to center them or your hood will lean.
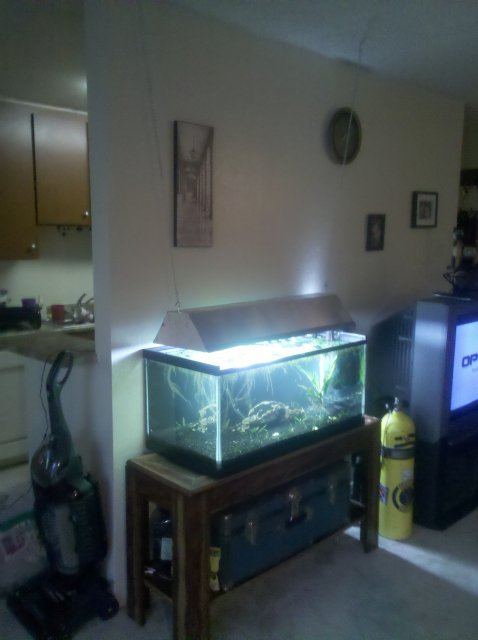
Fun little feature of the hook and chain, billiards style hood is that i just shorten up the chains for maintenance.
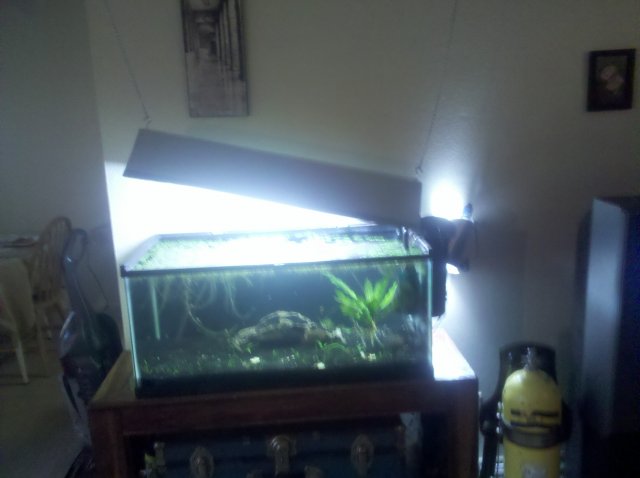
I hope this thread proves helpful for ya'll and feel free to punch holes in my system or ask questions as you see fit.
[Solid mounted socket plan]
I have not actually constructed this yet so when it comes to practical application, your guess is as good as mine. Also, if you build this and causes a thermo-nuclear reaction and blows you up...its not my fault.
Start with the wooden frame from step whatever.

insert a bugger something like this...drill out a hole appropriately sized to receive the ceramic socket.

Wire the ceramic sockets with the lamp wire, putting the electrical plug ends on them.
Enjoy!


Fixture chain
4 x Eye hooks
36"x20" sheet aluminum.
4ish feet 1x6 board
7ish feet any board larger than 1x1
Tin snips or industrial scissors
Nails
Hammer
Clamp Lights or (see follow up posts for solid mounted ceramic sockets)
(If using solid mounted ceramic sockets)
Sockets,
15' lamp wire
crimps or wire nuts
electrical plugs
Materials

Cut wood into a frame to fit your tank. My trapezoid endcaps were made 7 inches on the angles and 5 inches on the flat to provide 1 inch overlap with the 20inch tin to provide for derping...wound up wishing I'd just gone 7"x6"x7"

Make sure that whatever you use for your long boards are more shallow than what you cap with to provide room for your lights.

Begin attaching the aluminum on the square flat box provided by your wooden frame. Work from the center out to try to prevent warping.

I chose to drive nails 1 inch apart across the whole thing to give it a pop-rivet WWII aircraft look...i'm partial to it in these types of applications. Screws can be used here, and spacing of up to 4-5 inches between fasteners would be appropriate. I used a yardstick and sharpie to quickly mark up.

This part is stupidly simple. I don't have any good pictures of it...but using some left over scrap of my 1x2 board i drove in two platforms for the clamp lamp clamps at the ends of the hood. This way the clamp lamps are simply clamped into it and the wires duct-taped up.

Attach eye-hooks to the hood and ceiling. Make sure to center them or your hood will lean.

Fun little feature of the hook and chain, billiards style hood is that i just shorten up the chains for maintenance.

I hope this thread proves helpful for ya'll and feel free to punch holes in my system or ask questions as you see fit.
[Solid mounted socket plan]
I have not actually constructed this yet so when it comes to practical application, your guess is as good as mine. Also, if you build this and causes a thermo-nuclear reaction and blows you up...its not my fault.
Start with the wooden frame from step whatever.

insert a bugger something like this...drill out a hole appropriately sized to receive the ceramic socket.

Wire the ceramic sockets with the lamp wire, putting the electrical plug ends on them.
Enjoy!


