Thanks for the link Brent! Very informative...I haven't found the info on how best to make sure everything stays secure and perfect while curing, but that dude knows a lot..I may just end up emailing him  ! And thanks for all the other comments, I'll be sure to post more as I continue the process of fixing this beauty, it's definitely a learning experience. It didn't come with a slate bottom, although the glass was affixed with the same black tar as the rest of the tanks so it didn't seem to be an after-market repair. I'm glad to know I can stick with silicone for the whole process. Although...I could probably fix it with glass, and then use slate tile on top of the glass for a similar look, and for a nice bare-bottom effect...*ponders*
Help refurbishing metal-rimmed tank?
- Thread starter justahannah
- Start date
You are using an out of date browser. It may not display this or other websites correctly.
You should upgrade or use an alternative browser.
You should upgrade or use an alternative browser.
Some tanks like that were made for a short time with glass bottoms. The late 60s and early 70s saw the beginning of people using silicone to put tanks together. At that time, glass had been in use as the tank bottom for a few years. Before that period, in the early 60s and before, tanks were made with slate bottoms. In the 50s the tanks were made with chrome plated mild steel that rusted badly as the chrome plating broke down so they were frequently painted black to preserve the metal. The transition to stainless steel frames happened along side the change to glass bottoms. Steel frames were quickly replaced with the plastic frames as the ability of silicone to hold a tank together was proven to the hobbyists.
Depending on the manufacture date, the glass bottom may well have been the original design. It very likely was the original design if you have a stainless steel frame.
Depending on the manufacture date, the glass bottom may well have been the original design. It very likely was the original design if you have a stainless steel frame.
I haven't been able to learn what the black sealant in those old tanks is, but I have some suspicions. I'm gonna do some testing and see if I'm right- I'll let you know!
Does the tank have a slate bottom? If so, you'll have to replace the bottom, because silicone does not bond to slate.
My refurbished tank has a slate bottom and the silicone bonded very well to the slate. No problem with leaks. You just have to take the time to thoroughly clean the slate before you silicone. I used vinegar and alcohol to clean it before I sealed it.
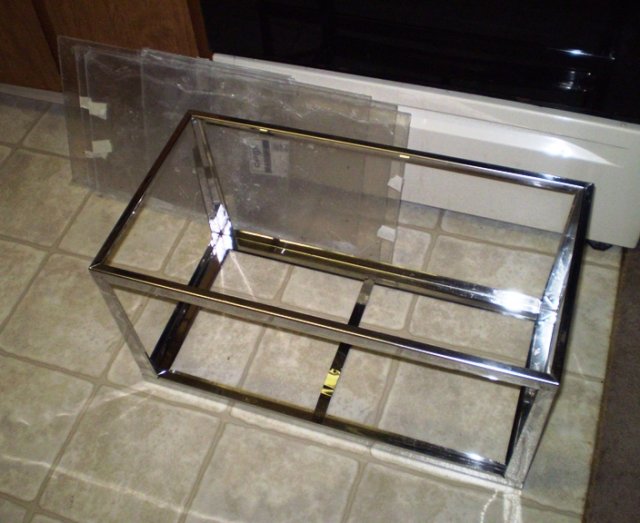
It's been a few weeks, but here's what I've done (with pics!). I totally scrubbed out the frame with Comet and a Brillo pad, it worked wonders for the stainless steel and it's super shiny now! Then I called every glass shop in Pierce and King counties and found out glass is dirty expensive. We're talking minimum $75 just a 2'x4' sheet of 1/4" thick glass, add $10 if I want it cut out to my specs. So I spent a lot of time wading around Craigslist and Freecycle for glass and still couldn't find anything suitable...then I found out I could go with 1/4" acrylic from Lowes for $45. Still had to cut it myself, but hey, I'm cheap. Then I found out that silicone doesn't bond to acrylic (through research, not the hard way thankfully) so I decided my options were to either get black silicone for purely asthetic purposes between the frame and the tank, or to just build the tank inside of the frame, and let the metal shine through (since I wouldn't need clear silicone either...got to love those clear seams). I decided (financially and asthetically) to skip the silicone.
Acrylic is a pain in the arse to work with...you should have a power saw with the proper type of blade as well as a good router/sander since the cuts need to be perfectly level for the "stuff" to work on....it's not an adhesive, it's this thin liquid that basically dissolves and chemically welds the plastic, making for beautiful, strong edges, but only if your acrylic matches up perfectly to begin with. Not having access to such equipment, I scored and snapped it like glass, then spent hours sanding the edges with a piece of sandpaper taped around a deck of cards to make sure it was level. I "glued" it alll together last night, and it wasn't 100% perfect, so I dissolved some acrylic scraps in more of the solvent and reapplied it more like a glue around the seams (I read this works for miniscule gaps, which is all I had).
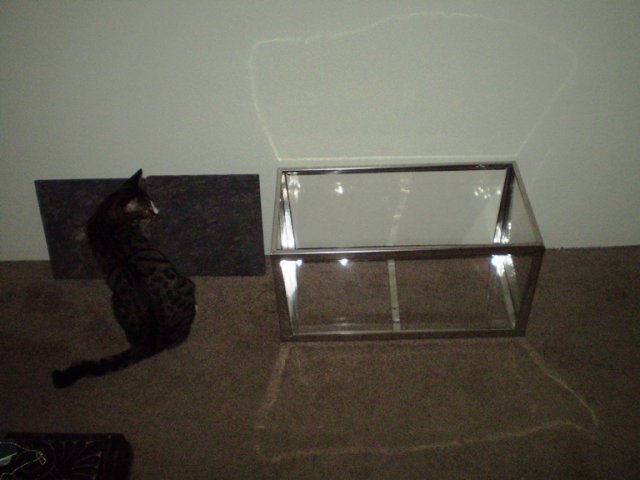
So now I have an acrylic aquarium inside of a shiny frame. I'm going to let it cure another 48 hours before I test for water tightness. If it isn't, I'll track down a thicker acrylic glue to go over the seams with. If it is, I'm going to epoxy a couple of slate tiles, (I think they're gorgeous, and so does Sasuke) to the bottom and then use it for a gecko cage if my egg hatches (http://www.aquariacentral.com/forums/showthread.php?t=176177) and a shrimp tank if it doesn't. I feel so close to the finish line!


I actually finished this project a few weeks ago, I've just been too busy/lazy/forgetful to properly finish out this thread.
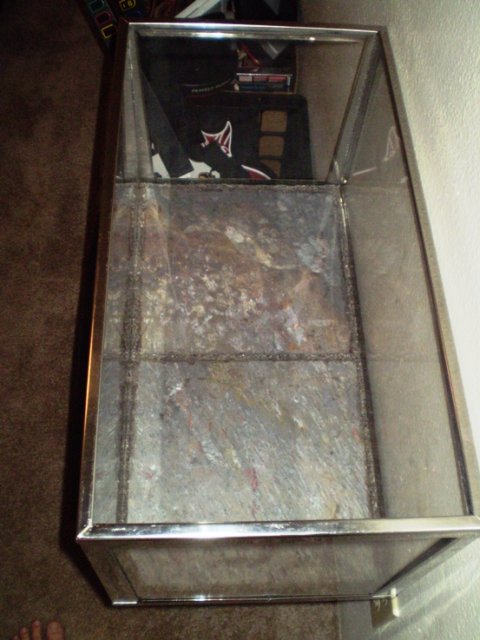
My seals from the last post turned out to be water tight, so no extra work needed there . What I ended up doing for the bottom was buying a couple 12"x12" slate tiles from Lowes and having them trim the edges down so I could get them in without damaging the acrylic. Since the bond to hold them in place is more cosmetic than structural and gravity is already doing most of the work, I decided to seat them in place with clear aquarium silicone. I taped the edges of the tiles and the tank at tile-level so I could be sloppy w/o too much cleanup and used it like a grout, layering some on the bottom and thick around the edges. To finish it, I pressed sand into the top of the silicone, and spread some more so it would be imbedded in the silicone to give it a more natural, grout-like look than straight silicone.
So...here's a pic of the final product, water tight and fish safe. I still plan on using it for a pictus gecko terrarium once my egg hatches, but it'll be nice to have options down the road

My seals from the last post turned out to be water tight, so no extra work needed there
So...here's a pic of the final product, water tight and fish safe. I still plan on using it for a pictus gecko terrarium once my egg hatches, but it'll be nice to have options down the road

Last edited:


