Daily Log of Constructing a Tropical Fish Pond

  • Get the NEW AquariaCentral iOS app --> http://itunes.apple.com/app/id1227181058 // Android version will be out soon!

lousybreed

Aquaria Central Site Controller
Sep 7, 2004
664
0
0
Bay Area, CA
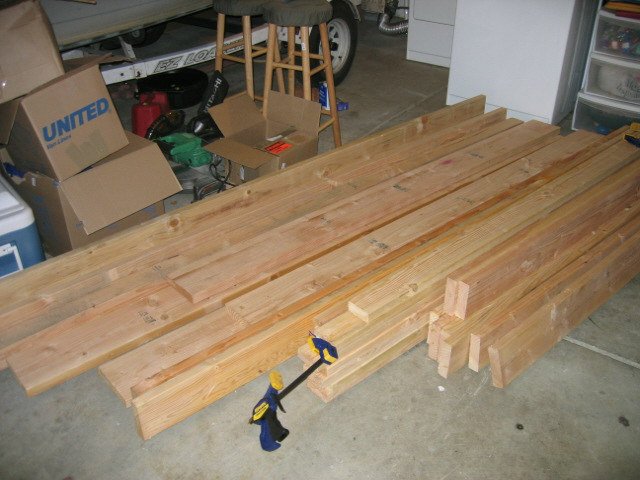
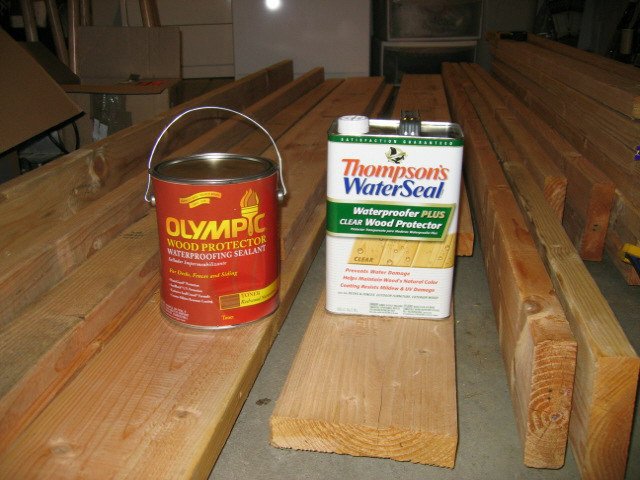
Ok went to Lowes today and talked to some who actually knew something about wood. He gave me a sealer that is non toxic and safe for humans/pets. He told me to stain the wood and then paint with the clear sealer and I shouldn't have to worry for the fish. The pics below show where the pond is going to be located and some pics of the wood and stain and sealant.

To all my midwest friends take note how nice and green everything is, you know spring has started here. If you look you can see dafodills about to open.... Sorry I just moved here from detroit and I cant get over spring in feburary.

I hope to start construction tomorrow. I will be sanding all the wood first, then I have to stain all the wood, then seal all the wood. After all that is done then I will build each side, becuase I designed them as frames. Once the frames are done then I just securely attach all the sides and I am done! Man this is going to be a slow process! 48 hrs between staining and sealing, then another 48 until the sealant is dried! Oh well I would rather do it right and have the wood last 5-10 yrs than just do it half-a**ed and have rotten wood in 3 yrs!!!!

The only problem is I havent really figured out how to attach the sides together so they are really strong.
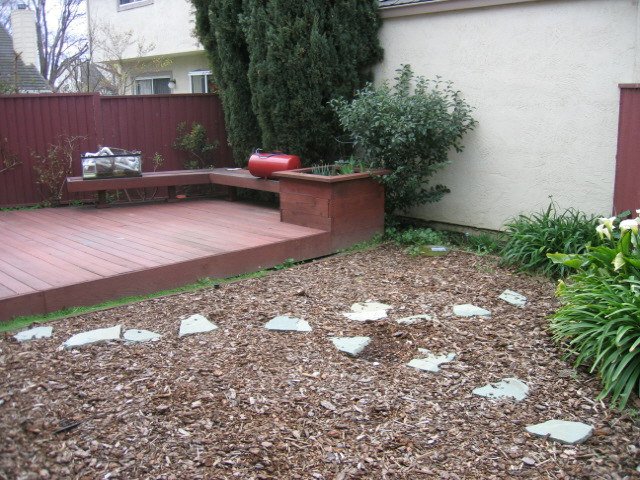
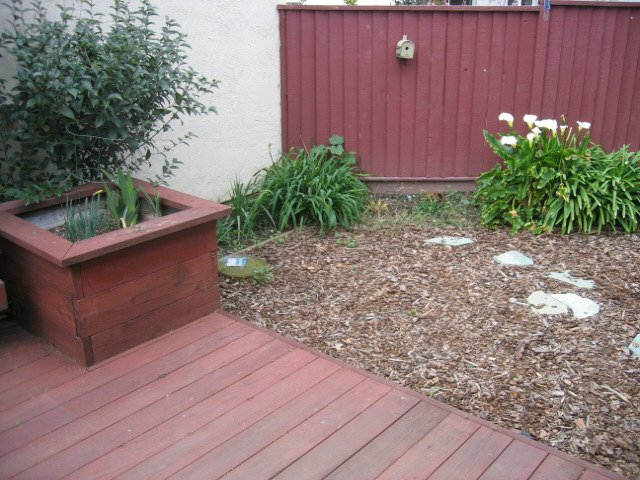
future location of pond.jpg future location of pond 2.jpg Lots of Wood.jpg stain and sealer.jpg
 

lousybreed

Aquaria Central Site Controller
Sep 7, 2004
664
0
0
Bay Area, CA
What a fun sunday

I now feel bad for anyone that has to work with wood on a daily basis. Man is it slow and tedious.... I cut and sanded all the pieces for the 8 foot sections. I went to sears today to beef up my sandpaper selection for my orbital sander (you are absolutely crazy if you had to sand 75 sqft by hand).

I went to town after i read one page from the internet on how to sand wood. Actually it was the best 3 minutes I spent for this project. I started with 60 grit paper and took all the rough defects and scars off. I rough sanded all sides of the wood even the stuff that wont show. Then I used 100 grit on the exposed sides of the wood. It was amazing how much the appearance improved after the second round of sanding. Then I got really ambitous and put on the 150 grit paper and went through all the exposed wood sides. I spent more time on than on the previous 2 sandings. I can't believe that this is the same wood that I started with. It looks really good, I can't wait to see it stained!!!!

All of this doesn't sound like it would take much time but trust me it does! I probably put in 5-6 hours, but I am very anal so it could take less if you could allow some imperfections.

The biggest thing I noticed about this project is the extra time involved in "doing things right". I could have already slapped this baby together if I didn't sand it or stain it. Also I measured each piece of wood and cut them to 1/16th of an inch so I will have a tight fit. You would be amazed at how much each piece of lumber differs, I would say around 1/2" isn't uncommon.

A little warning all stains and wood protectant require a minimum temperature of 50 degrees for 48 hours! If you live in the midwest, either find someone with a heated garage or you will have to wait until late spring. Lower temps interfere with the curing process.

Here are my suggestions to anyone that isn't a master woodworker and you want to build a pond like this:
1) Set lots of time aside for all the things you need to buy (clamps, tools, screws, a square, ect)
2) Measure and cut each piece of wood to your standards or else you will get a very funny looking final product.
3) use the web and hardware dudes for advice if you are a novice.
4) Measure 3 times before you cut or it will cost you.
5) If you use cheap tools, good luck.


Here are the tools that I have needed so far:
1) Cordless drill (DeWalt)
2) Compound miter saw (Hitachi)
3) Variable Speed Orbital sander (Craftsman) although a one directional sander is supposedly better, I don't know my finished pieces look good.
4) Clamps, Measuring tape, lights, ect
5) Deck stain (Olympic)
6) Weather protectant coating (Thompsons)
7) Good paint brush, paint thinner, and towels.
8) High quality, coated deck screws 2.5". The 2.5" length allows good wood penetration but leaves 0.5" of wood so no screws poking thru wood! (This is based on you are fastening two pieces of 2x4's, 2x6's ect.....
9) At least 3 grades of sandpaper 60, 100, 150 grit.
10) PPE......gloves, safety glasses, hearing protection.

Well back to sanding!!!!
 

Aussie_hippie_2

AC Members
Sep 17, 2006
767
0
0
Wisconsin USA
www.myspace.com
Extremely well written dude. Very ambitious, I look forward to reading the updates in the future!
 

lousybreed

Aquaria Central Site Controller
Sep 7, 2004
664
0
0
Bay Area, CA
Extremely well written dude. Very ambitious, I look forward to reading the updates in the future!
Thanks for the motivation, sanding wood is like watching grass grow...

All the sanding is competed for the two 8 foot sides. All I need to do is cut the 2x4's, stain all the wood, apply the water protector, and then put together (the easy part). Then on to the 5 foot sides....My wife is already hating how much time I waste on this project!!
 

lousybreed

Aquaria Central Site Controller
Sep 7, 2004
664
0
0
Bay Area, CA
More cutting wood and sanding today. Yipee....

I found two peices of wood that look pretty junky so I am going to return them back to lowes soon. Not much to report.....
 

lousybreed

Aquaria Central Site Controller
Sep 7, 2004
664
0
0
Bay Area, CA
I returned the lumber to lowes and headed over to home depot to check out their lumber.....WAY better stuff. If I had to start over again, I would go home depot all the way. Well since last time I posted I have gotten several things done. I finished sanding and cutting for all sides of the pond. I am ready for staining now. I just got done practicing on some junk wood and I am ready to take the plunge. I am starting to look at what pump I want to get for the pond and how I am going to design a waterfall of some sort....

I also bought some furniture clamps (36") so when I build my pond, all the boards will be lined up. Trying to do this without a clamping system isn't fun. I bought a bunch of metal fasteners for joining the sides of the pond. I will take pics later.

If anyone has any ideas on how to design a waterfall that will look good on a wooden pond please let me know.

I am going to get a firestone epdm 45 mil liner, I am just working on negotiating a lower price. Right now I have them at $80 shipped to the door 10'x15' liner. There should be enough liner left over if I want to make a waterfall of some sort. Is that price good? I was thinking of lining the wood sides and floor of the pond with with newspaper for added protection.

So here is the plan:

Stain the wood
Restain everything that will have contact with the ground
Apply the water protectant
Construct each side
Construct the pond outside near resting spot. This baby is going to be heavy!

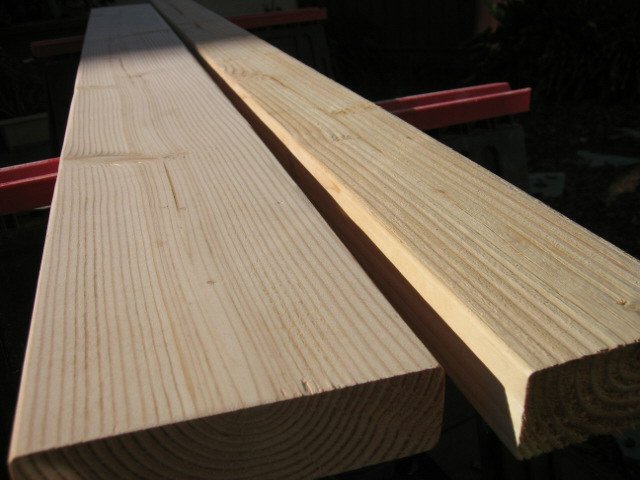
here is a pic of unsanded wood vs. sanded wood. Note the different color, wood grain appearance, and how smooth the finished wood is!

wood sanding.jpg
 

lousybreed

Aquaria Central Site Controller
Sep 7, 2004
664
0
0
Bay Area, CA
one quick thing

sanding procdure:

1) 60 grit sand slowly until major blemishes dissapear. This takes for ever. Sand all sides to same standard.

2) 100 grit sand until uniform smoothness. look for swirl marks from 60 grit. Sand exposed side and joining sides to same standard. Sand back very quickly.

3) 150 grit sand until there are no noticable imperfections. do this in sunlight for best detail attention. Sand front and sides once. Sand front again and payattention to details.

4)Remove wood dust with brush, brush until dust removed is little to none
Store somewhere safe

5) Continue until all 35,280 sq inches of board surface are finished to perfection. Have fun!

Time Breakdown:
60 grit 60%
100 grit 15%
150 grit 20%
Dust removal 5%
 

soccerkidbs

How do you like me now?
Mar 9, 2007
645
0
0
36
Medford
Wow that was impressive I am in shock after reading all of those figures. I can’t wait to see what it looks like when it’s gone. Props for making an outdoor tropical pond I am not brave enough to try this I think I will stick to my non tropic pond.
 
zoomed.com
hikariusa.com
aqaimports.com
Store