99 Gallon Tank Journal
- Thread starter Luc
- Start date
You are using an out of date browser. It may not display this or other websites correctly.
You should upgrade or use an alternative browser.
You should upgrade or use an alternative browser.
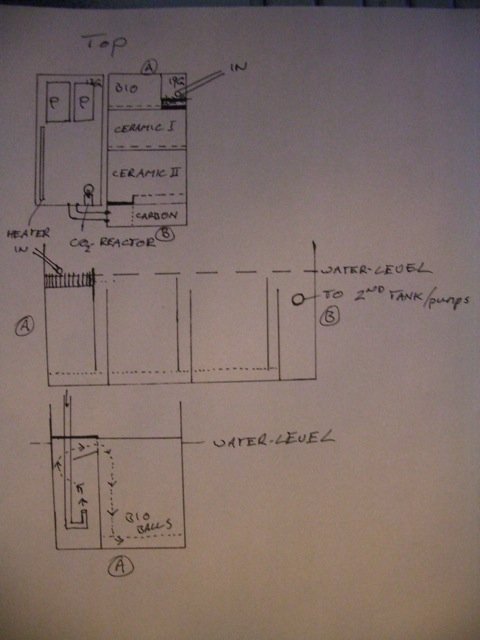
Now, the top view shows:
1. Left side the equipment tank.
Pumps
CO2
Heater
Chiller (not drawn in)
2. Right side shows the filtration-tank
By the way, I mis-calculated in my previous post, it should be 13G for the equipment tank, 19G for the filtration tank...total sump-volume 32G
Ok, water will come from the overflow-box into the receiving area of the filtration tank.
I plan to put a very thin piece of filter-floss on eggcrate in the overflow box to keep the rubbish out over there already.
If anything still comes through, I hope to keep that in the first compartment somehow.
Next, water flows through combed top over the Bio-balls.
Because its all submerged, I'm thinking of putting some airline-tubes on the bottom of the Bio-balls compartment to get oxygen in. Whatever is still in there after the filtration will not hurt the tank anyway.
All dotted lines in the first drawing are baffles where water goes underneath, solid lines are baffles where water goes over. The very thick short lines are high baffles where water does not go over at all.
The high baffles should stick above the water-level by the way and the inlet compartment will be a bit higher as well.
So, from the bio, it goes into the Ceramic I, then II, over the last baffle into carbon and then equipment-tank.
Return lines to the tank, and it starts again.
To make sure nothing cloggs, egg-crate on the bottom and ceramics & carbon into netted bags. Makes it easier for cleaning as well.
I could maybe skip the double baffles between Ceramic I & II and the Carbon, making them single and then having the last baffle (between Carbon and exit) lowered, water spilling over it to reach the 'exit' to the equipment-tank...
What you think? Hope some people can help me to make this one run optimal.
Thanks in advance.
Last edited:
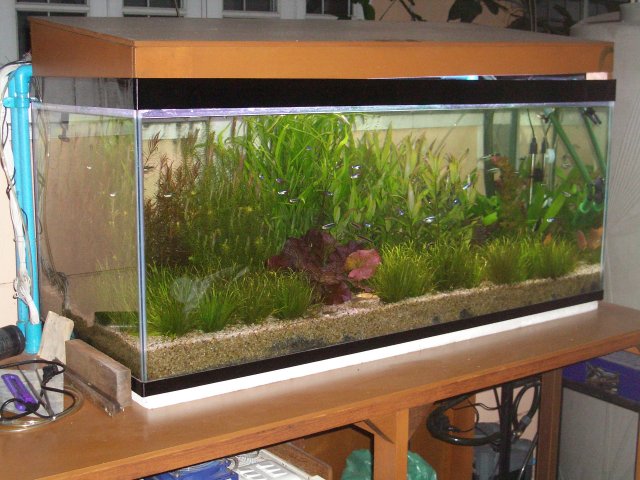
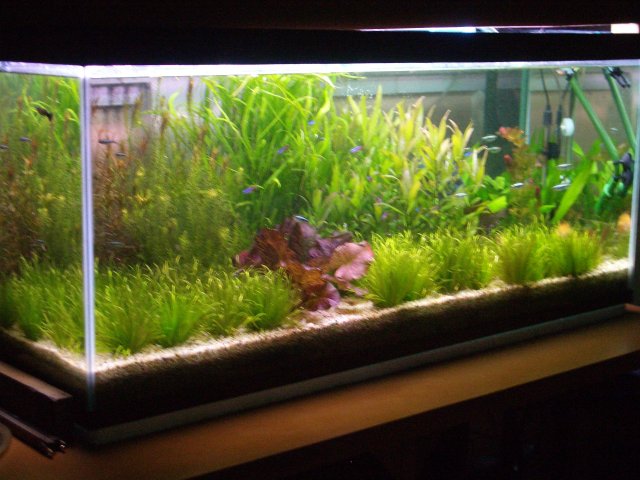
Before I start on the 99 Gallon, some pictures of the 79 Gallon after moving.
Was just done quickly, not much attention to where the plants had to go. Made some obvious mistakes, like putting green next to green, etc.
Anyhow, plants all survived, did some cleaning and trimming on them as well and it's all running ok for as long as it takes to start up the 99 Gallon (over the next 2 months or so)


And yes, finally I received the styrofoam 'cushion'. Cut it to size and started moving the 99 Gallon to its new stand. Quite heavy, guess it comes in at about 50 kg now. But clampled the metal stand level to the new wood stand. slided it over and after that toppled it with my dear wife in upright position forward and back on the metal frame.
Same process of sliding it on the wooden stand again and I was ready. Quite easy in hindsight but a scary experience no less.
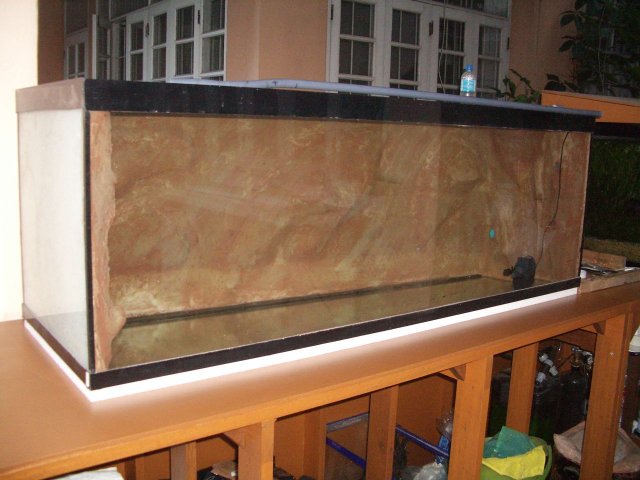
Then a big step forward. Fill it up and more important, how do the colors come out fully submerged? I'm very happy with it, colors not getting as dark as I expected, though I have to wait for the first lights on top to see how that turns out.
Tonight I will get my 17 Gallon tank for the filtration-side of the sump. At 400 Baht, (12 USD) that's not bad.
Followed Nopalete's advise to go for redundancy and got the two Resun 6000 pumps for USD 14 each. (They claim 2800 ltr/hr at 0-head each. See my earlier post for the details)
Now I can finally start drawing up the frame around the tank that will hold all wiring, water and light.
Main goals for it are:
1. Keep all wiring and electricity on the left side of the tank and separate from the wet systems.
2. Support and hold all 'under the hood' pipes and wires.
3. Reduce and avoid any weight on the tank itself. leaving the tank pretty much freestanding inside this cave-like enclosure.
4. Enable the complete top to open from horizontal to vertical and secure it for maintenance/feeding.
Anyhow, after a night of holding water with an added pump for circulation, we're now into curing the tank.
Yesterday's reading at start showed a 7.0 Ph.
Will do some more testing to see how that develops. This morning's water did feel (yes, literally feel) very stinging to the skin. Might be my imagination, but will test tonight again to see if it's really of the scale.
From what I've read in various forums, curing could take as long as 6 - 8 weeks, but is largely depending on the thickness of the cement.
We'll start next month I guess with some guppies to check the water. Meantime, regular water changes and getting the sump, overflow and pipes ready.


I've mentioned before, the chiller to keep it all cool.
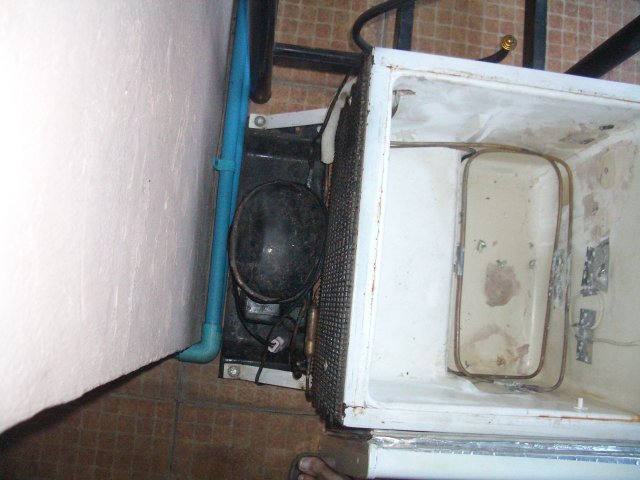
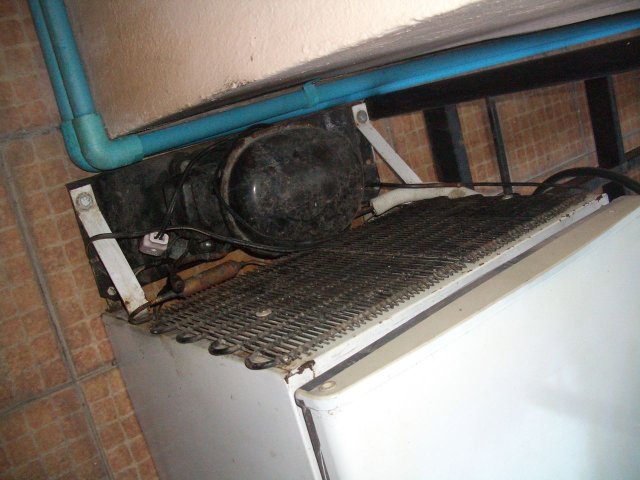
In another thread, "DIY Chiller", I converted a dorm-fridge to become my chiller. This one will now be used in the equipment-sump. The fridge casing will be cut away completely, I've attached 2 pictures to give the idea.
Requires only 2 small cuts and some screws to take the compressor and condensor together with the copper 'chill-tube' out.
I'm looking around for a good seal, since this copper-tube will go directly into the tank-water. The compressor-sled will be isolated from the rest of course to avoid the heat reaching the chilled water.


Quick update.
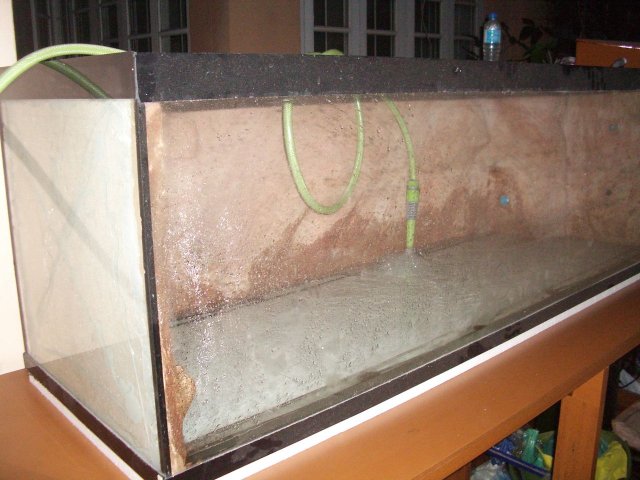
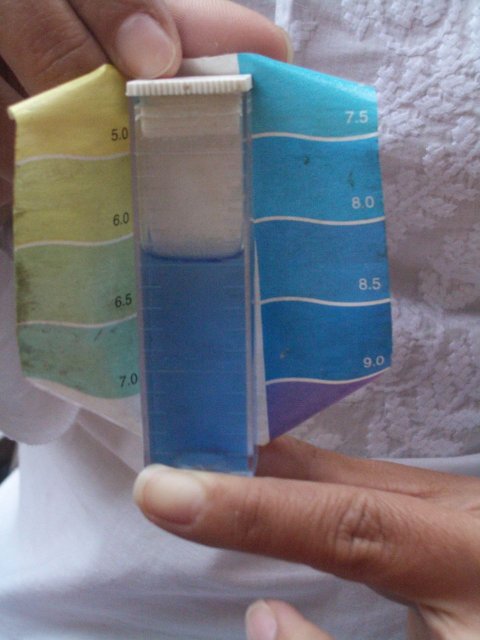
As expected, the Ph is off the charts now. It's at 9 after a day of water circulation. Nice, picture below, have never seen water getting there outside of my biology classes 20 years ago.
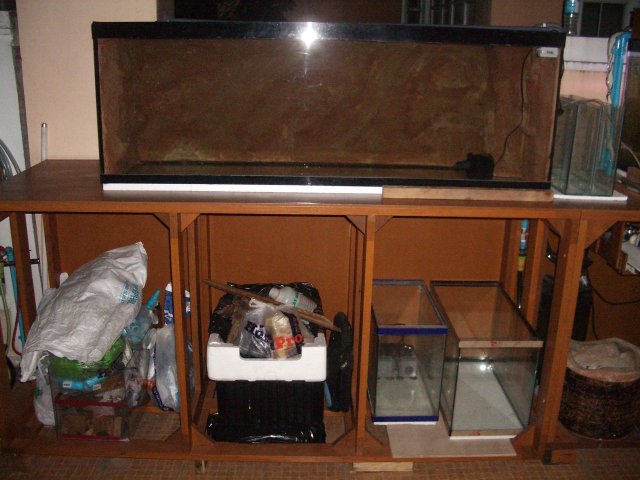
Got my filter-tank. Put all the glass in place, can start to measure and build stand for the overflow, drains, drill holes in the sump-tanks.
The two pumps nicely fit in the equipment tank and look forward to get it all installed.
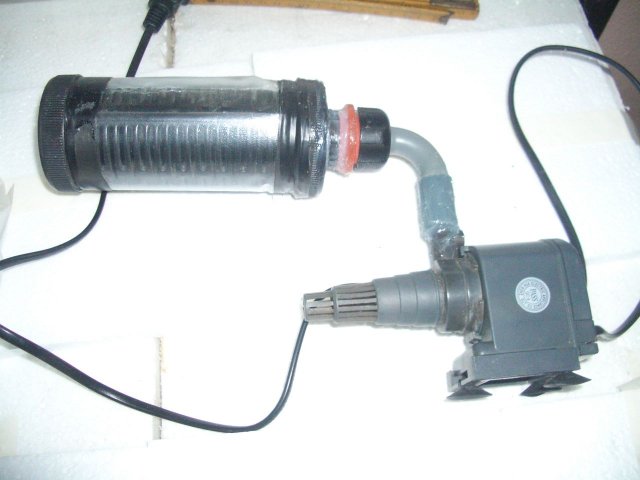
Ah, I've also put together a CO2 reactor for the sump. Old powerhead and its bio-ball holder with some elbows from electricity piping. Just put a plastic sheet around the bio-ball holder, glue with silicone and now only need to connect the CO-2 tube in the bottom, 4 bio-balls inside, venturi hose through the top and back on the air-intake from the powerhead.
Currently 'bubbling' CO2 in the return of one of the canisters, giving good enough results but want to see how this one goes.


Hello Bob, thanks for the reply, but which part would you have sealed?
And, on sump-design, you have any suggestions or idea's there? I'm about to start drilling and cutting the dividers and sections. I hope to have some feedback on it to avoid having to take it apart again once done.
Appreciate everybody's comments so far. Thanks.
And, on sump-design, you have any suggestions or idea's there? I'm about to start drilling and cutting the dividers and sections. I hope to have some feedback on it to avoid having to take it apart again once done.
Appreciate everybody's comments so far. Thanks.


