99 Gallon Tank Journal
- Thread starter Luc
- Start date
You are using an out of date browser. It may not display this or other websites correctly.
You should upgrade or use an alternative browser.
You should upgrade or use an alternative browser.
I hope another 4 - 6 weeks to light and water earlier than that..
Hard to say. I still need to get 2 1-way valves for the pumps for example.
Can get them in Brass, but plastic...no way.
Water is mostly done but for the distribution panel between pumps and return-lines.
Rough idea of the setup this weekend, maybe even test-running it without the 1-way valves.
Hard to say. I still need to get 2 1-way valves for the pumps for example.
Can get them in Brass, but plastic...no way.
Water is mostly done but for the distribution panel between pumps and return-lines.
Rough idea of the setup this weekend, maybe even test-running it without the 1-way valves.
In between posting comments on Nolapete's monstertank, I managed quite some work.
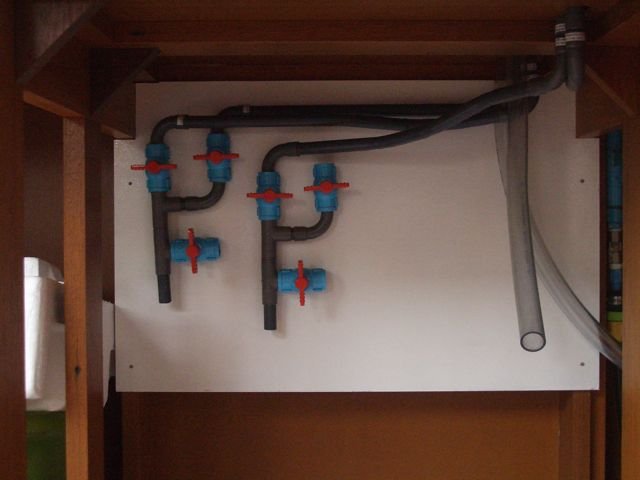
Distribution panel for water is in, decided to (and pretty much finished) building an external CO2 Reactor from scrap-parts and silicone.
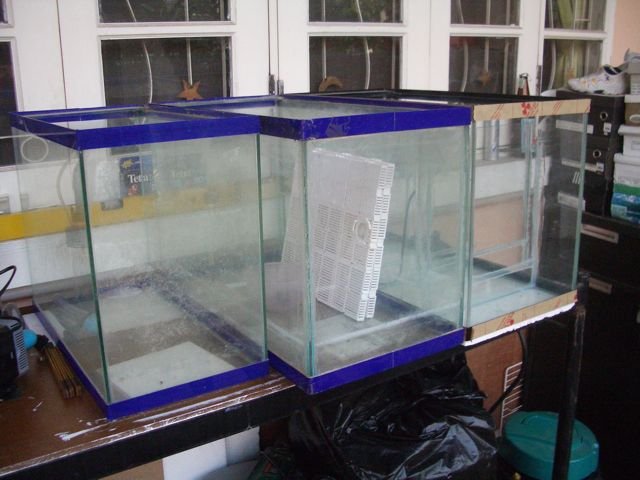
Besides that I've been lucky to get another sump-tank for free, same size as the big one I purchased. (60x30x40h cm) so make my sump-volume 38 Gallon now. Nice upgrade from with another 6 gallon from before and more space for the chiller-section and pumps.
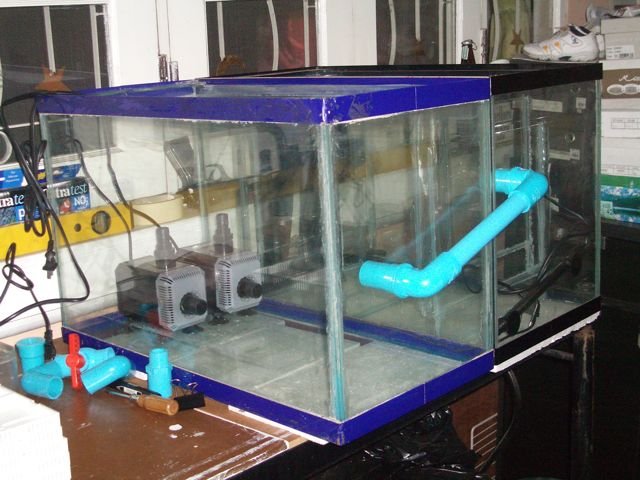
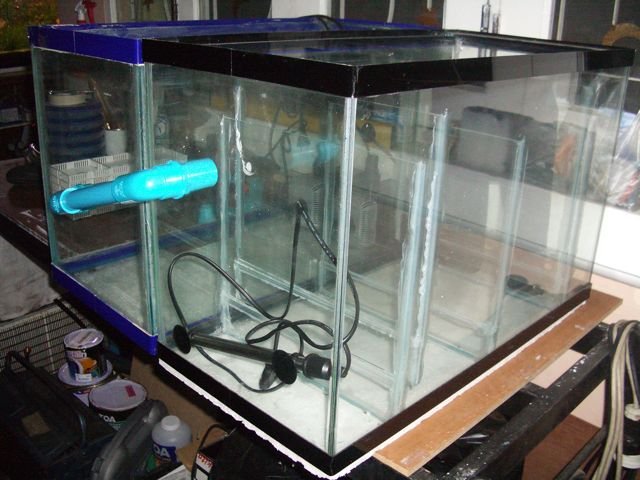
Drilled holes to connect the 2 tanks. Out from the Filtration tank high, sloping down to enter the equipment tank low. Figured that the pumps will lower the water level and to minimize waterfalls I drilled this way. Still some drilling to do for water-change plumbing. Not 100% decided on that yet. The general idea is to have 'old water' run out from the filtration-tank and at the same time keep the pumps running whilst adding fresh water in that tank.
The 'new' tank also came with UGF that I'll use in the filtration-tank for spacing, to prevent clogging, at the bottom.
Anyhow, need to get some more silicone tomorrow and try to find some rubber-sheet. O-rings, can't find so need to make it myself. Could go with silicone seal, but that makes it difficult to change or clean.
No luck in finding the non-return valves as well, so likely will make some holes in the clear PVC-tubes where the tank and pipes connect on top of the tank. From those holes, run small airtubes just below the water and the problem is solved as well.
For the pictures, you'll notice that 3 out of 4 valves in the distribution-panel are connected. No 4 is for the CO2 reactor. If that doesn't work out as planned, then we'd have one spare (UV maybe) or just connect it directly like the others.
It's moving and I really hope I can finish this part by end next weekend. Then the week after firing up the pumps and testing...


Very interesting Luc. You have a lot of work into your filtration. I can't wait to see it in action.
Thanks, same here. Really trying to restrain myself and think things through.
Looking at it:
1. Drill hole in the Black tank (last picture) long side, front, bottom to drain.
2. Put some glass support strips at various places, for a lid on both tanks.
3. Put glass support for egg-crate at various places
4. In the equipment-tank or Blue tank, put in dividers for the chiller-tube (copper, separate and sealed from the normal tank-water!) and fill it with water, which in combination with the glass would provide excellent conductivity for chilling.
5. Connect all electrical gear with a float-switch and relais to 1 electrical group to ensure close-down of the system when water runs out.
6. Installation and connection of the hoses.
Quite a list, hope I'll get on the way with it this weekend...
Time for some update, it's getting close to the first wet-test...(sweat breaking on my back...is it done correctly????)
From my previous post:
1. Drill hole in the Black tank (last picture) long side, front, bottom to drain.
Done
2. Put some glass support strips at various places, for a lid on both tanks.
Open
3. Put glass support for egg-crate at various places
Part done
4. In the equipment-tank or Blue tank, put in dividers for the chiller-tube (copper, separate and sealed from the normal tank-water!) and fill it with water, which in combination with the glass would provide excellent conductivity for chilling.
Done, but need to check on the waterlevel once running.
5. Connect all electrical gear with a float-switch and relais to 1 electrical group to ensure close-down of the system when water runs out.
Open
6. Installation and connection of the hoses.
Almost finished
Quite a list, hope I'll get on the way with it this weekend...
Yep, and still working on it.
Pictures will show the result as usual.
Put the media in the sump for now.
Did also add a hose to the overflow-tube, check-valve in it so I can suck out air and it closes. Likely I will connect it to a small powerhead in the equipment-tank that will keep the water moving around for heat-exchange. Need to check.
I've also completed the CO2 reactor, that will go on the 4th (still empty) return-line. Will get some pictures soon on that one.
Enjoy the pictures.
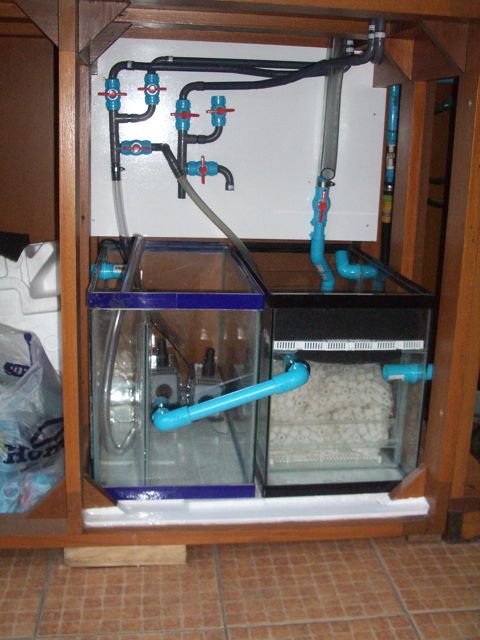
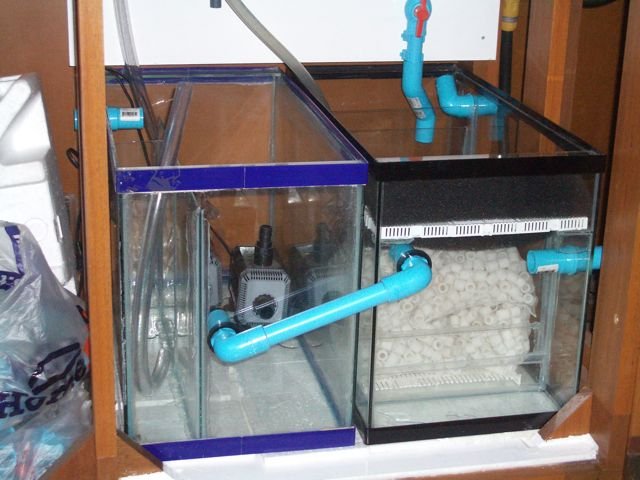
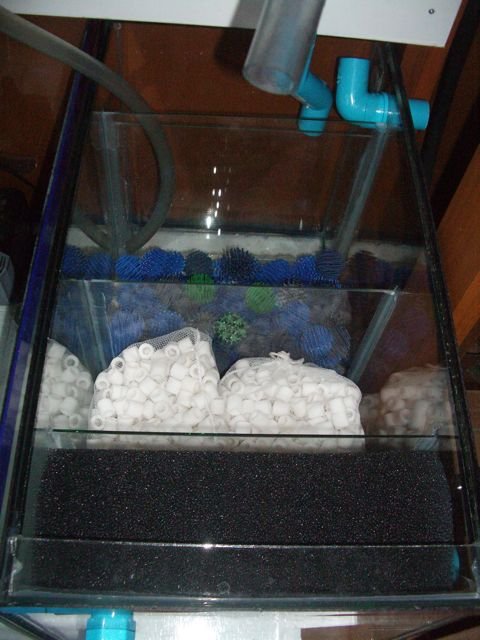
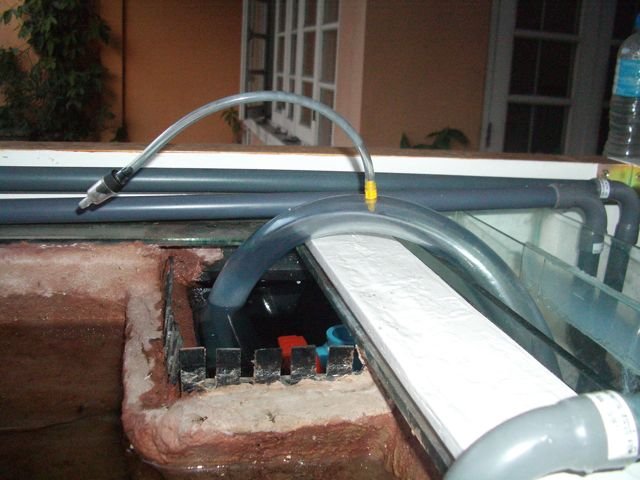
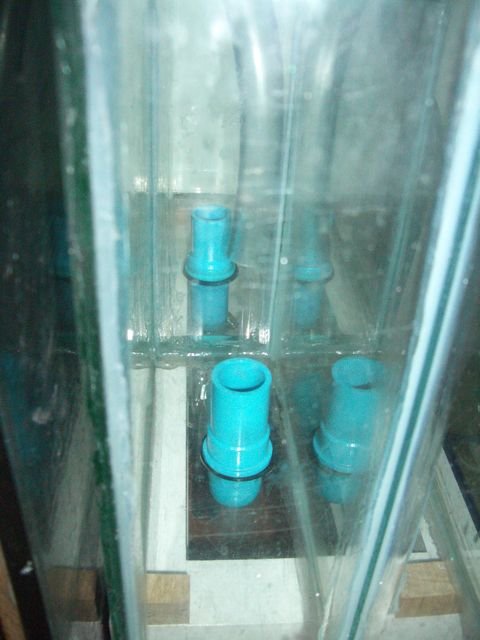


Wow gonna be some serious filtration on that tank. Are you worried about too much gas exchange with that setup?
I will try to limit that with covers on the sump and having the water in- and outlet continuous under water. Have to wait and see how much difference it makes.
The overflow box gives me enough space to test it out and where the water enters the sump, it will be under water anyway.
Still have to do the safety-connections. If anything happens in the sump then the water will run into overflow-hoses that run into the drain. Before any plants or fish go into the tank there will be a lot of testing.
Eventually I want to keep Discus in there, but I don't want to come back home and have them splashing for water or air.
Noticed as well that plants will suck up a lot of oxygen at night, so probably have an airstone at the first compartment that runs at night.
My goal is to have as much filtration as possible, as well as zero equipment in the display-tank itself. On top of that I want to the tank to be as natural as possible and have no worries on light. (There'll be 7 T-8's for now, some plans for more but get it running first.).
Last aim is to have all plastic rims and the tank itself disappear in a wood stand/cabinet that's solid and safe.
You are certainly taking your time with it!! I don't think I could stand to do it myself, too anxious to see the end results myself. lol
Should look amazing. The other tank setup looked great to me, good plants and all.
Should look amazing. The other tank setup looked great to me, good plants and all.


