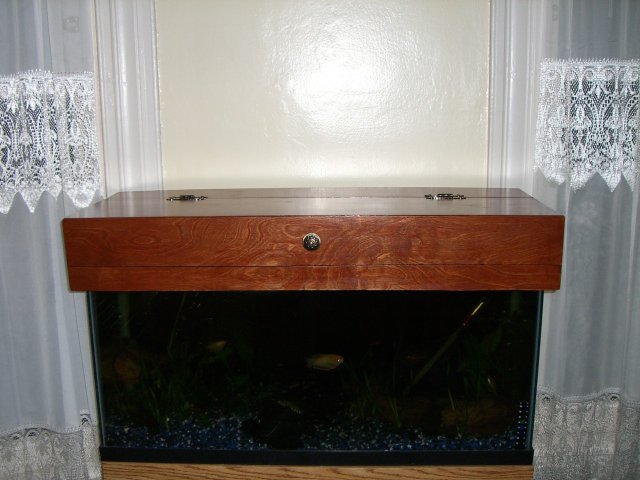
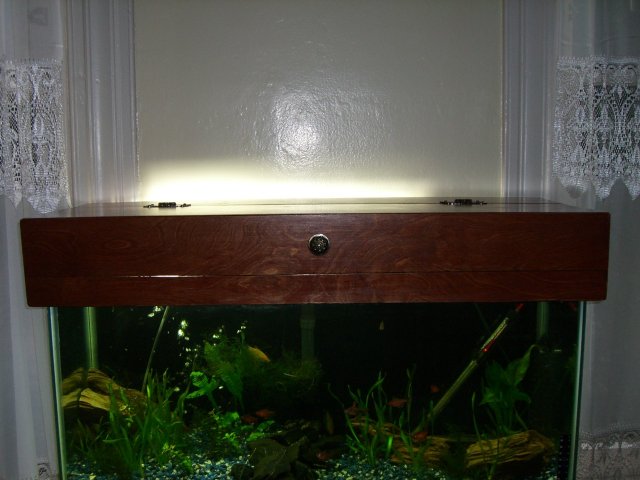
Log of building my 30gal custom lighting hood

  • Get the NEW AquariaCentral iOS app --> http://itunes.apple.com/app/id1227181058 // Android version will be out soon!

jmhart

Revolutionary
Sep 8, 2007
2,746
0
36
Atlanta,GA
I stained it first to make sure that my cracks wouldn't show any unstained wood. I'm going to stain it again once it's together, two coats total. Also, I'm using wood filler to fill in cracks(making a second coat of stain necessary). I'm not gluing together, rather I'm using L brakcets to make it more sturdy(earthquakes and all).

I may end up sanding the edges before I put in the wood filler. I'll think on that.

Should look nice...

I believe I would have put it all together first then stained it......this way you could have sanded down any extra glue that gets squeezed out and used some filler putty in any places that might need it and sanded the whole thing smooth then stained it. And like mentioned above the glue might not get as good of a hold on the edges that are already stained.
 

uglyfido

The ugliest of fido's.
Apr 10, 2006
143
0
0
42
Port Orchard, WA
Where is the rest?!?!?! I must know how this finishes since I may try it out myself. PLLLEEEAAASSSSE update us. I must know. Thank You.
 

jmhart

Revolutionary
Sep 8, 2007
2,746
0
36
Atlanta,GA
Sorry to not update in a while. I had a bunch of problems that put off my progress. My time line went like this:


First weekend:
Friday: drew up plans
Saturday: hit up REI used gear sale, received some free plants, and purchased all[sic] of my supplies for the project(I will include a full list later).
Sunday: Tried to cut the wood and assemble, see second weekend.

Second Weekend:
Friday: After unsuccessfully trying to use my battery operated circular saw to cut my wood, I borrowed a plug in from my landlord. Cut all the wood, applied stain.
Saturday: Taped out, primed, and applied two coast of white paint to interior surfaces.
Sunday: Assembled wood. Built initial structure. Returned plug-in circular saw, then, battery died as I needed to cut more wood. Project suspended to let batteries charge

Third weekend:
Friday: Applied one more coat of white paint to interior surface
Saturday: Installed wiring. Tested wiring. Meltdown. Realized my wire was 18 AWG. Game off
Sunday: Trip to Home Depot. Purchased 14 AWG wire. Restart wiring. Again, wiring issues. Tripping the breaker. Realized switch was installed at the wrong place in the circuit. Rewired, game on. VICTORY. Touched up interior white paint.

Today: Sanded outside surfaces and applied second and final coat of stain.

I realize I could provide pictures, but I'm only missing polyuretane, one knob, and two hinges. I'd hate to spoil the ending. I'll have completed pictures, as well as detailed pictures of what I did, and a how to(or at least how I did) up by next Tuesday. Pictures should be up Saturday, depending on how quickly stuff dries. The complete "this is what I did" may take a minute. I'll be traveling on business next week, so I might be able to type it up on the plane Sunday.
 

jmhart

Revolutionary
Sep 8, 2007
2,746
0
36
Atlanta,GA
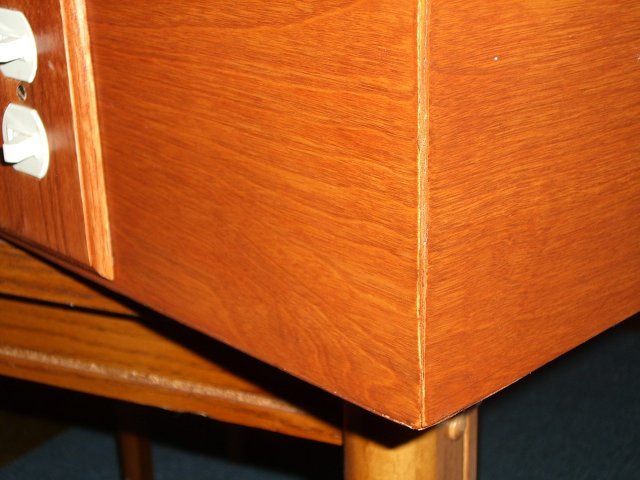
To comment on the above pictures.

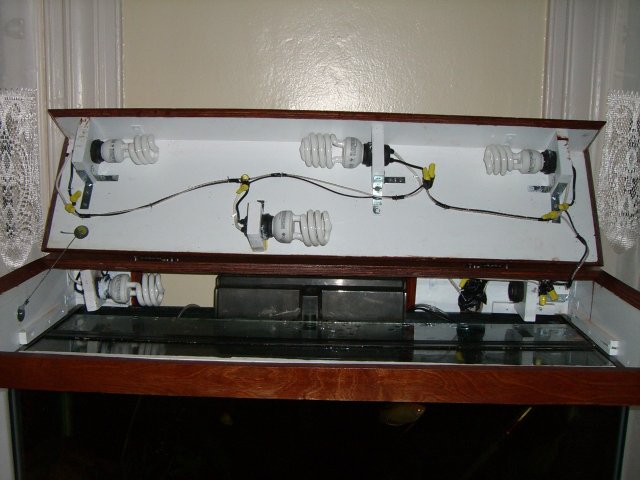
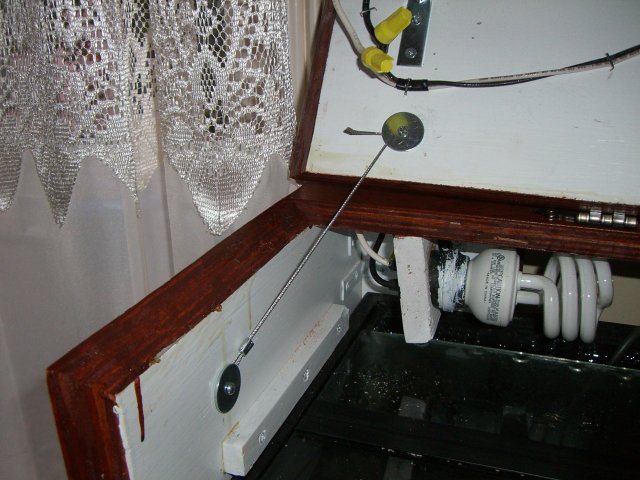
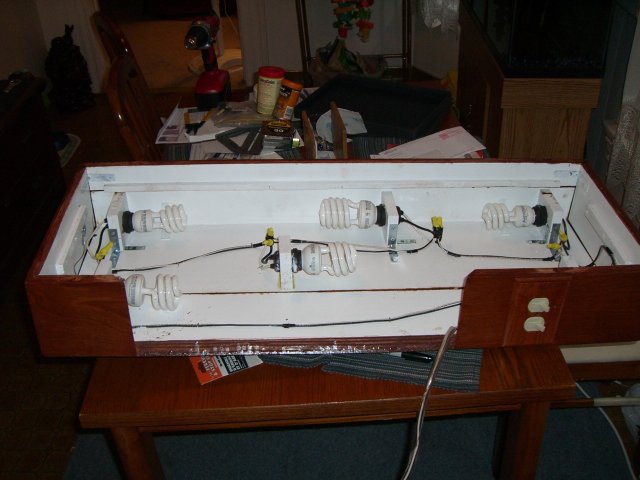
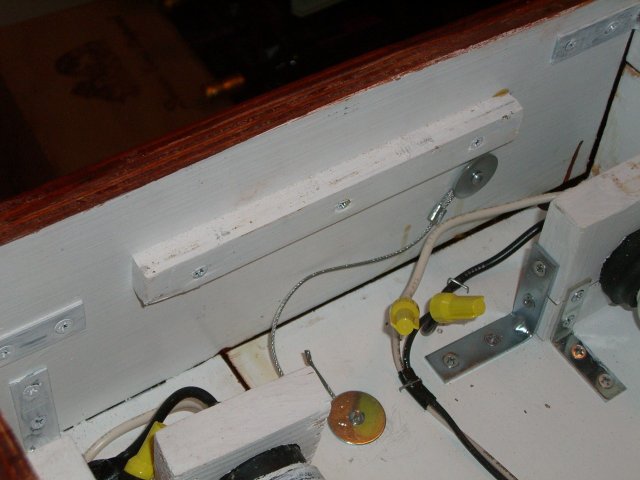
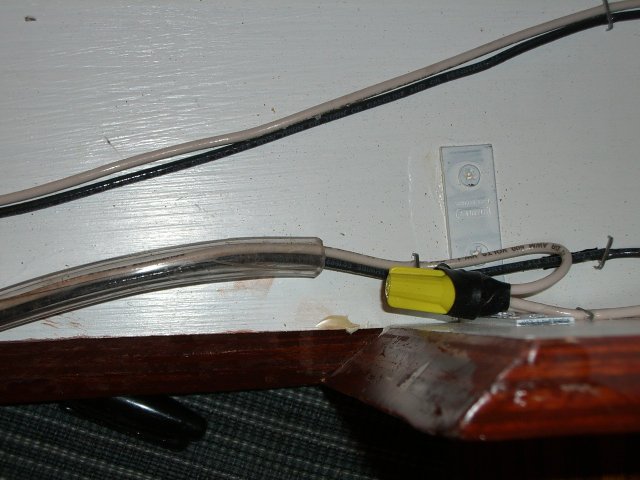
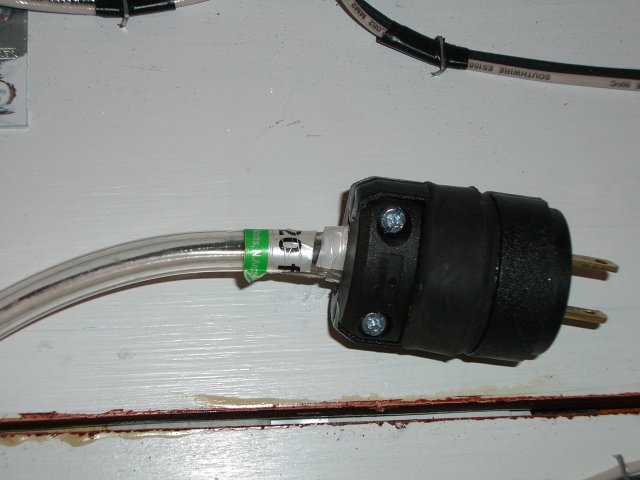
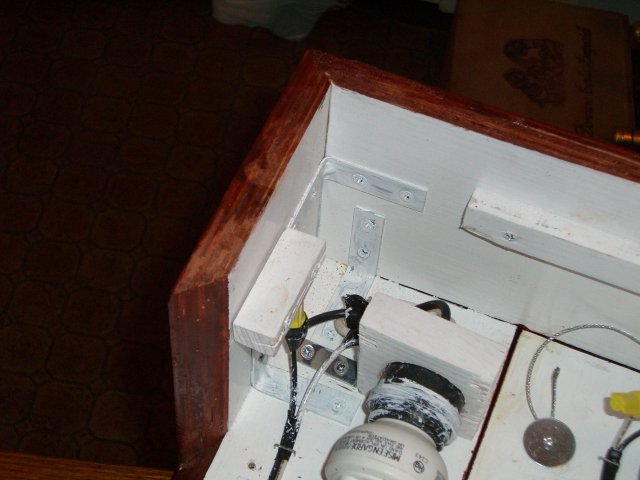
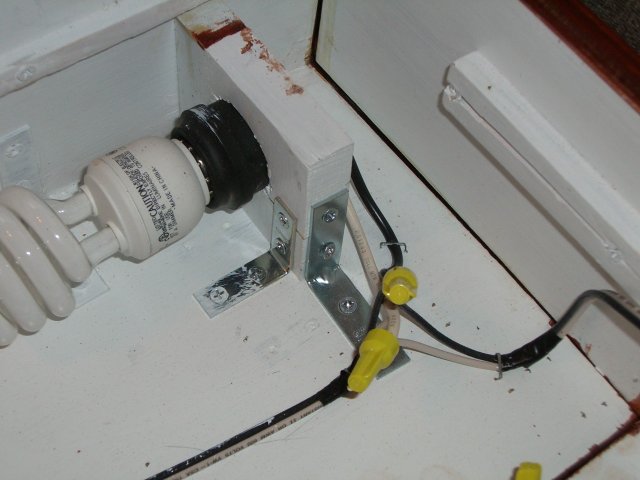
I wanted to illustrate how I attached everything(L-brackets). Also, I wanted to point out it was necessary for me to make my own plug. I used 14 AWG wire and covered it with clear vinyl tubing. I couldn't thread two 14 AWG wires through the tubing, so I sliced it and have since wrapped the entire thing in electrical tape.

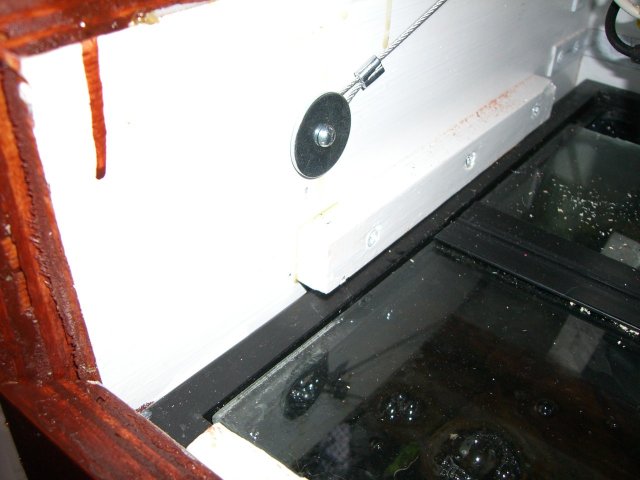
You can see the square rods I used to allow the hood to sit on my fish tank. They are seen as they sit on the fish tank and I showed them off of the tank.

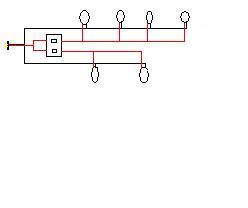
I wired the two back lights to one switch, and the four front lights to a second switch. This way I can keep the back lights on even when I need to access my tank so I can see what I'm doing. In my original plan, I had three and three, but due to the placement of my filter, I had to move the "rear" center light to the front lifting panel.


I used stainable wood filler in all cracks that were permanent. As I mentioned I'll be using side manner of rubber weather stripping to fill in those cracks that belong to the lifting area. Finally, I'm thinking on a way to block out further light from escaping from the back of the canopy.

I'll post a recap of how I did things and what I learned in a few days.
 

jmhart

Revolutionary
Sep 8, 2007
2,746
0
36
Atlanta,GA
Here is my "How-To"(according to how I did it). I finish by adding what I would have done differently.

Supplies:

3/4" Plywood sheet(I purchased a full sheet of Birch)
60" of 1/2" square rod(used to brace or allow the top to sit on your tank)
24" of 3/4" x 4" board(solid, could be scrap from around your house)
10 2" L-brackets(used to attach wood)
12 1" L-brackets(used to attach light "fixtures"...I'll explain)
100 pack of 3/4" flat head wood screws(used to attach all L-brackets)
~20 1" #6 flat head wood screws(used to attach 1/2" square rod to hood)
12" of 1/16" cable(used to hold the liftable portion when open)
2 3/4" # 6round head wood screws(used to hold down cable)
2 1" #6 washers(used with screws to hold down cable)
6 rubber insulated outdoor light sockets
20' #14 AWG wire Black
20' #14 AWG wire White
1 15 amp double switch
1 stainable double switch switch cover
6 compact fluorescent bulbs(I used two 26, two 20, and two 15 watts)
Staples(used with staple gun to attach wire)
14 #14 AWG wire caps
Electrical tape
6' of vinyl tubing(3/8" internal diameter)
1 heavy duty(15-20 amp) plug
Stain of choice
Polyurethane of choice
Primer(not really needed, but I used it anyway for the paint)
Semi Gloss White Paint
Brushes(I used 3, but you if you don't want to wash, get more)
2 hinges of choice
1 knob of choice

Tools needed(according to what I used):
Circular Saw: Finishing blade
Jig Saw: Any wood blade
Drill:1/8" bit, 1.25" bit, Phillips head
Obvious tools(measuring tape, square, screw driver, utility knife,etc...)
Stable Gun

Once you have everything, here's a glossed over "how to"

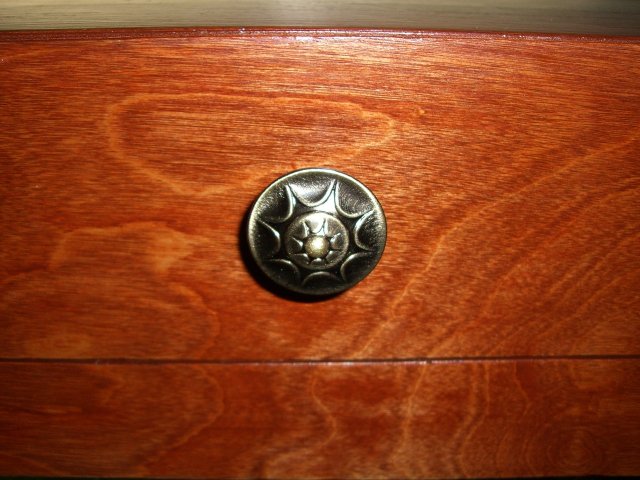
Cut wood to the appropriate dimensions(see first post for design). I cut at a 45" angle so that everything would look nice. However, if you decide to use solid wood(see recommendations) this isn't required. Cut your square rod into lengths so that you can put a piece on each edge of the hood(see pictures). According to the design, my back piece of wood was one solid piece with a cut out for the filter. I changed this, it is two separate pieces. In one of them cut out a hole for the switch (make sure it fits). Once everything is cut, sand the edges, and make sure everything fits together the way it should(flat edges, angles coming together, your lengths are correct, etc...).

You will also use the 3/4" solid board. This will be cut into 6 3" inch squares
to be used as your light socket "fixtures". Using the 1.25" bit, drill a whole in the center. Paint(primer first) these white. Paint the square rods white as well. Coat well with white paint.

Once it's all sanded and fits nicely, I stained all of it. (It has been suggested to wait to stain until it's all together: see above posts). I then taped off the edges and exterior portions. Primer the inside portion. Paint the inside portion with the white paint(I don't believe the primer is really necessary, but whatever. I painted several coats to make it as white as possible). It's white to reflect. Throughout this forum, white paint has been the reflective material of choice for costs and ease. Aluminum foil should not be considered.

Everything is painted, and the exterior has one coat of stain. Now, build your hood. See design and pictures. Use 2" L-brackets with 3/4" #6 flat head wood screws to attach. According to my design, I used 10 L-brackets and it's held together nicely. Attach your square rods after the hood is built. These should be measured carefully to make sure they are level all the way around. This ensures your hood will be level when it is on your tank. Also attach your "light fixture" wood squares. Use 1" L-brackets. These should be place however you want, but you can see how I did it in my sketch.

So, now it is built. I recommend testing to make sure it fits. Certain things may have to be adjusted according your specific tank needs.

Now, the fun part: wiring. Slide your outdoor, rubber insulated, light sockets into the "fixtures". I didn't glue these because with the paint and 1.25" hole, they fit snugly. You can glue these if you want. I've attached a crude drawing of the wiring. Things important to remember: Wire in parallel and switch must be on the "live", white(in the drawing red) wire. I used 14 AWG wire to really ensure high quality power. You can use 16 AWG. Do not use 18 AWG for this project. Wire using wire caps. I used electrical tape for redundancy over the wire caps given the exposure to evaporated water. I made my "plug wire" 6 ft long. Additionally, I "wrapped" the "plug wire" in vinyl tubing and then wrapped that with electrical tape to protect my wire.(I cut the tubing down the center, placed the electrical wires inside, and then wrapped in electrical tape to seal it all up). Wiring to the plug is easy. Using the drawing this should be pretty easy. Feel confident, wiring is not as scary as it seems. After everything is wired up, and you are sure your circuit works, mount the switch if you haven't already(I left it unmounted so it was easier to work with).

I then filled every crack I could(the cracks belonging to the lifting cover are exempt) with wood putty.

At this point I touched up the inside white paint. I then sanded the outside down slightly(at the minimum to make your dried wood putty look good), and restained(including the stainable switch cover). I applied two coats of polyurethane. Install the knob and hinges. Then, mount the bracing cable(as seen in the pictures). I can't tell you how long to make this. I did it to fit my situation. I didn't want the top to hit the wall, so I opened it up until was almost touching the wall and installed the cable. Again, see the pictures. This is it. It's done.

Took me a little over 3 weekends including all the problems I encountered as noted in the above posts.


In a kind of random fashion, here are a few things I would have done differently.

First off, given my particular dimensions, I would have used 3/4 inch solid wood instead of ply. I mean, it's got a nice veneer(Birch), but I could have worked with it a little more if it were solid wood. And, give my dimensions, I could have used 3/4" x 12" boards and cut them down to size. The downside of this is that when I build the matching base, I couldn't find a 38" sheet.

I used a circular saw to cut my wood, which made some of the cuts a little off from straight. If I could do it again, I would have used a table saw(my landlord actually told me after I had made my cuts that I could have borrowed his table saw). The cuts would have been closer to straight. I addressed the uneven cuts by filling the cracks with wood putty, so it looks good. The cracks in the liftable portion couldn't be filled with wood putty, so I do wish these cuts were perfectly straight.

I filled the cracks after assembly. I would recommend putting putty in the cracks during assembly(before screwing in the L-brackets). You would still have to come back and add more, but it would have been easier I suspect.

Remember, always: "Measure Twice, Cut Once" & "There's Always Time To Do It Right"
wiring.JPG
 

kj5kb

KEEPER OF CATS, FISH AND CATFISHES
Mar 1, 2007
1,513
1
38
58
Spring Hill Kansas SW of Kansas City
Real Name
Don
Nice job...amazing how these 'simple' projects end up becoming a "quest" :angryfire: after a few days, aint it!

As an electronics tech with electrical wiring experience I'm not thrilled about the wire nuts long-term over a tank. I'd suggest soldering and heat-shrinking the connections for better long -term reliability.

Best of luck! Don
 

jmhart

Revolutionary
Sep 8, 2007
2,746
0
36
Atlanta,GA
Thanks for the tip.


Nice job...amazing how these 'simple' projects end up becoming a "quest" :angryfire: after a few days, aint it!

As an electronics tech with electrical wiring experience I'm not thrilled about the wire nuts long-term over a tank. I'd suggest soldering and heat-shrinking the connections for better long -term reliability.

Best of luck! Don
 

Ketso

Cityfied Redneck
Jan 26, 2007
347
0
16
Peebles, Ohio
I'm not gluing together, rather I'm using L brakcets to make it more sturdy(earthquakes and all).
Not that there is anything wrong with your design and use of L brackets, but your reason for using them is all wrong. A properly glued joint will be much stronger than anything one could accomplish using L brackets. Personally, I would have glued it. But that's just roughly 30 years of hobby woodworking talking.

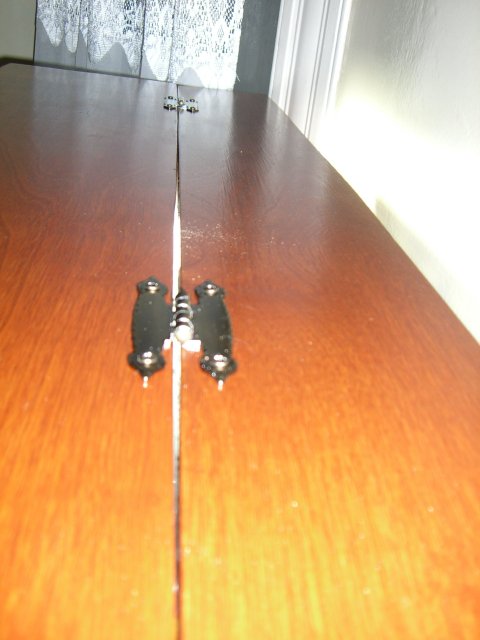
Also, I noticed on one of your photos, a gap where light escapes. I believe it is on the top of the unit where the lid is hinged. If it were me, I would by a piece of felt and glue in there to block the light. I would think it would be thick enough to do the job and yet thin enough to allow the lid to close properly.

This is still one nice looking light hood. Very nice. Very nice, indeed.
 

jmhart

Revolutionary
Sep 8, 2007
2,746
0
36
Atlanta,GA
Not that there is anything wrong with your design and use of L brackets, but your reason for using them is all wrong. A properly glued joint will be much stronger than anything one could accomplish using L brackets. Personally, I would have glued it. But that's just roughly 30 years of hobby woodworking talking.

Also, I noticed on one of your photos, a gap where light escapes. I believe it is on the top of the unit where the lid is hinged. If it were me, I would by a piece of felt and glue in there to block the light. I would think it would be thick enough to do the job and yet thin enough to allow the lid to close properly.

This is still one nice looking light hood. Very nice. Very nice, indeed.
To be completely honest, I choose to use l-brackets for simplicity. It was much easier to use these.

I am considering either felt or a dark thin weather stripping to hide the light coming through the hinged area. My concern about felt is any exposure to water.
 
zoomed.com
hikariusa.com
aqaimports.com
Store